Woodworker's Journal 2006-30-Winter, страница 22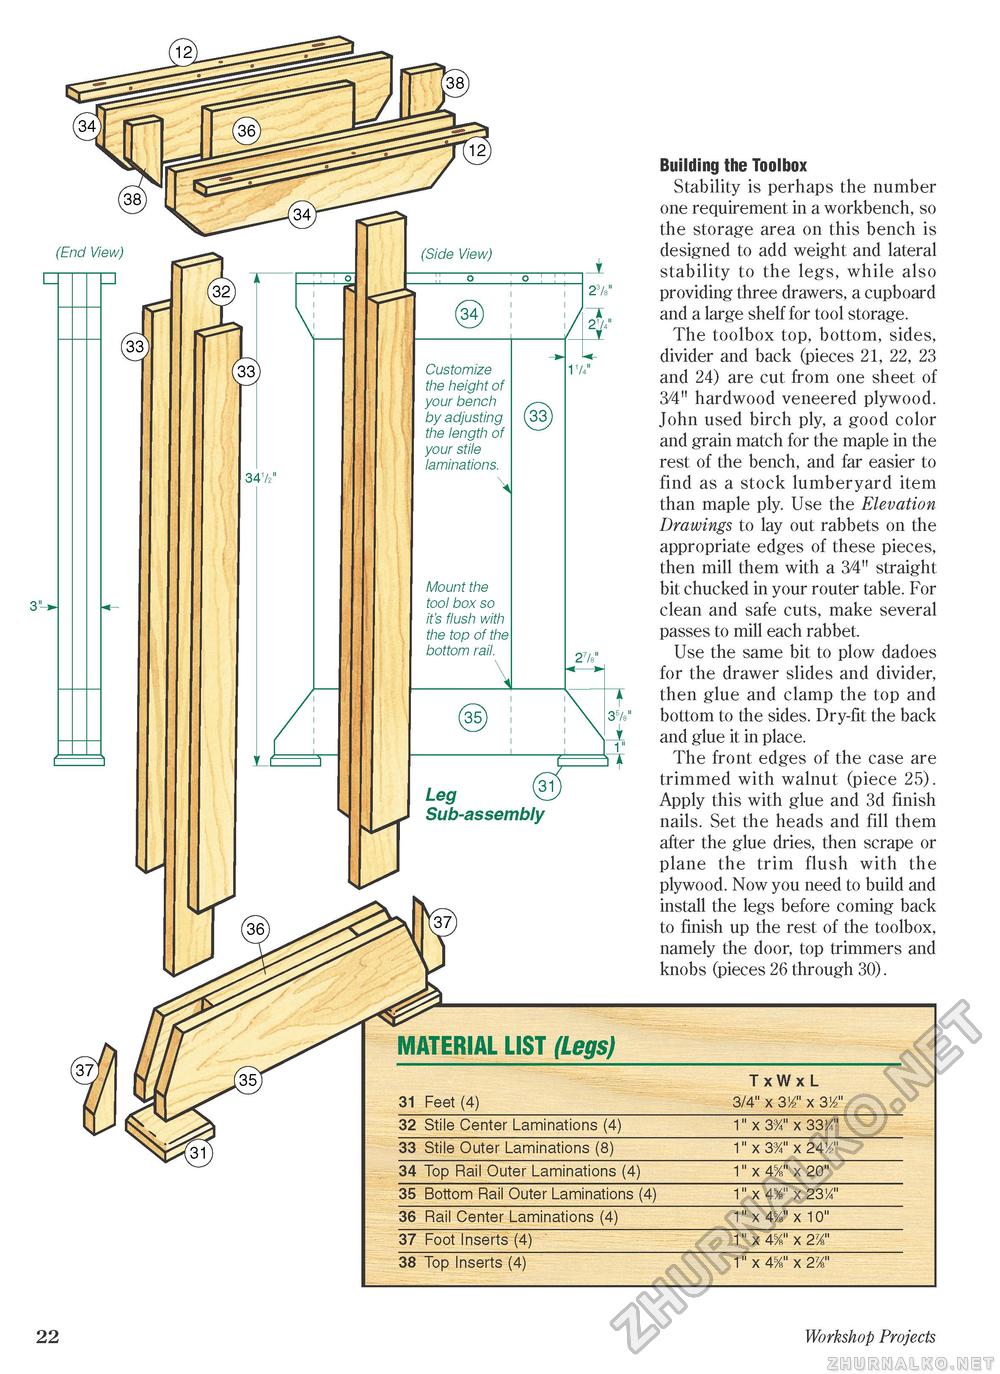
Building the Toolbox Stability is perhaps the number one requirement in a workbench, so the storage area on this bench is designed to add weight and lateral stability to the legs, while also providing three drawers, a cupboard and a large shelf for tool storage. The toolbox top, bottom, sides, divider and back (pieces 21, 22, 23 and 24) are cut from one sheet of 3/4" hardwood veneered plywood. John used birch ply, a good color and grain match for the maple in the rest of the bench, and far easier to find as a stock lumberyard item than maple ply. Use the Elevation Drawings to lay out rabbets on the appropriate edges of these pieces, then mill them with a 3/4" straight bit chucked in your router table. For clean and safe cuts, make several passes to mill each rabbet. Use the same bit to plow dadoes for the drawer slides and divider, then glue and clamp the top and bottom to the sides. Dry-fit the back and glue it in place. The front edges of the case are trimmed with walnut (piece 25). Apply this with glue and 3d finish nails. Set the heads and fill them after the glue dries, then scrape or plane the trim flush with the plywood. Now you need to build and install the legs before coming back to finish up the rest of the toolbox, namely the door, top trimmers and knobs (pieces 26 through 30). MATERIAL LIST (Legs)
22 Workshop Projects |


