Woodworker's Journal 2011-35-1, страница 43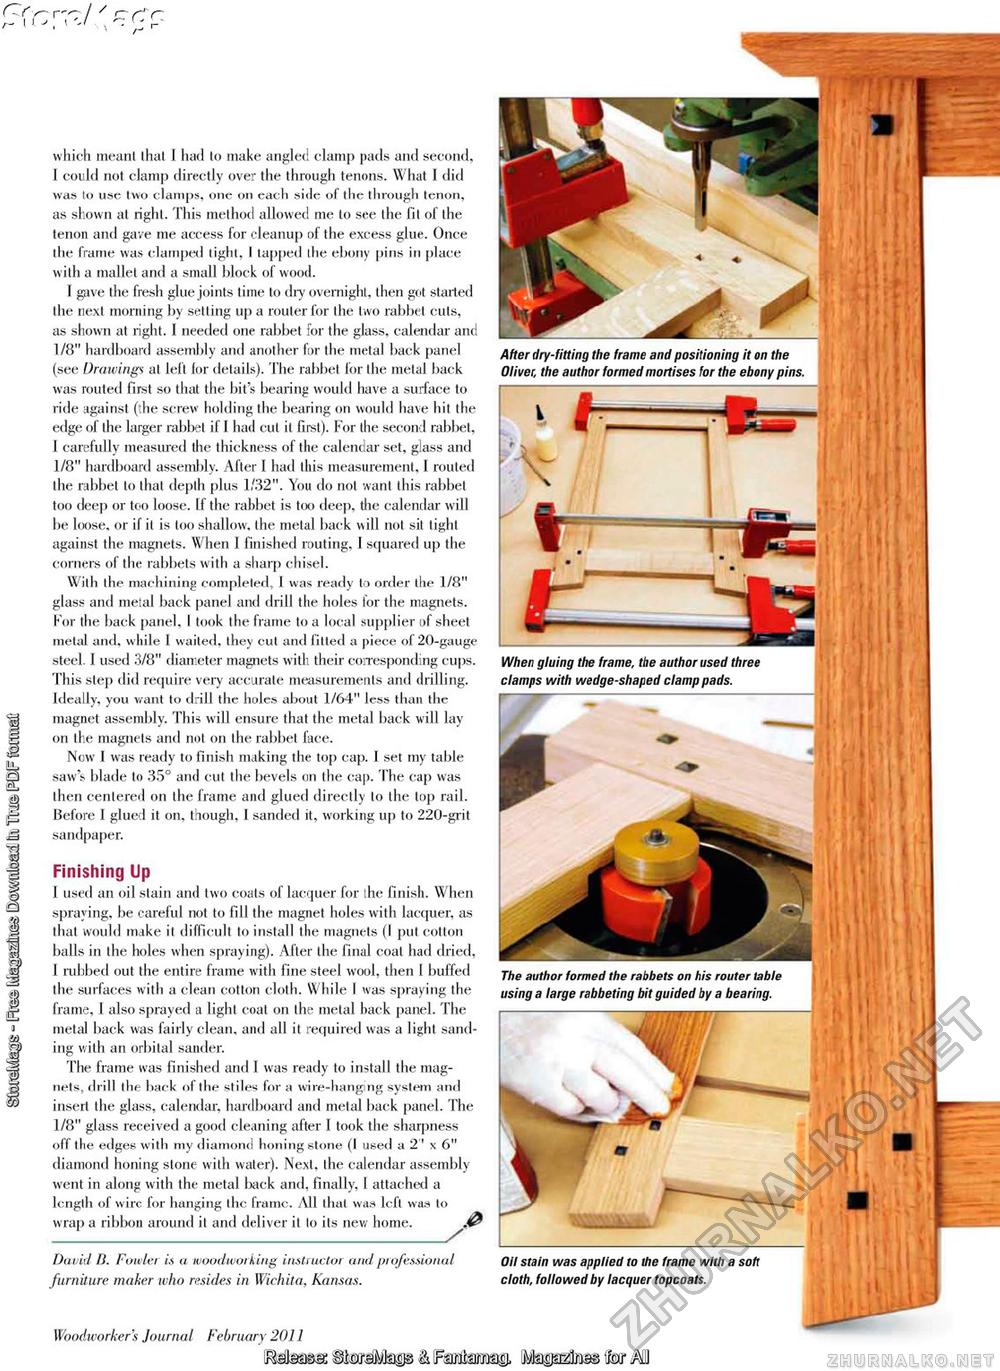
CZf r"^ / / r* which meant that I had to make angled clamp pads and second, I could not clamp directly over the through tenons. What I did was to use two clamps, one on each side of the through tenon, as shown at right. This method allowed me to see the fit of the tenon and gave me access for cleanup of the excess glue. Once the frame was clamped tight, I tapped the ebony pins in place with a mallet and a small block of wood. 1 gave the fresh glue joints time to dry overnight, then got started the next morning by setting up a router for the two rabbet cuts, as shown at right. I needed one rabbet for the glass, calendar and 1/8" hardboard assembly and another for the metal back panel (see Drawings at left lor details). The rabbet for the inetal back was routed first so that the bit's bearing would have a surface to ride against (the screw holding the bearing on would have hit (he edge of the larger rabbet if 1 had cut it first). For the second rabbet, I carefully measured the thickness of the calendar set, glass and 1/8" hardboard assembly. After 1 had this measurement, 1 routed the rabbet to that depth plus 1/32". You do not want this rabbet too deep or too loose. If the rabbet is too deep, the calendar will be loose, or if it is too shallow, the metal back will not sil tight against the magnets. When I finished routing, I squared up the corners of the rabbets with a sharp chisel. With the machining completed, I was ready to order the 1/8" glass and metal back panel and drill the holes for the magnets. For the back panel, I took the frame to a local supplier of sheet metal and, while 1 waited, they cut and lilted a piece of 20-gauge steel. I used 3/8" diameter magnets with their corresponding cups. This step did require very accurate measurements and drilling. Ideally, you want to drill the holes about 1/64" less than the magnet assembly. This will ensure that the metal back will lay on the magnets and not on the rabbet face. New I was ready to finish making the top cap. 1 set my table saw's blade to 35° and cut the bevels on the cap. The cap was then centered on the frame and glued directly to the lop rail. Before I glued it on, though, I sanded it, working up to 220-grit sandpaper. Finishing Up I used an oil stain and two coats of lacquer for the finish. When spraying, be careful not to fill the magnet holes with lacquer, as that would make it difficult to install the magnets (I put cotton balls in the holes when spraying). After the final coat had dried, I nibbed out the entire frame with fine steel wool, then I buffed the surfaces with a clean cotton cloth. While I was spraying the frame, 1 also sprayed a light coat on the metal hack panel. The metal back was fairly clean, and all it required was a light sanding with an orbital sander. The frame was finished and I wras ready to install the magnets, drill the back of the stiles for a wire-hanging system and insert the glass, calendar, hardboard and metal back panel. The 1/8" glass received a good cleaning after I took the sharpness off the edges with my diamond honing stone (I used a 2 ' x 6" diamond honing stone with water). Next, the calendar assembly went in along with the metal back and, finally, 1 attached a length of wire for hanging the frame. All that was left was to wrap a ribbon around it and deliver it to its new home. David Ti. Fowler is a woodworking instructor and professional furniture maker who resides in Wichita, Kansas. Woodworker's Journal February 2011 After dry-fitting the frame and positioning it on the Oliver, the author formed mortises for the ebony pins. The author formed the rabbets on his router table using a large rabbeting bit guided by a bearing. Oil stain was applied to the frame with a soft cloth, followed by lacquer topcoats. MmSJk^iiFrnMrnB' Map^tetorMI |


