Woodworker's Journal 2011-35-1, страница 46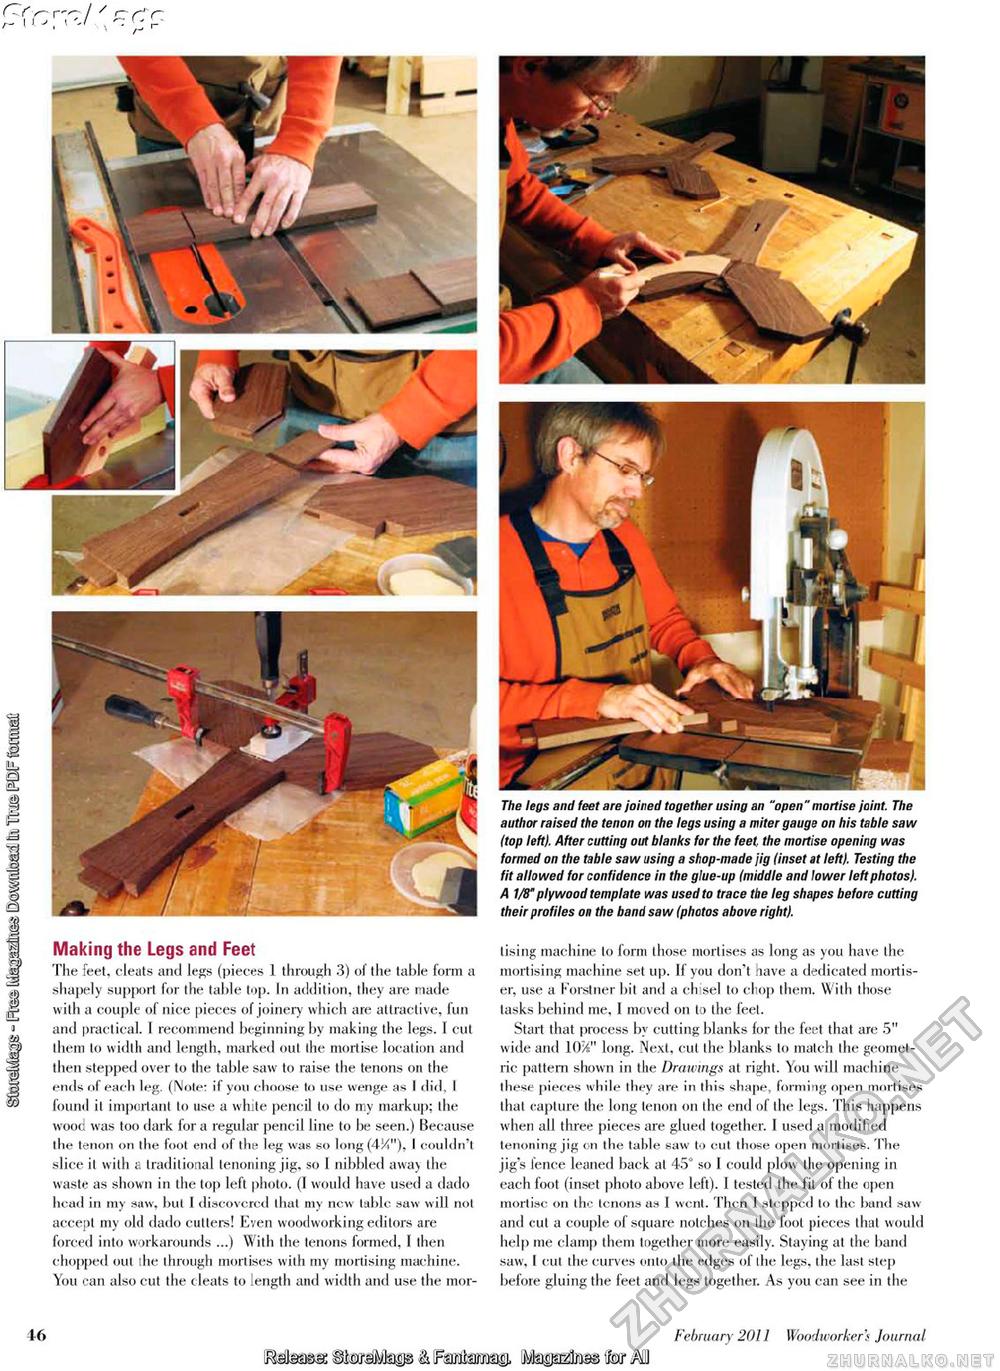
j \'J r: < - L- \ Making the Legs and Feet The feet, cleats and legs (pieces 1 through 3) of the table form a shapely support for the table top. In addition, they are made with a couple of nice pieces of joinery which are attractive, fun and practical. 1 recommend beginning by making the legs. 1 cut theui to width and length, marked out the mortise location and then stepped over to the table saw to raise the tenons oil the ends of each leg. (Note: if you choose to use wenge as I did, I found il important to use a white pencil to do my markup; the wood was too dark for a regular pencil line to be seen.) Because the tenon on the foot end of the leg was so long (4Mn), I couldn't slice it with a traditional tenoning jig, so 1 nibbled away the waste as shown in the top left photo. (I would have used a dado head in my saw, but 1 discovered that my new table saw will not accept my old dado cutters! Even woodworking editors are forced into workarounds ...) With the tenons formed, I then chopped out the through mortises with my mortising machine. You can also cut the cleats to length and wridth and use the mor- The legs and feet are joined together using an "open" mortise joint. The author raised the tenon on the legs using a miter gauge on his table saw (top left)- After cutting out blanks for the feet, the mortise opening was formed on the table saw using a shop-made jig (inset at left)- Testing the fit allowed for confidence in the glue-up (middle and lower left photos). A 1/8" plywood template was used to trace the leg shapes before cutting their profiles on the band saw (photos above right). tising machine to form those mortises as long as you have the mortising machine set up. If you don't have a dedicated mortis-er, use a Forstner bit and a eh sel to chop them. With those tasks behind me, I moved on to the feet. Start that process by cutting blanks for the feet that arc 5" wide and 10%" long. Next, cut the blanks to match the geometric pattern shown in the Drawings at right. You will machine these pieces while they are in this shape, forming open mortises that capture the long tenon on the end of the legs. This happens when all three pieces are glued together. I used a modified tenoning jig en the table saw to cut those open mortises. The jigs fence leaned back at 45° so I could plow the opening in each foot (inset photo above left). I tested the fit of the open mortise on the tenons as I went. Then 1 stepped to the band saw and cut a couple of square notches on the foot pieces that would help me clamp them together more easily. Staying at the band saw, I cut the curves onto the edges of the legs, the last step before gluing the feet and legs together. As you can see in the 46 February 2011 Woodworkers Journal JMaasa: & [Fsmtas© (fetap&to^to^ |


