Woodworker's Journal Summer-2008, страница 48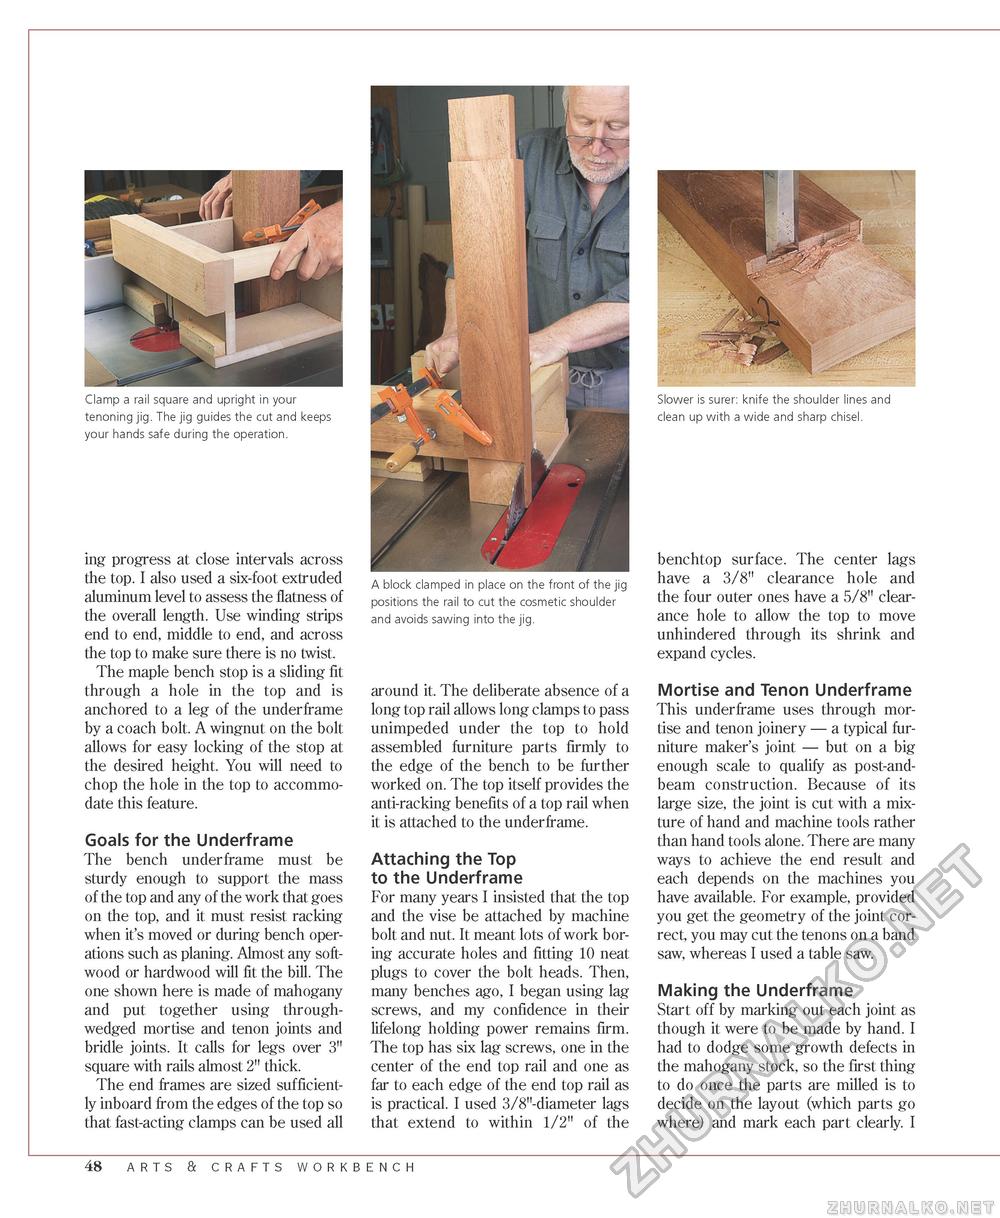
A block clamped in place on the front of the jig positions the rail to cut the cosmetic shoulder and avoids sawing into the jig. ing progress at close intervals across the top. I also used a six-foot extruded aluminum level to assess the flatness of the overall length. Use winding strips end to end, middle to end, and across the top to make sure there is no twist. The maple bench stop is a sliding fit through a hole in the top and is anchored to a leg of the underframe by a coach bolt. A wingnut on the bolt allows for easy locking of the stop at the desired height. You will need to chop the hole in the top to accommodate this feature. Goals for the Underframe The bench underframe must be sturdy enough to support the mass of the top and any of the work that goes on the top, and it must resist racking when it's moved or during bench operations such as planing. Almost any softwood or hardwood will fit the bill. The one shown here is made of mahogany and put together using through-wedged mortise and tenon joints and bridle joints. It calls for legs over 3" square with rails almost 2" thick. The end frames are sized sufficiently inboard from the edges of the top so that fast-acting clamps can be used all around it. The deliberate absence of a long top rail allows long clamps to pass unimpeded under the top to hold assembled furniture parts firmly to the edge of the bench to be further worked on. The top itself provides the anti-racking benefits of a top rail when it is attached to the underframe. Attaching the Top to the Underframe For many years I insisted that the top and the vise be attached by machine bolt and nut. It meant lots of work boring accurate holes and fitting 10 neat plugs to cover the bolt heads. Then, many benches ago, I began using lag screws, and my confidence in their lifelong holding power remains firm. The top has six lag screws, one in the center of the end top rail and one as far to each edge of the end top rail as is practical. I used 3/8"-diameter lags that extend to within 1/2" of the benchtop surface. The center lags have a 3/8" clearance hole and the four outer ones have a 5/8" clearance hole to allow the top to move unhindered through its shrink and expand cycles. Mortise and Tenon Underframe This underframe uses through mortise and tenon joinery — a typical furniture maker's joint — but on a big enough scale to qualify as post-and-beam construction. Because of its large size, the joint is cut with a mixture of hand and machine tools rather than hand tools alone. There are many ways to achieve the end result and each depends on the machines you have available. For example, provided you get the geometry of the joint correct, you may cut the tenons on a band saw, whereas I used a table saw. Making the Underframe Start off by marking out each joint as though it were to be made by hand. I had to dodge some growth defects in the mahogany stock, so the first thing to do once the parts are milled is to decide on the layout (which parts go where) and mark each part clearly. I 48 arts & crafts workbench |


