Woodworker's Journal Summer-2008, страница 49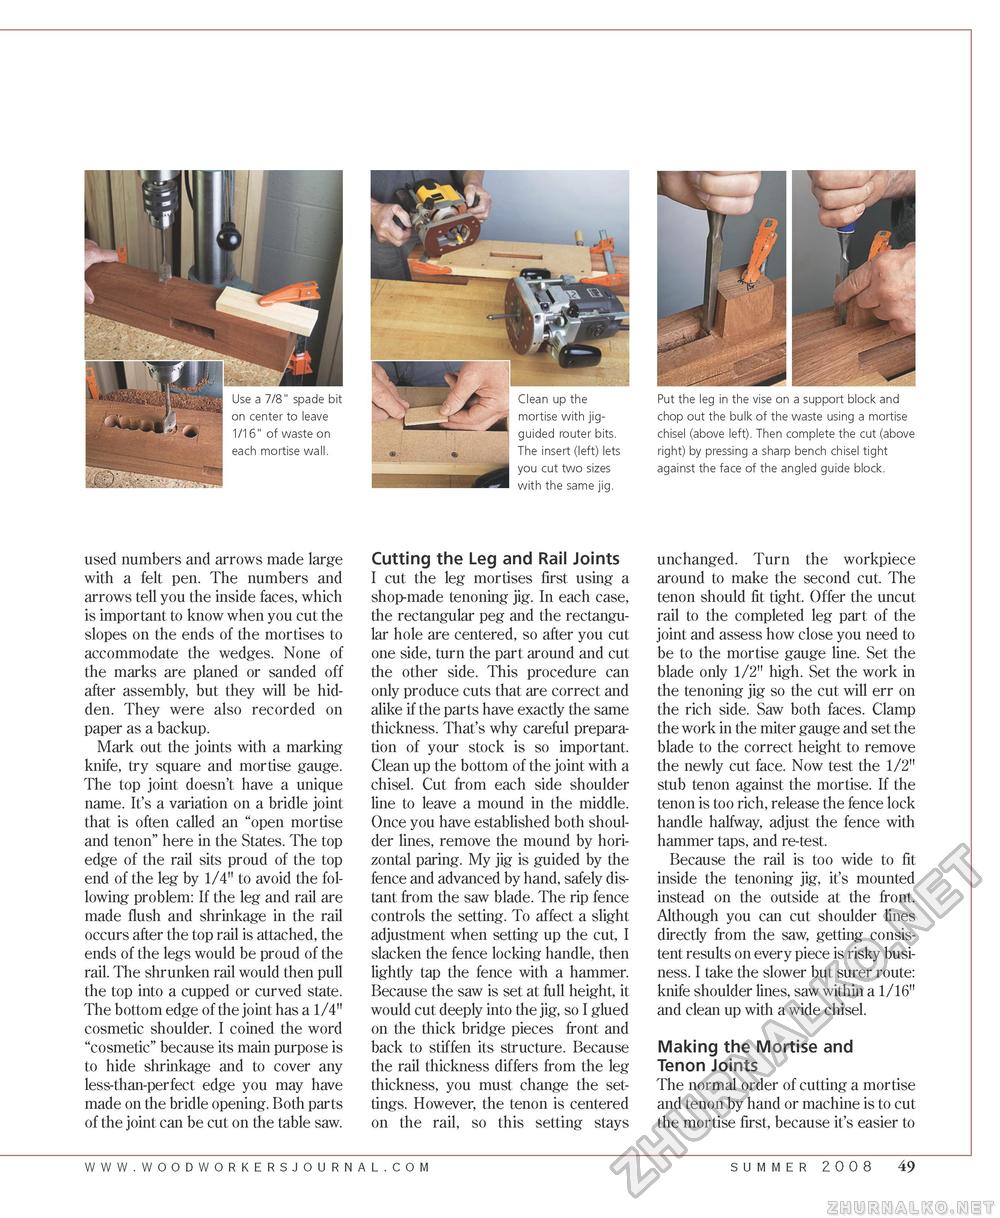
Put the leg in the vise on a support block and chop out the bulk of the waste using a mortise chisel (above left). Then complete the cut (above right) by pressing a sharp bench chisel tight against the face of the angled guide block. used numbers and arrows made large with a felt pen. The numbers and arrows tell you the inside faces, which is important to know when you cut the slopes on the ends of the mortises to accommodate the wedges. None of the marks are planed or sanded off after assembly, but they will be hidden. They were also recorded on paper as a backup. Mark out the joints with a marking knife, try square and mortise gauge. The top joint doesn't have a unique name. It's a variation on a bridle joint that is often called an "open mortise and tenon" here in the States. The top edge of the rail sits proud of the top end of the leg by 1/4" to avoid the following problem: If the leg and rail are made flush and shrinkage in the rail occurs after the top rail is attached, the ends of the legs would be proud of the rail. The shrunken rail would then pull the top into a cupped or curved state. The bottom edge of the joint has a 1/4" cosmetic shoulder. I coined the word "cosmetic" because its main purpose is to hide shrinkage and to cover any less-than-perfect edge you may have made on the bridle opening. Both parts of the joint can be cut on the table saw. Cutting the Leg and Rail Joints I cut the leg mortises first using a shop-made tenoning jig. In each case, the rectangular peg and the rectangular hole are centered, so after you cut one side, turn the part around and cut the other side. This procedure can only produce cuts that are correct and alike if the parts have exactly the same thickness. That's why careful preparation of your stock is so important. Clean up the bottom of the joint with a chisel. Cut from each side shoulder line to leave a mound in the middle. Once you have established both shoulder lines, remove the mound by horizontal paring. My jig is guided by the fence and advanced by hand, safely distant from the saw blade. The rip fence controls the setting. To affect a slight adjustment when setting up the cut, I slacken the fence locking handle, then lightly tap the fence with a hammer. Because the saw is set at full height, it would cut deeply into the jig, so I glued on the thick bridge pieces front and back to stiffen its structure. Because the rail thickness differs from the leg thickness, you must change the settings. However, the tenon is centered on the rail, so this setting stays unchanged. Turn the workpiece around to make the second cut. The tenon should fit tight. Offer the uncut rail to the completed leg part of the joint and assess how close you need to be to the mortise gauge line. Set the blade only 1/2" high. Set the work in the tenoning jig so the cut will err on the rich side. Saw both faces. Clamp the work in the miter gauge and set the blade to the correct height to remove the newly cut face. Now test the 1/2" stub tenon against the mortise. If the tenon is too rich, release the fence lock handle halfway, adjust the fence with hammer taps, and re-test. Because the rail is too wide to fit inside the tenoning jig, it's mounted instead on the outside at the front. Although you can cut shoulder lines directly from the saw, getting consistent results on every piece is risky business. I take the slower but surer route: knife shoulder lines, saw within a 1/16" and clean up with a wide chisel. Making the Mortise and Tenon Joints The normal order of cutting a mortise and tenon by hand or machine is to cut the mortise first, because it's easier to www.woodworkersjourna l . c o m summer 2008 49 |


