Woodworker's Journal Summer-2008, страница 50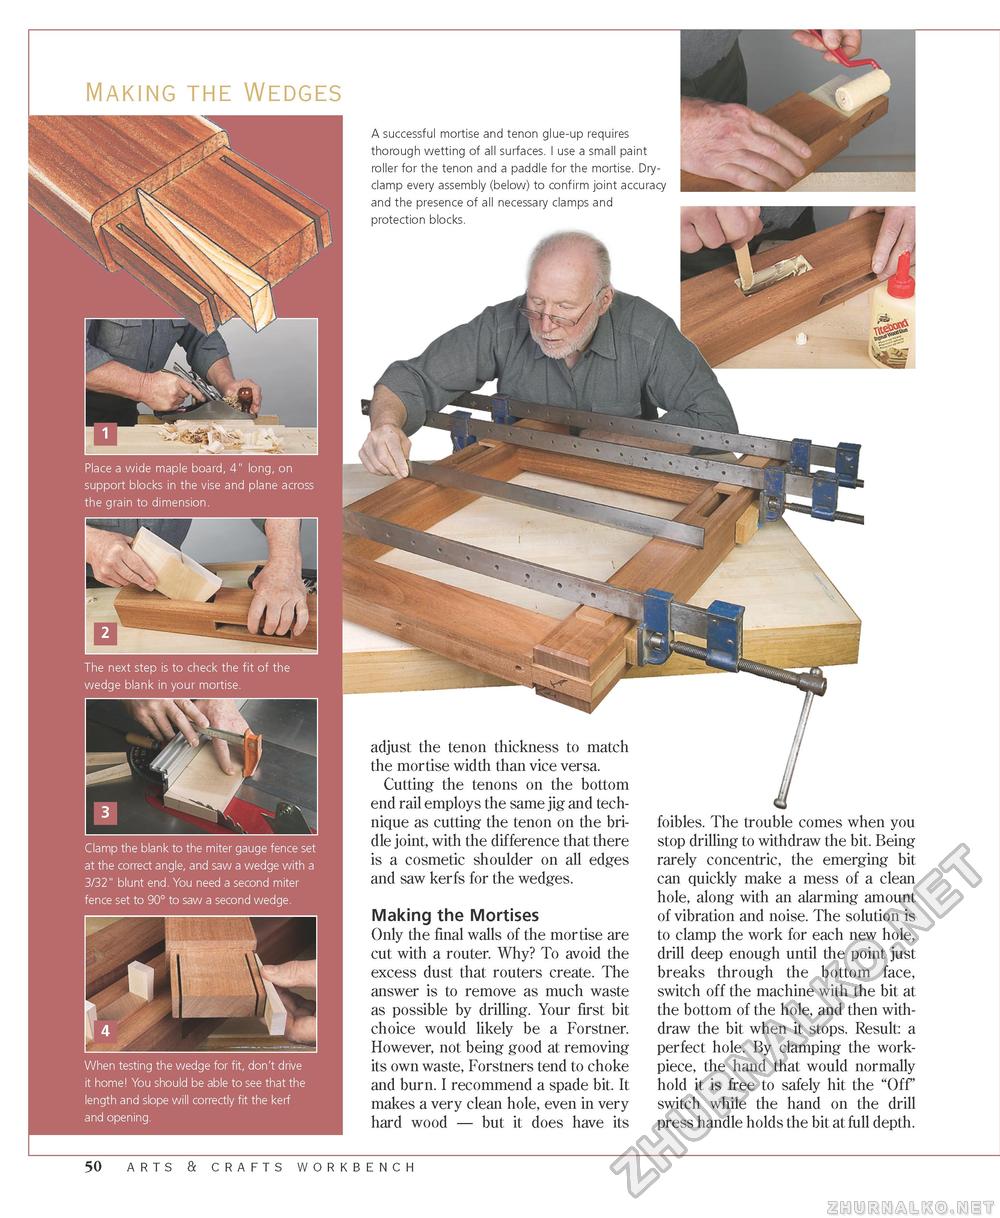
Making the Wedges
Place a wide maple board, 4" long, on support blocks in the vise and plane across the grain to dimension. The next step is to check the fit of the wedge blank in your mortise. Clamp the blank to the miter gauge fence set at the correct angle, and saw a wedge with a 3/32" blunt end. You need a second miter fence set to 90° to saw a second wedge. When testing the wedge for fit, don't drive it home! You should be able to see that the length and slope will correctly fit the kerf and opening. A successful mortise and tenon glue-up requires thorough wetting of all surfaces. I use a small paint roller for the tenon and a paddle for the mortise. Dry-clamp every assembly (below) to confirm joint accuracy and the presence of all necessary clamps and protection blocks. adjust the tenon thickness to match the mortise width than vice versa. Cutting the tenons on the bottom end rail employs the same jig and technique as cutting the tenon on the bridle joint, with the difference that there is a cosmetic shoulder on all edges and saw kerfs for the wedges. Making the Mortises Only the final walls of the mortise are cut with a router. Why? To avoid the excess dust that routers create. The answer is to remove as much waste as possible by drilling. Your first bit choice would likely be a Forstner. However, not being good at removing its own waste, Forstners tend to choke and burn. I recommend a spade bit. It makes a very clean hole, even in very hard wood — but it does have its foibles. The trouble comes when you stop drilling to withdraw the bit. Being rarely concentric, the emerging bit can quickly make a mess of a clean hole, along with an alarming amount of vibration and noise. The solution is to clamp the work for each new hole, drill deep enough until the point just breaks through the bottom face, switch off the machine with the bit at the bottom of the hole, and then withdraw the bit when it stops. Result: a perfect hole. By clamping the work-piece, the hand that would normally hold it is free to safely hit the "Off' switch while the hand on the drill press handle holds the bit at full depth. 50 arts & crafts workbench |
||||||


