Woodworker's Journal Summer-2008, страница 59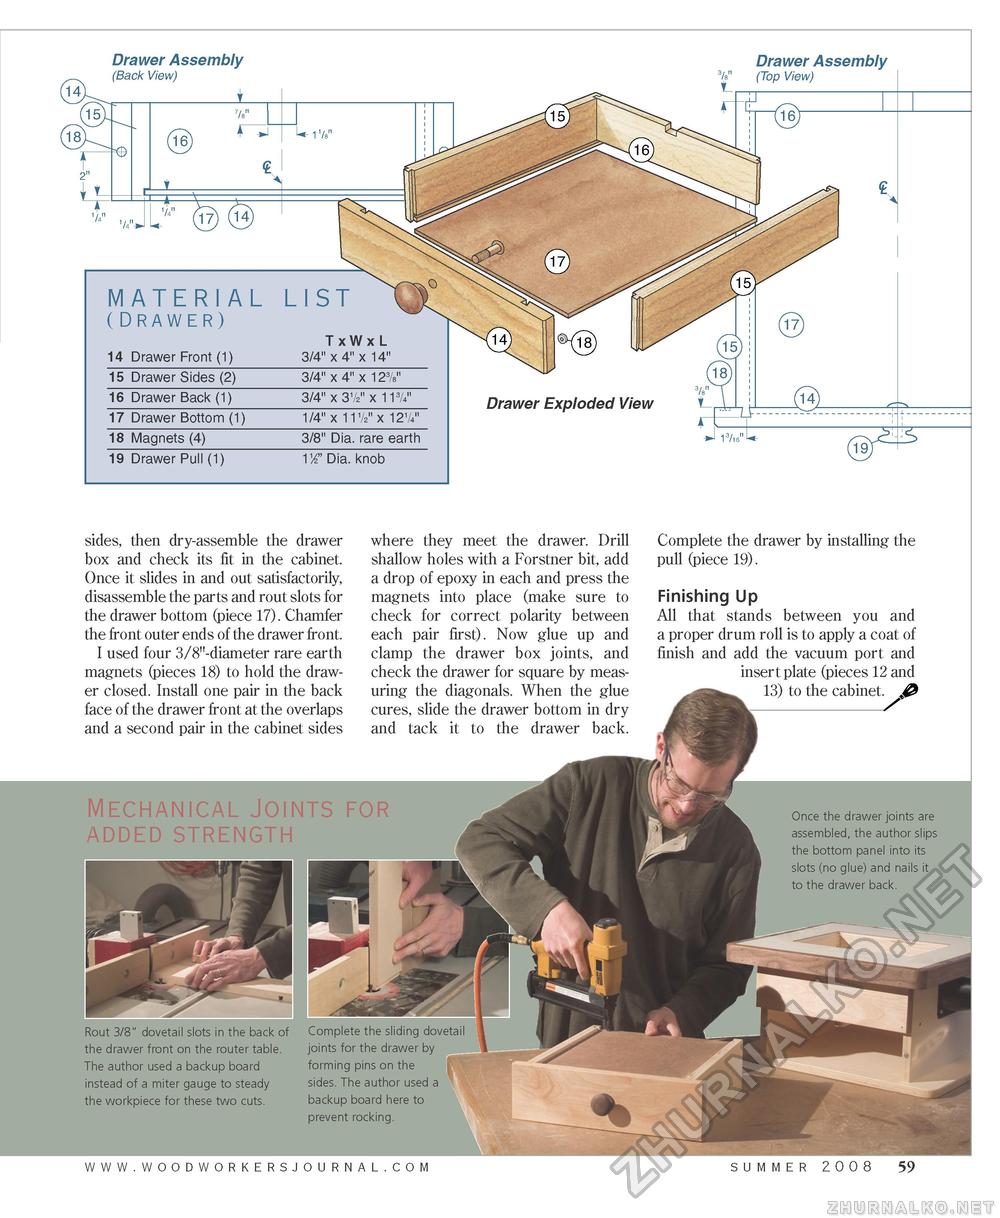
sides, then dry-assemble the drawer box and check its fit in the cabinet. Once it slides in and out satisfactorily, disassemble the parts and rout slots for the drawer bottom (piece 17). Chamfer the front outer ends of the drawer front. I used four 3/8"-diameter rare earth magnets (pieces 18) to hold the drawer closed. Install one pair in the back face of the drawer front at the overlaps and a second pair in the cabinet sides where they meet the drawer. Drill shallow holes with a Forstner bit, add a drop of epoxy in each and press the magnets into place (make sure to check for correct polarity between each pair first). Now glue up and clamp the drawer box joints, and check the drawer for square by measuring the diagonals. When the glue cures, slide the drawer bottom in dry and tack it to the drawer back. Complete the drawer by installing the pull (piece 19). Finishing Up All that stands between you and a proper drum roll is to apply a coat of finish and add the vacuum port and insert plate (pieces 12 and 13) to the cabinet. Mechanical Joints for added strength Once the drawer joints are assembled, the author slips the bottom panel into its slots (no glue) and nails it to the drawer back. Rout 3/8" dovetail slots in the back of Complete the sliding dovetail the drawer front on the router table. The author used a backup board instead of a miter gauge to steady the workpiece for these two cuts. joints for the drawer by forming pins on the sides. The author used a backup board here to prevent rocking. www.woodworkersjourna l . c o m summer 2008 59 |


