Woodworker's Journal Summer-2008, страница 86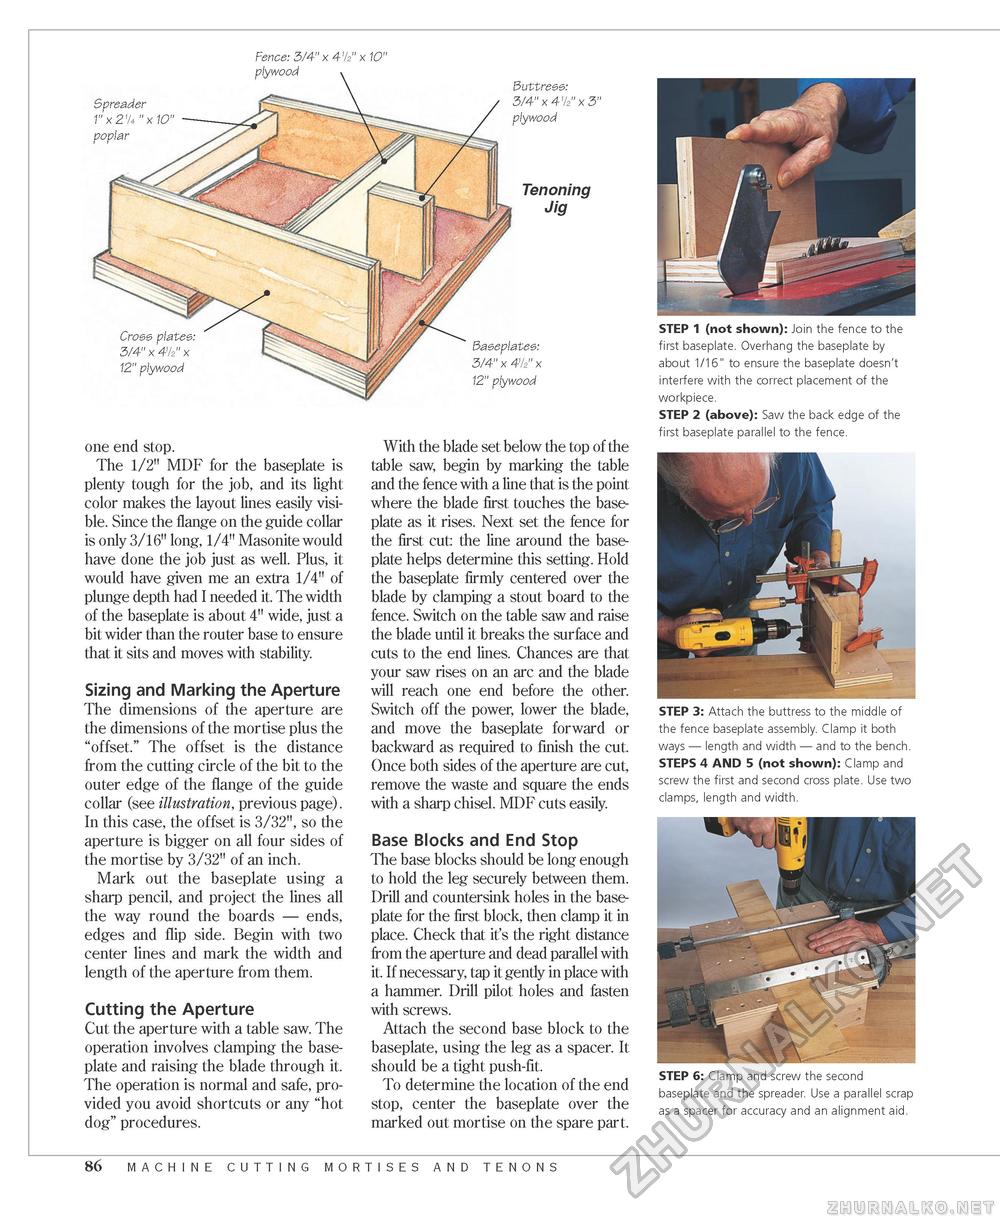
Fence: 3/4" x 4'k" x 10" plywood Spreader 1" x 21/4 " x 10" poplar Buttress: 3/4" x 41/2" x 3" plywood Tenoning Jig Cross plates: 3/4" x 41/"' x 12" plywood one end stop. The 1/2" MDF for the baseplate is plenty tough for the job, and its light color makes the layout lines easily visible. Since the flange on the guide collar is only 3/16" long, 1/4" Masonite would have done the job just as well. Plus, it would have given me an extra 1/4" of plunge depth had I needed it. The width of the baseplate is about 4" wide, just a bit wider than the router base to ensure that it sits and moves with stability. Sizing and Marking the Aperture The dimensions of the aperture are the dimensions of the mortise plus the "offset." The offset is the distance from the cutting circle of the bit to the outer edge of the flange of the guide collar (see illustration, previous page). In this case, the offset is 3/32", so the aperture is bigger on all four sides of the mortise by 3/32" of an inch. Mark out the baseplate using a sharp pencil, and project the lines all the way round the boards — ends, edges and flip side. Begin with two center lines and mark the width and length of the aperture from them. Cutting the Aperture Cut the aperture with a table saw. The operation involves clamping the baseplate and raising the blade through it. The operation is normal and safe, provided you avoid shortcuts or any "hot dog" procedures. Baseplates: 3/4" x 4/2" x 12" plywood With the blade set below the top of the table saw, begin by marking the table and the fence with a line that is the point where the blade first touches the baseplate as it rises. Next set the fence for the first cut: the line around the baseplate helps determine this setting. Hold the baseplate firmly centered over the blade by clamping a stout board to the fence. Switch on the table saw and raise the blade until it breaks the surface and cuts to the end lines. Chances are that your saw rises on an arc and the blade will reach one end before the other. Switch off the power, lower the blade, and move the baseplate forward or backward as required to finish the cut. Once both sides of the aperture are cut, remove the waste and square the ends with a sharp chisel. MDF cuts easily. Base Blocks and End Stop The base blocks should be long enough to hold the leg securely between them. Drill and countersink holes in the baseplate for the first block, then clamp it in place. Check that it's the right distance from the aperture and dead parallel with it. If necessary, tap it gently in place with a hammer. Drill pilot holes and fasten with screws. Attach the second base block to the baseplate, using the leg as a spacer. It should be a tight push-fit. To determine the location of the end stop, center the baseplate over the marked out mortise on the spare part. STEP 1 (not shown): Join the fence to the first baseplate. Overhang the baseplate by about 1/16" to ensure the baseplate doesn't interfere with the correct placement of the workpiece. STEP 2 (above): Saw the back edge of the first baseplate parallel to the fence. STEP 3: Attach the buttress to the middle of the fence baseplate assembly. Clamp it both ways — length and width — and to the bench. STEPS 4 AND 5 (not shown): Clamp and screw the first and second cross plate. Use two clamps, length and width. STEP 6: Clamp and screw the second baseplate and the spreader. Use a parallel scrap as a spacer for accuracy and an alignment aid. 86 machine cutting mortises and tenons |


