Woodworker's Journal winter-2010, страница 50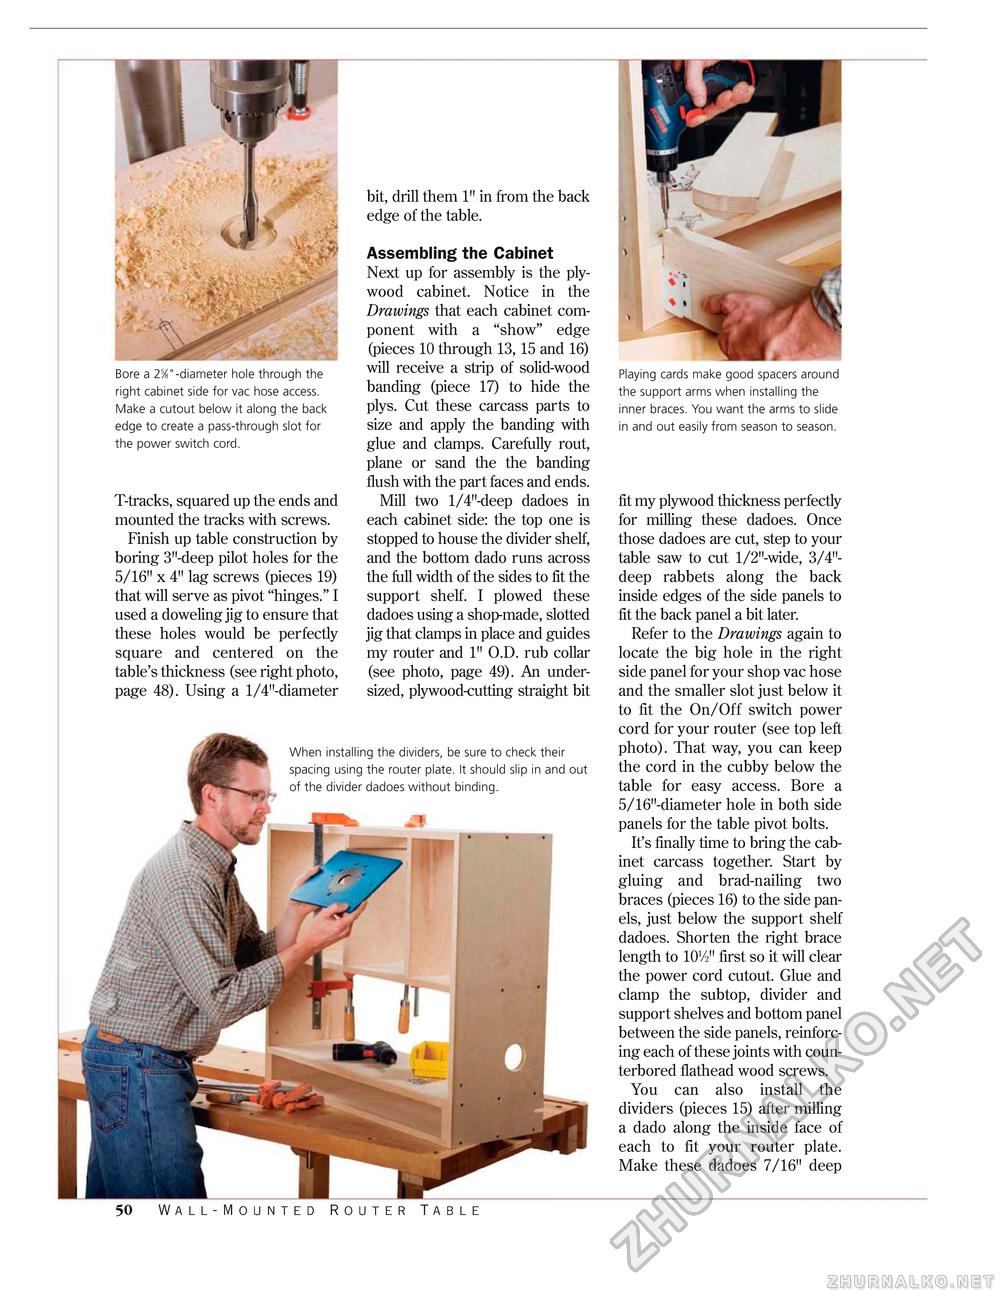
bit, drill them 1" in from the back edge of the table. Assembling the Cabinet Next up for assembly is the plywood cabinet. Notice in the Drawings that each cabinet component with a "show" edge (pieces 10 through 13,15 and 16) will receive a strip of solid-wood banding (piece 17) to hide the plys. Cut these carcass parts to size and apply the banding with glue and clamps. Carefully rout, plane or sand the the banding flush with the part faces and ends. Mill two l/4M-deep dadoes in each cabinet side: the top one is stopped to house the divider shelf, and the bottom dado runs across the full width of the sides to fit the support shelf. I plowed these dadoes using a shop-made, slotted jig that clamps in place and guides my router and 1" O.D. rub collar (see photo, page 49). An undersized, plywood-cutting straight bit fit my plywood thickness perfectly for milling these dadoes. Once those dadoes are cut, step to your table saw to cut l/2M-wide, 3/4M-deep rabbets along the back inside edges of the side panels to fit the back panel a bit later. Refer to the Drawings again to locate the big hole in the right side panel for your shop vac hose and the smaller slot just below it to fit the On/Off switch power cord for your router (see top left photo). That way, you can keep the cord in the cubby below the table for easy access. Bore a 5/16M-diameter hole in both side panels for the table pivot bolts. It's finally time to bring the cabinet carcass together. Start by gluing and brad-nailing two braces (pieces 16) to the side panels, just below the support shelf dadoes. Shorten the right brace length to 10y2M first so it will clear the power cord cutout. Glue and clamp the subtop, divider and support shelves and bottom panel between the side panels, reinforcing each of these joints with coun-terbored flathead wood screws. You can also install the dividers (pieces 15) after milling a dado along the inside face of each to fit your router plate. Make these dadoes 7/16" deep T-tracks, squared up the ends and mounted the tracks with screws. Finish up table construction by boring 3"-deep pilot holes for the 5/16" x 4" lag screws (pieces 19) that will serve as pivot "hinges." I used a doweling jig to ensure that these holes would be perfectly square and centered on the table's thickness (see right photo, page 48). Using a l/4"-diameter Playing cards make good spacers around the support arms when installing the inner braces. You want the arms to slide in and out easily from season to season. Bore a 2%"-diameter hole through the right cabinet side for vac hose access. Make a cutout below it along the back edge to create a pass-through slot for the power switch cord. 50 Wall-Mounted Router Table When installing the dividers, be sure to check their spacing using the router plate. It should slip in and out of the divider dadoes without binding. |


