Creative Woodworks & crafts 2001-10, страница 46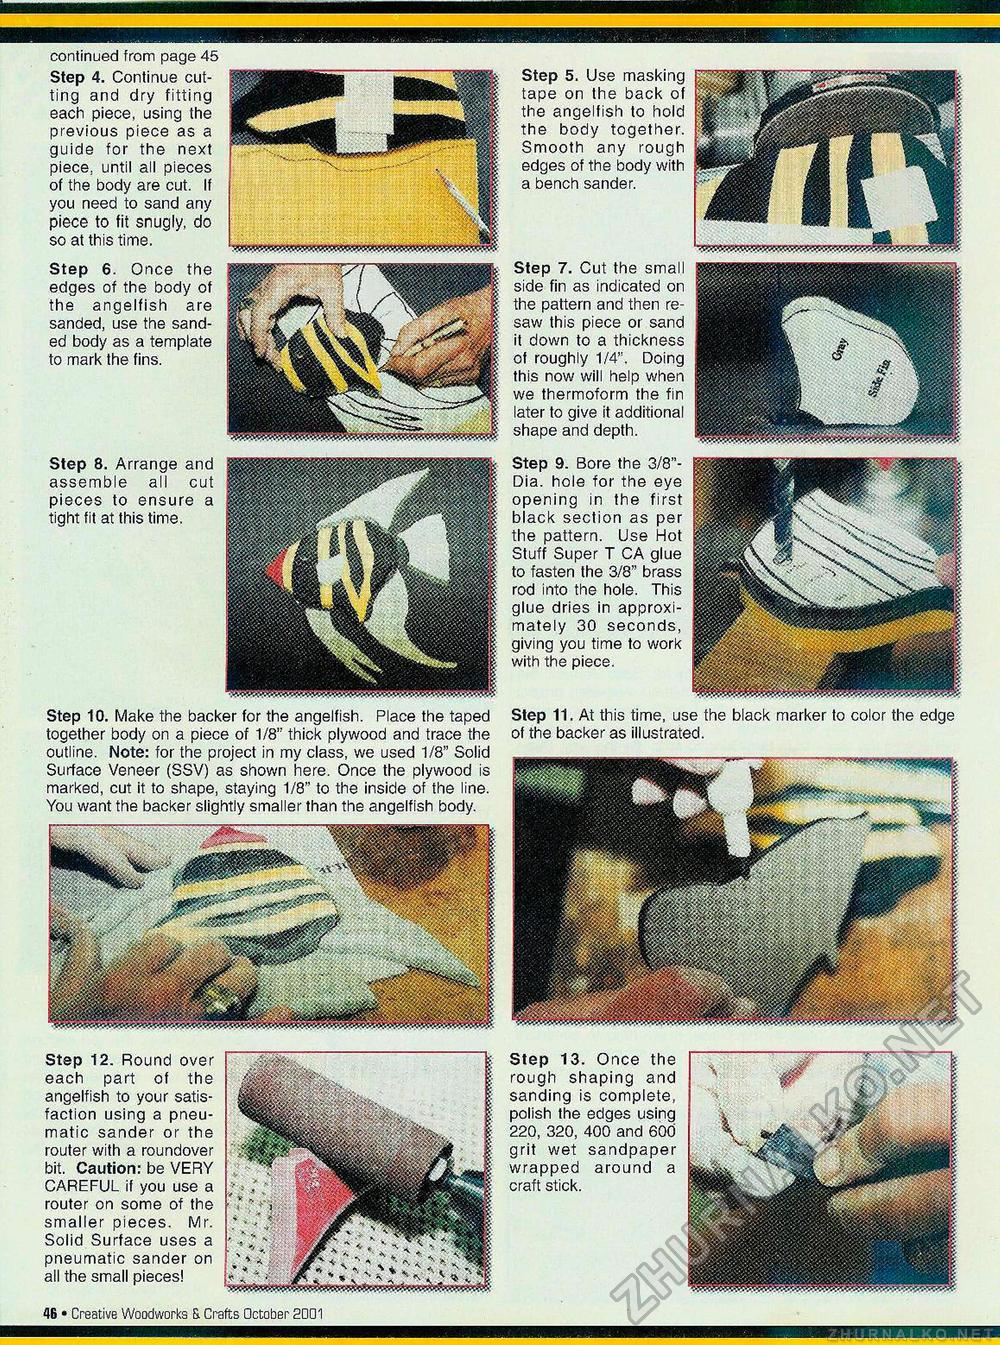
Step 10. Make the backer for the angelfish. Place the taped together body on a piece of 1/8'" thick plywood and trace the outline. Note: for the project in my class, we used 1/8" Solid Surface Veneer (SSV) as shown here. Once the plywood is marked, cut it to shape, staying 1/8" to the inside of the line. You want the backer slightly smaller than the angelfish body. Step 11. At this time, use the black marker to color the edge of the backer as illustrated. continued from page 45 Step 4. Continue cutting and dry fitting each piece, using the previous piece as a guide for the next piece, until all pieces of the body are cut. If you need to sand any piece to fit snugly, do so at this time. Step 6. Once the edges of the body of the angelfish are sanded, use the sanded body as a template to mark the fins. Step 8. Arrange and assemble all cut pieces to ensure a tight fit at this time. Step 5. Use masking tape on the back of the angelfish to hold the body together. Smooth any rough edges of the body with a bench sander. Step 7. Cut the small side fin as indicated on the pattern and then re-saw this piece or sand it down to a thickness of roughly 1/4". Doing this now will help when we thermoform the fin later to give it additional shape and depth. Step 9. Bore the 3/8"-Dia. hole for the eye opening in the first black section as per the pattern. Use Hot Stuff Super T CA glue to fasten the 3/8" brass rod into the hole. This glue dries in approximately 30 seconds, giving you time to work with the piece. Wm^- mmm Step 12. Round over each part of the angelfish to your satisfaction using a pneumatic sander or the router with a roundover bit. Caution: be VERY CAREFUL if you use a router on some of the smaller pieces. Mr. Solid Surface uses a pneumatic sander on all the small pieces! Step 13. Once the rough shaping and sanding is complete, polish the edges using 220, 320, 400 and 600 grit wet sandpaper wrapped around a craft stick. 12 • Creative Woodworks & Crafts October- 2001 |


