Creative Woodworks & crafts 2001-10, страница 48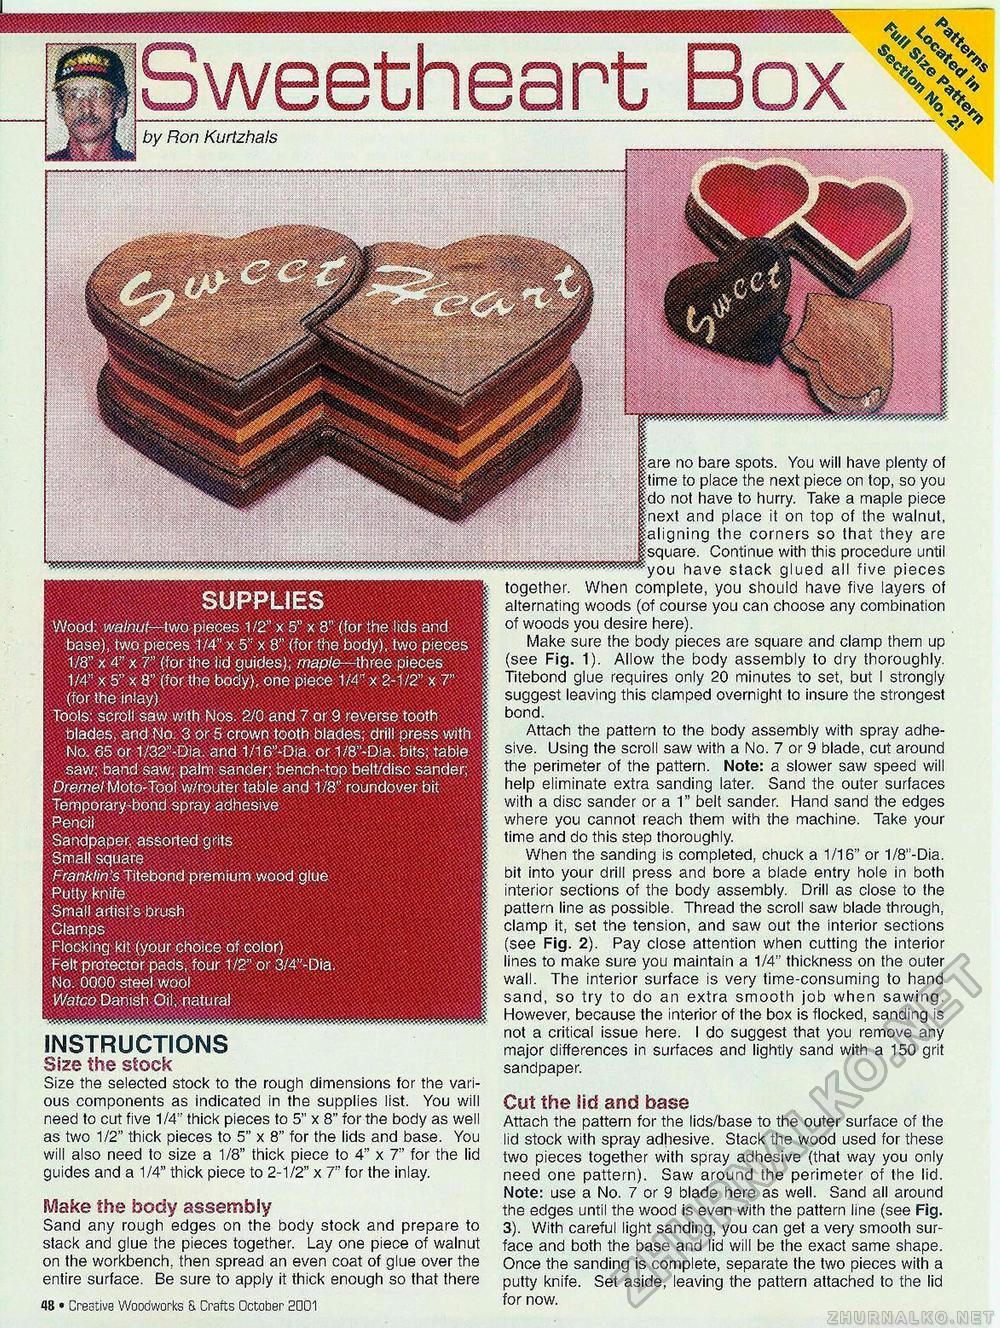
SUPPLIES Wood:, watnut- lwo pieces 1/2" x 5" x 8" (for the lids and base), two pieces 1/4" x 5" x 8" (for the body), two pieces 1/8" x 4" x 7" (for the iid guides); maple-three pieces 1/4" x 5" x 8" (for the body), one piece 1/4" x 2-1/2" x 7" (for the iniay) Tools: scroll saw with Nos. 2/0 and 7 or 9 reverse, tooth blades, and No. 3 or 5 crown tooth blades: drill press with No 65 or 1/32"-Dia. and 1/16"-Dia.. or 1/8"-Dia. bits; tabie saw; band saw; palni sander; bench-top belt/disc sander; Dremel Moto-Tool w/router table and 1/8" roundover bit Temporary-bond spray adhesive Pencii Sandpaper, assorted grits Small square Franklin's Titebond premium wood glue Putty knife Small artist's brush Clamps Flocking kit (your choice of color) Felt protector pads,: four 1/2" or 3/4"-Dia. No. 0000 steel wool V/atco Danish Oil natural by Ron Kurtzhals weetheart no bare spots. You will have plenty of to place the next piece on top, so you not have to hurry. Take a maple piece and place it on top of the walnut, igning the corners so that they are Continue with this procedure until ___have stack glued all five pieces together. When complete, you should have five layers of alternating woods (of course you can choose any combination of woods you desire here). Make sure the body pieces are square and clamp them up (see Fig. 1). Allow the body assembly to dry thoroughly. Titebond glue requires only 20 minutes to set, but I strongly suggest leaving this clamped overnight to insure the strongest bond. Attach the pattern to the body assembly with spray adhesive. Using the scroll saw with a No. 7 or 9 blade, cut around the perimeter of the pattern. Note: a slower saw speed will help eliminate extra sanding later. Sand the outer surfaces with a disc sander or a 1" belt sander. Hand sand the edges where you cannot reach them with the machine. Take your time and do this step thoroughly. When the sanding is completed, chuck a 1/16" or 1/8"-Dia. bit into your drill press and bore a blade entry hole in both interior sections of the body assembly. Drill as close to the pattern line as possible. Thread the scroll saw blade through, clamp it, set the tension, and saw out the interior sections (see Fig. 2). Pay close attention when cutting the interior lines to make sure you maintain a 1/4" thickness on the outer wall. The interior surface is very time-consuming to hand sand, so try to do an extra smooth job when sawing. However, because the interior of the box is flocked, sanding is not a critical issue here. I do suggest that you remove any major differences in surfaces and lightly sand with a 150 grit sandpaper. Cut the Sid and base Attach the pattern for the lids/base to the outer surface of the lid stock with spray adhesive. Stack the wood used for these two pieces together with spray adhesive (that way you only need one pattern). Saw around the perimeter of the lid. Note: use a No. 7 or 9 blade here as well. Sand all around the edges until the wood is even with the pattern line (see Fig. 3). With careful light sanding, you can get a very smooth surface and both the base and lid will be the exact same shape. Once the sanding is complete, separate the two pieces with a putty knife. Set aside, leaving the pattern attached to the lid for now. INSTRUCTIONS Size the stock Size the selected stock to the rough dimensions for the various components as indicated in the supplies list. You will need to cut five 1/4" thick pieces to 5" x 8" for the body as well as two 1/2" thick pieces to 5" x 8" for the lids and base. You will also need to size a 1/8" thick piece to 4" x 7" for the lid guides and a 1/4" thick piece to 2-1/2" x 7" for the inlay. Make the body assembly Sand any rough edges on the body stock and prepare to stack and glue the pieces together. Lay one piece of walnut on the workbench, then spread an even coat of glue over the entire surface. Be sure to apply it thick enough so that there 12 • Creative Woodworks & Crafts October- 2001 |


