Popular Woodworking 2004-04 № 140, страница 77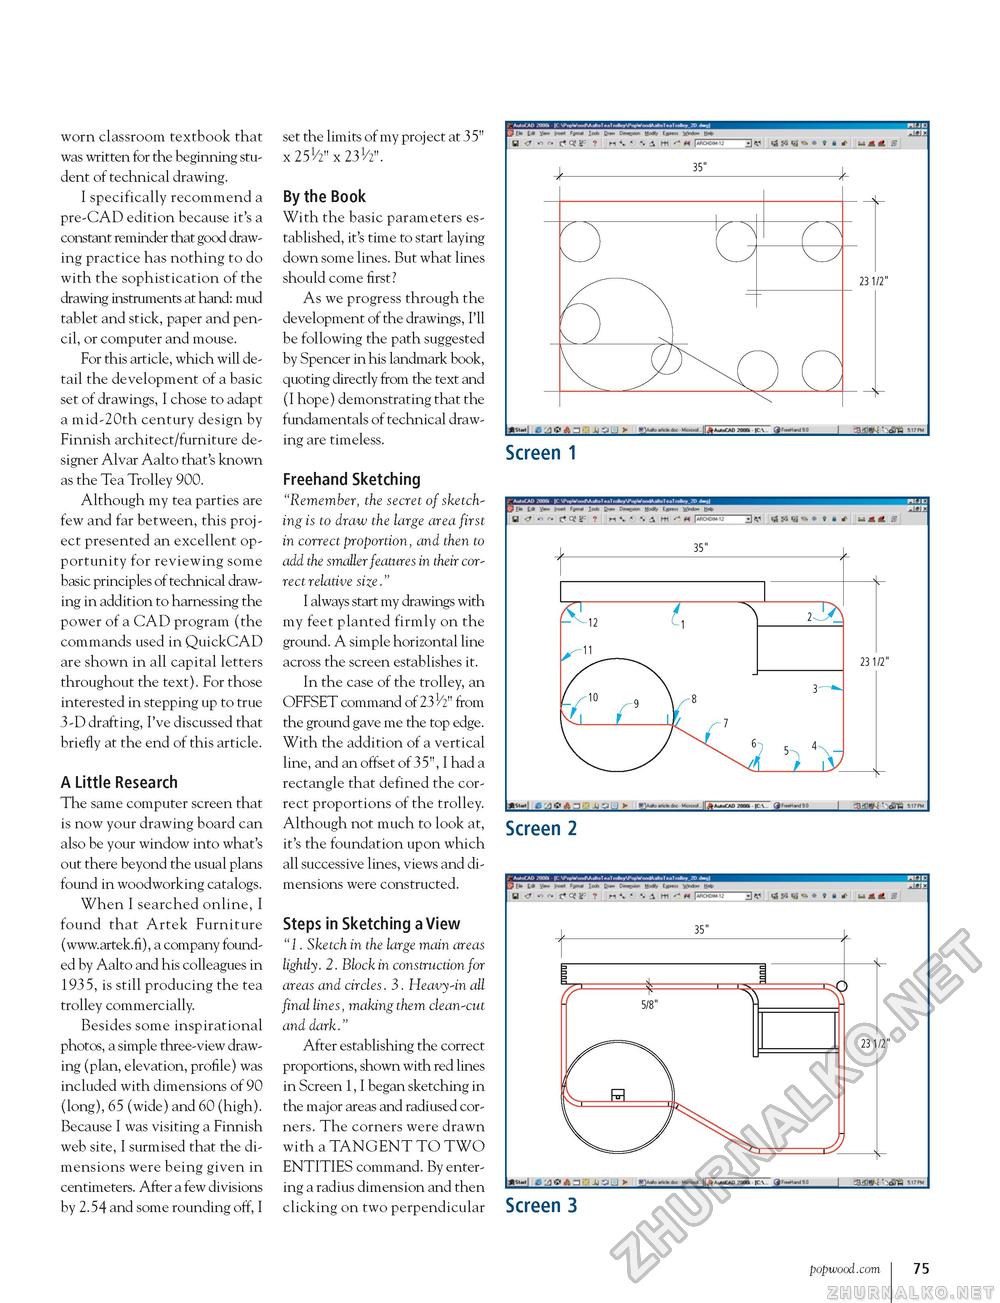
worn classroom textbook that was written for the beginning student of technical drawing. I specifically recommend a pre-CAD edition because it's a constant reminder that good drawing practice has nothing to do with the sophistication of the drawing instruments at hand: mud tablet and stick, paper and pencil, or computer and mouse. For this article, which will detail the development of a basic set of drawings, I chose to adapt a mid-20th century design by Finnish architect/furniture designer Alvar Aalto that's known as the Tea Trolley 900. Although my tea parties are few and far between, this project presented an excellent opportunity for reviewing some basic principles of technical drawing in addition to harnessing the power of a CAD program (the commands used in QuickCAD are shown in all capital letters throughout the text). For those interested in stepping up to true 3-D drafting, I've discussed that briefly at the end of this article. A Little Research The same computer screen that is now your drawing board can also be your window into what's out there beyond the usual plans found in woodworking catalogs. When I searched online, I found that Artek Furniture (www.artek.fi), a company founded by Aalto and his colleagues in 1935, is still producing the tea trolley commercially. Besides some inspirational photos, a simple three-view drawing (plan, elevation, profile) was included with dimensions of 90 (long), 65 (wide) and 60 (high). Because I was visiting a Finnish web site, I surmised that the dimensions were being given in centimeters. After a few divisions by 2.54 and some rounding off, I set the limits of my project at 35" x 25V2" x 23h". By the Book With the basic parameters established, it's time to start laying down some lines. But what lines should come first? As we progress through the development of the drawings, I'll be following the path suggested by Spencer in his landmark book, quoting directly from the text and (I hope) demonstrating that the fundamentals of technical drawing are timeless. Freehand Sketching "Remember, the secret of sketching is to draw the large area first in correct proportion, and then to add the smaller features in their cor-rectrelative size." I always start my drawings with my feet planted firmly on the ground. A simple horizontal line across the screen establishes it. In the case of the trolley, an OFFSET command of 231/2" from the ground gave me the top edge. With the addition of a vertical line, and an offset of 35", I had a rectangle that defined the correct proportions of the trolley. Although not much to look at, it's the foundation upon which all successive lines, views and dimensions were constructed. Steps in Sketching a View "1. Sketch in the large main areas lightly. 2. Block in construction for areas and circles. 3. Heavy-in all final lines, making them clean-cut and dark." After establishing the correct proportions, shown with red lines in Screen 1, I began sketching in the major areas and radiused corners. The corners were drawn with a TANGENT TO TWO ENTITIES command. By entering a radius dimension and then clicking on two perpendicular Ipd bm Dte^a met r" w-.y- HK e $ Aimlii B- II- * pMni 35" 23 1/2" JBSW J&AJ -I ---- ■■■■ ■ I ajMj-.iaw Screen 1 >1—* Ir.* c^fM* E«m*i 0*1 Of jf" ? M <V ' "-A htl H |«BOM-1 . Ul X d V uAtfiir 12 2 23 1/2" 5 ' . I jam.! Screen 2 Screen 3 popwood.com 75 |


