Popular Woodworking 2004-11 № 144, страница 66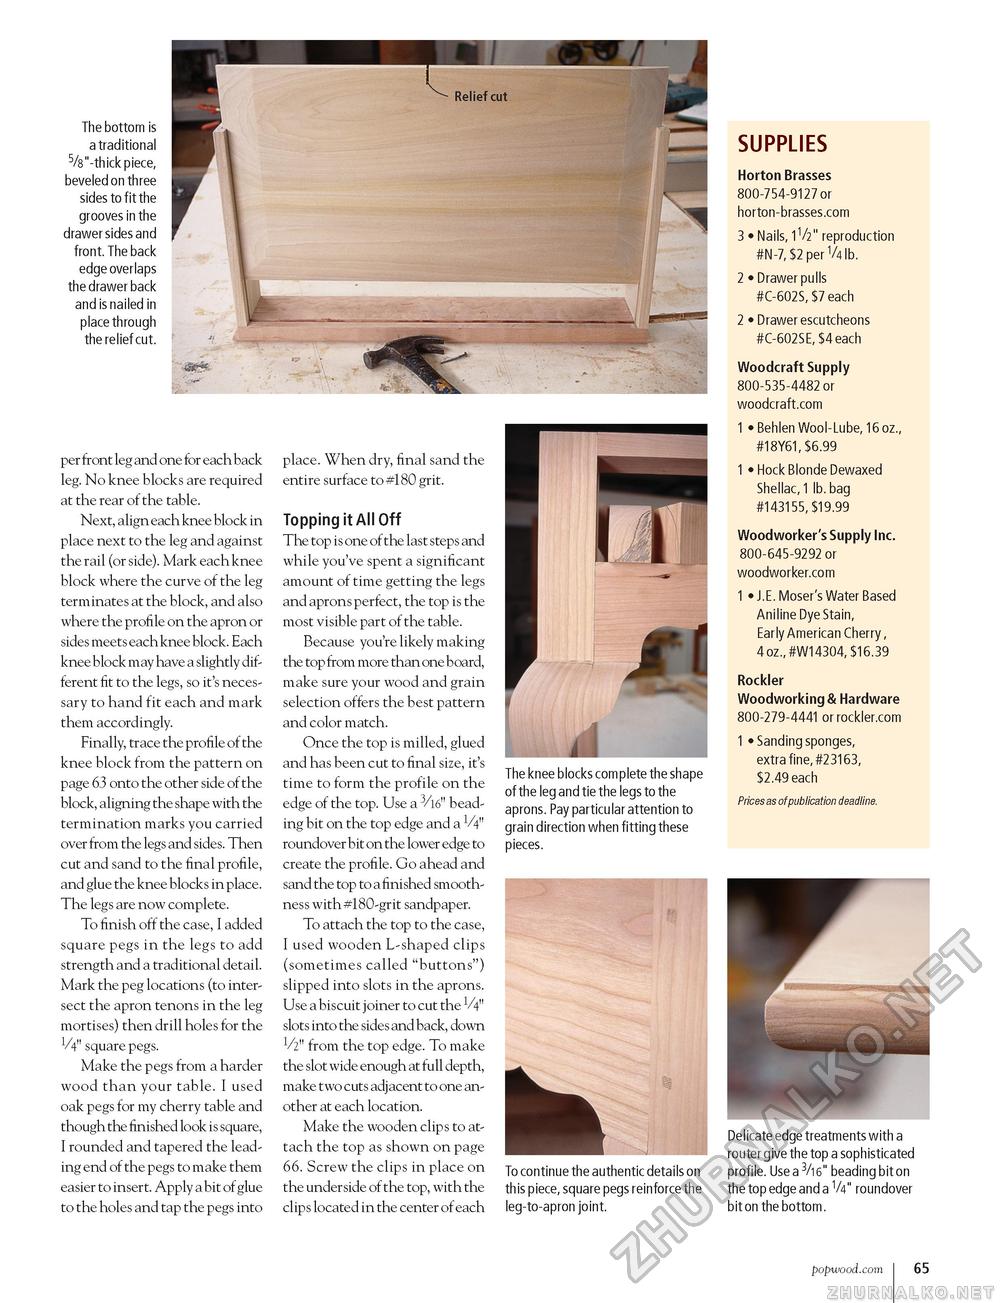
The bottom is a traditional 5/8"-thick piece, beveled on three sides to fit the grooves in the drawer sides and front. The back edge overlaps the drawer back and is nailed in place through the relief cut. SUPPLIES Horton Brasses 800-754-9127 or horton-brasses.com 3 • Nails, 1V2" reproduction #N-7, $2 per V4 lb. 2 • Drawer pulls #C-602S, $7 each 2 • Drawer escutcheons #C-602SE, $4 each Woodcraft Supply 800-535-4482 or woodcraft.com 1 • Behlen Wool-Lube, 16 oz., #18Y61, $6.99 1 • Hock Blonde Dewaxed Shellac, 1 lb. bag #143155, $19.99 Woodworker's Supply Inc. 800-645-9292 or woodworker.com 1 • J.E. Moser's Water Based Aniline Dye Stain, Early American Cherry , 4 oz., #W14304, $16.39 Rockler Woodworking & Hardware 800-279-4441 or rockler.com 1 »Sanding sponges, extra fine, #23163, $2.49 each Prices as of publication deadline. per front leg and one for each back leg. No knee blocks are required at the rear of the table. Next, align each knee block in place next to the leg and against the rail (or side). Mark each knee block where the curve of the leg terminates at the block, and also where the profile on the apron or sides meets each knee block. Each knee block may have a slightly different fit to the legs, so it's necessary to hand fit each and mark them accordingly. Finally, trace the profile of the knee block from the pattern on page 63 onto the other side of the block, aligning the shape with the termination marks you carried over from the legs and sides. Then cut and sand to the final profile, and glue the knee blocks in place. The legs are now complete. To finish off the case, I added square pegs in the legs to add strength and a traditional detail. Mark the peg locations (to intersect the apron tenons in the leg mortises) then drill holes for the 1/4" square pegs. Make the pegs from a harder wood than your table. I used oak pegs for my cherry table and though the finished look is square, I rounded and tapered the leading end of the pegs to make them easier to insert. Apply a bit of glue to the holes and tap the pegs into place. When dry, final sand the entire surface to #180 grit. Topping it All Off The top is one of the last steps and while you've spent a significant amount of time getting the legs and aprons perfect, the top is the most visible part of the table. Because you're likely making the top from more than one board, make sure your wood and grain selection offers the best pattern and color match. Once the top is milled, glued and has been cut to final size, it's time to form the profile on the edge of the top. Use a 3/l6" beading bit on the top edge and a V4" roundover bit on the lower edge to create the profile. Go ahead and sand the top to a finished smoothness with #180-grit sandpaper. To attach the top to the case, I used wooden L-shaped clips (sometimes called "buttons") slipped into slots in the aprons. Use a biscuit joiner to cut the V4" slots into the sides and back, down V2" from the top edge. To make the slot wide enough at full depth, make two cuts adj acent to one another at each location. Make the wooden clips to attach the top as shown on page 66. Screw the clips in place on the underside of the top, with the clips located in the center of each The knee blocks complete the shape of the leg and tie the legs to the aprons. Pay particular attention to grain direction when fitting these pieces. To continue the authentic details on this piece, square pegs reinforce the leg-to-apron joint. Delicate edge treatments with a router give the top a sophisticated profile. Use a 3/16" beading bit on the top edge and a V4" roundover bit on the bottom. popwood.com 65 |


