Popular Woodworking 2004-11 № 144, страница 67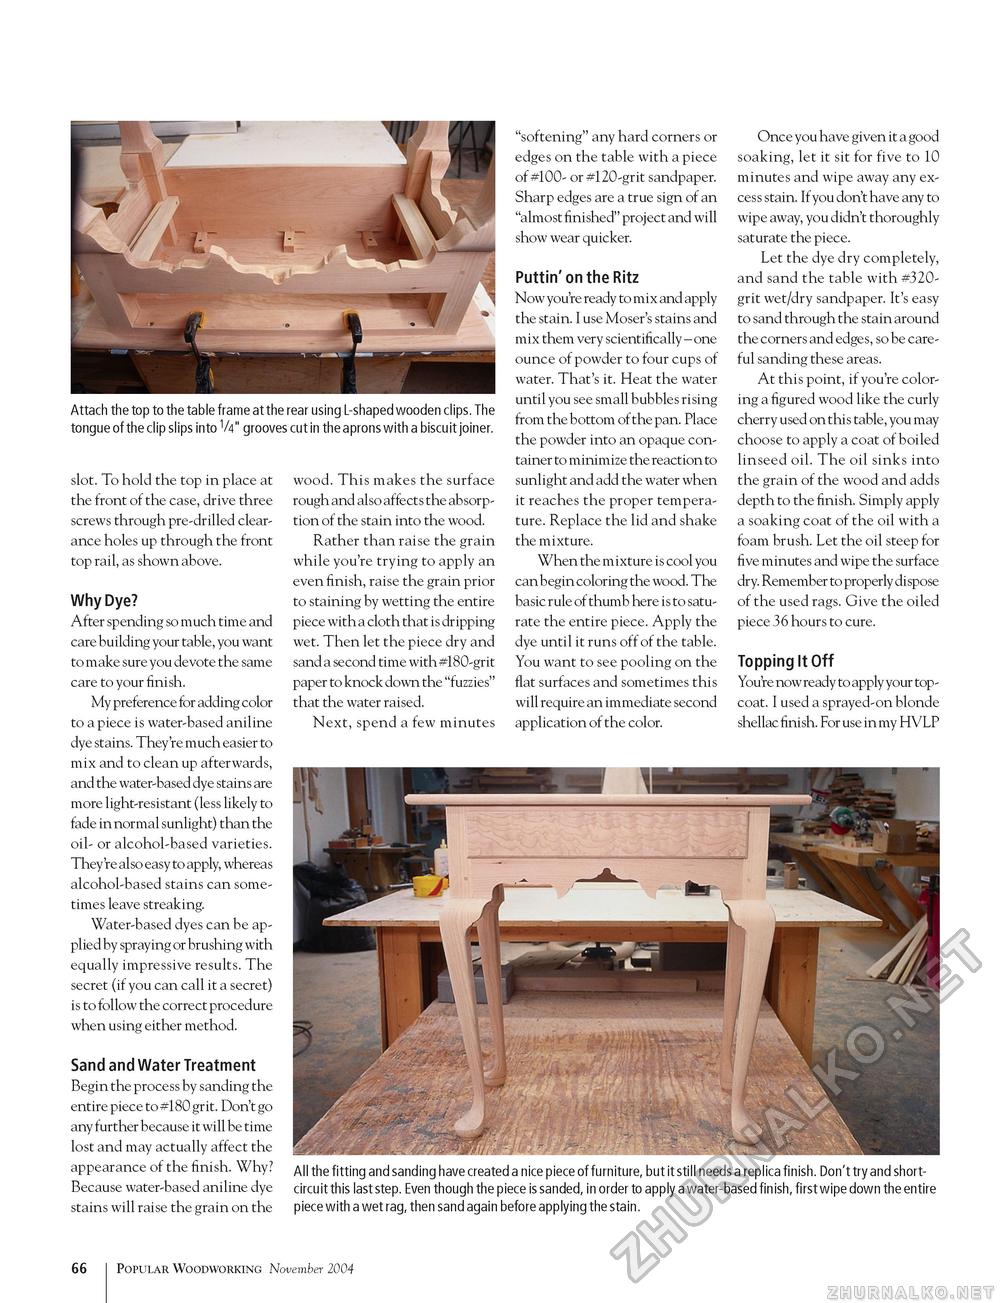
Attach the top to the table frame at the rear using L-shaped wooden clips. The tongue of the clip slips into V4" grooves cut in the aprons with a biscuit joiner. slot. To hold the top in place at the front of the case, drive three screws through pre-drilled clearance holes up through the front top rail, as shown above. Why Dye? After spending so much time and care building your table, you want to make sure you devote the same care to your finish. My preference for adding color to a piece is water-based aniline dye stains. They're much easier to mix and to clean up afterwards, and the water-based dye stains are more light-resistant (less likely to fade in normal sunlight) than the oil- or alcohol-based varieties. They're also easy to apply, whereas alcohol-based stains can sometimes leave streaking. Water-based dyes can be applied by spraying or brushing with equally impressive results. The secret (if you can call it a secret) is to follow the correct procedure when using either method. Sand and Water Treatment Begin the process by sanding the entire piece to #180 grit. Don't go any further because it will be time lost and may actually affect the appearance of the finish. Why? Because water-based aniline dye stains will raise the grain on the wood. This makes the surface rough and also affects the absorption of the stain into the wood. Rather than raise the grain while you're trying to apply an even finish, raise the grain prior to staining by wetting the entire piece with a cloth that is dripping wet. Then let the piece dry and sand a second time with #180-grit paper to knock down the "fuzzies" that the water raised. Next, spend a few minutes "softening" any hard corners or edges on the table with a piece of #100- or #120-grit sandpaper. Sharp edges are a true sign of an "almost finished" project and will show wear quicker. Puttin' on the Ritz Now you're ready to mix and apply the stain. I use Moser's stains and mix them very scientifically - one ounce of powder to four cups of water. That's it. Heat the water until you see small bubbles rising from the bottom of the pan. Place the powder into an opaque container to minimize the reaction to sunlight and add the water when it reaches the proper temperature. Replace the lid and shake the mixture. When the mixture is cool you can begin coloring the wood. The basic rule of thumb here is to saturate the entire piece. Apply the dye until it runs off of the table. You want to see pooling on the flat surfaces and sometimes this will require an immediate second application of the color. Once you have given it a good soaking, let it sit for five to 10 minutes and wipe away any excess stain. If you don't have any to wipe away, you didn't thoroughly saturate the piece. Let the dye dry completely, and sand the table with #320-grit wet/dry sandpaper. It's easy to sand through the stain around the corners and edges, so be careful sanding these areas. At this point, if you're coloring a figured wood like the curly cherry used on this table, you may choose to apply a coat of boiled linseed oil. The oil sinks into the grain of the wood and adds depth to the finish. Simply apply a soaking coat of the oil with a foam brush. Let the oil steep for five minutes and wipe the surface dry. Remember to properly dispose of the used rags. Give the oiled piece 36 hours to cure. Topping It Off You're now ready to apply your topcoat. I used a sprayed-on blonde shellac finish. For use in my HVLP All the fitting and sanding have created a nice piece of furniture, but it still needs a replica finish. Don't try and short-circuit this last step. Even though the piece is sanded, in order to apply a water-based finish, first wipe down the entire piece with a wet rag, then sand again before applying the stain. 66 Popular Woodworking November 2004 |


