Popular Woodworking 2006-02 № 153, страница 56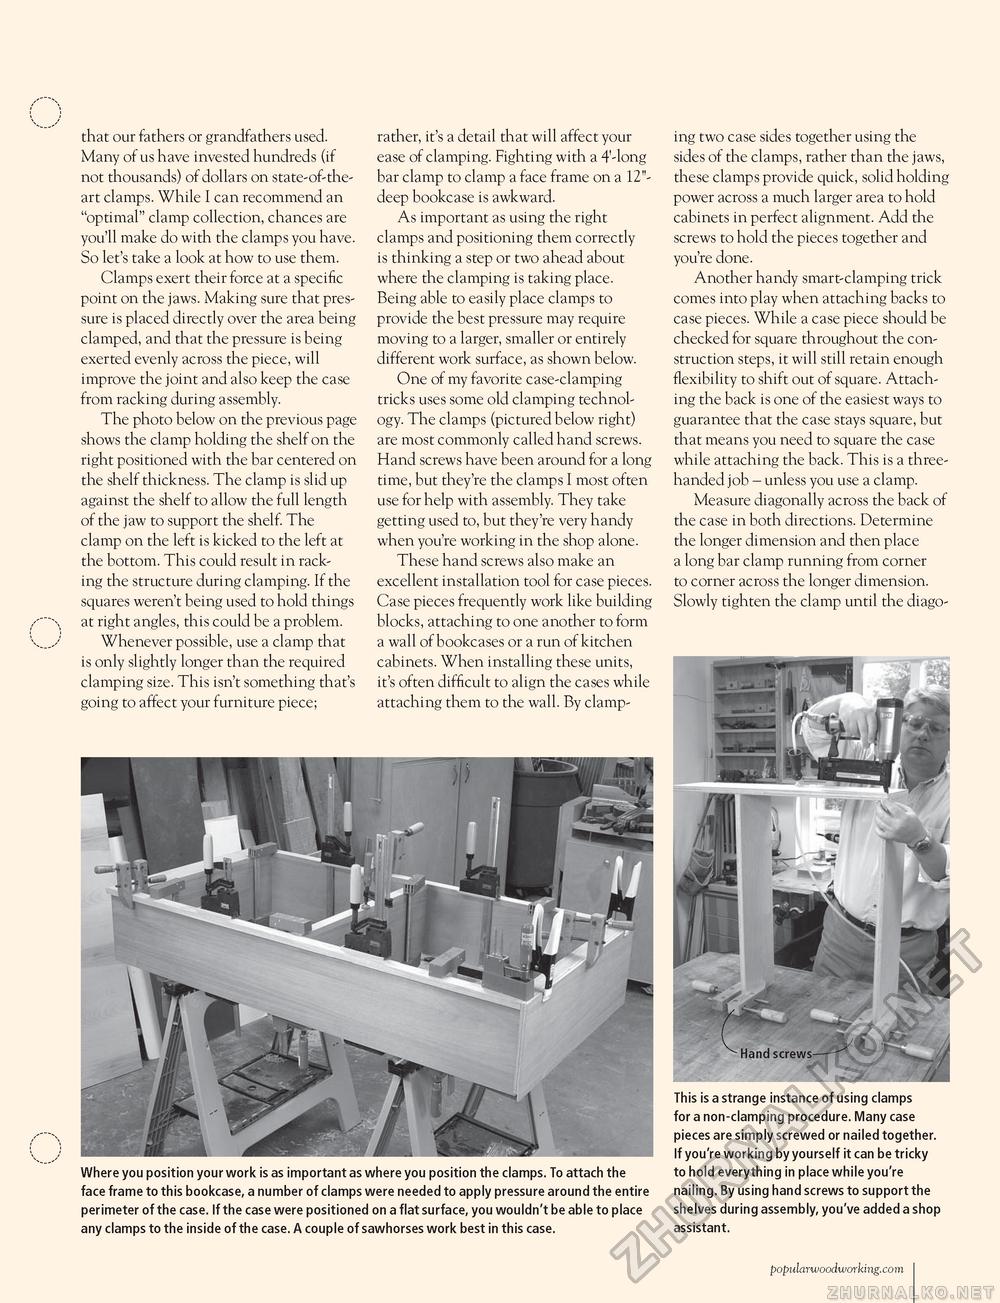
that our fathers or grandfathers used. Many of us have invested hundreds (if not thousands) of dollars on state-of-the-art clamps. While I can recommend an "optimal" clamp collection, chances are you'll make do with the clamps you have. So let's take a look at how to use them. Clamps exert their force at a specific point on the jaws. Making sure that pressure is placed directly over the area being clamped, and that the pressure is being exerted evenly across the piece, will improve the joint and also keep the case from racking during assembly. The photo below on the previous page shows the clamp holding the shelf on the right positioned with the bar centered on the shelf thickness. The clamp is slid up against the shelf to allow the full length of the jaw to support the shelf. The clamp on the left is kicked to the left at the bottom. This could result in racking the structure during clamping. If the squares weren't being used to hold things at right angles, this could be a problem. Whenever possible, use a clamp that is only slightly longer than the required clamping size. This isn't something that's going to affect your furniture piece; rather, it's a detail that will affect your ease of clamping. Fighting with a 4'-long bar clamp to clamp a face frame on a 12"-deep bookcase is awkward. As important as using the right clamps and positioning them correctly is thinking a step or two ahead about where the clamping is taking place. Being able to easily place clamps to provide the best pressure may require moving to a larger, smaller or entirely different work surface, as shown below. One of my favorite case-clamping tricks uses some old clamping technology. The clamps (pictured below right) are most commonly called hand screws. Hand screws have been around for a long time, but they're the clamps I most often use for help with assembly. They take getting used to, but they're very handy when you're working in the shop alone. These hand screws also make an excellent installation tool for case pieces. Case pieces frequently work like building blocks, attaching to one another to form a wall of bookcases or a run of kitchen cabinets. When installing these units, it's often difficult to align the cases while attaching them to the wall. By clamp ing two case sides together using the sides of the clamps, rather than the jaws, these clamps provide quick, solid holding power across a much larger area to hold cabinets in perfect alignment. Add the screws to hold the pieces together and you're done. Another handy smart-clamping trick comes into play when attaching backs to case pieces. While a case piece should be checked for square throughout the construction steps, it will still retain enough flexibility to shift out of square. Attaching the back is one of the easiest ways to guarantee that the case stays square, but that means you need to square the case while attaching the back. This is a three-handed job - unless you use a clamp. Measure diagonally across the back of the case in both directions. Determine the longer dimension and then place a long bar clamp running from corner to corner across the longer dimension. Slowly tighten the clamp until the diago- Where you position your work is as important as where you position the clamps. To attach the face frame to this bookcase, a number of clamps were needed to apply pressure around the entire perimeter of the case. If the case were positioned on a flat surface, you wouldn't be able to place any clamps to the inside of the case. A couple of sawhorses work best in this case. This is a strange instance of using clamps for a non-clamping procedure. Many case pieces are simply screwed or nailed together. If you're working by yourself it can be tricky to hold everything in place while you're nailing. By using hand screws to support the shelves during assembly, you've added a shop assistant. popularwoodworking.com I 103 |


