Popular Woodworking 2007-08 № 163, страница 14
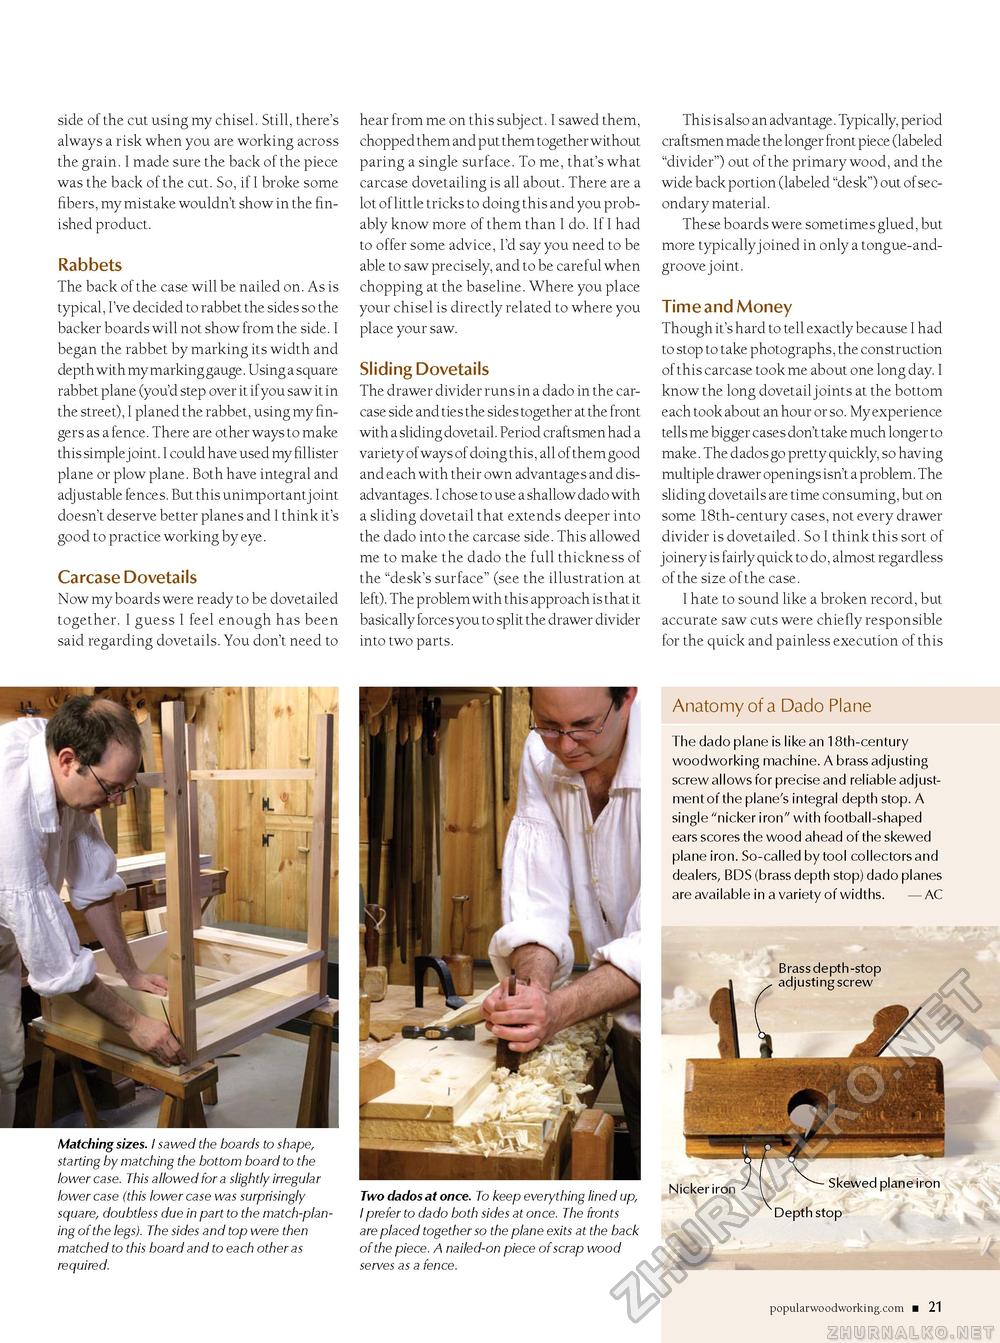
side of the cut using my chisel. Still, there's always a risk when you are working across the grain. I made sure the back of the piece was the back of the cut. So, if I broke some fibers, my mistake wouldn't show in the finished product. Rabbets The back of the case will be nailed on. As is typical, I've decided to rabbet the sides so the backer boards will not show from the side. I began the rabbet by marking its width and depth with my marking gauge. Using a square rabbet plane (you'd step over it if you saw it in the street), I planed the rabbet, using my fingers as a fence. There are other ways to make this simplejoint. I could have used my fillister plane or plow plane. Both have integral and adjustable fences. But this unimportant joint doesn't deserve better planes and I think it's good to practice working by eye. Carcase Dovetails Now my boards were ready to be dovetailed together. I guess I feel enough has been said regarding dovetails. You don't need to hear from me on this subject. I sawed them, chopped them and put them together without paring a single surface. To me, that's what carcase dovetailing is all about. There are a lot of little tricks to doing this and you probably know more of them than I do. If I had to offer some advice, I'd say you need to be able to saw precisely, and to be careful when chopping at the baseline. Where you place your chisel is directly related to where you place your saw. Sliding Dovetails The drawer divider runs in a dado in the carcase side and ties the sides together at the front with a sliding dovetail. Period craftsmen had a variety of ways of doing this, all of them good and each with their own advantages and disadvantages. I chose to use a shallow dado with a sliding dovetail that extends deeper into the dado into the carcase side. This allowed me to make the dado the full thickness of the "desk's surface" (see the illustration at left). The problem with this approach is that it basically forces you to split the drawer divider into two parts. This is also an advantage. Typically, period craftsmen made the longer front piece (labeled "divider") out of the primary wood, and the wide back portion (labeled "desk") out of secondary material. These boards were sometimes glued, but more typically joined in only a tongue-and-groove joint. Time and Money Though it's hard to tell exactly because I had to stop to take photographs, the construction of this carcase took me about one long day. I know the long dovetail joints at the bottom each took about an hour or so. My experience tells me bigger cases don't take much longer to make. The dados go pretty quickly, so having multiple drawer openings isn't a problem. The sliding dovetails are time consuming, but on some 18th-century cases, not every drawer divider is dovetailed. So I think this sort of j oinery is fairly quick to do, almost regardless of the size of the case. I hate to sound like a broken record, but accurate saw cuts were chiefly responsible for the quick and painless execution of this Matching sizes. I sawed the boards to shape, starting by matching the bottom board to the lower case. This allowed for a slightly irregular lower case (this lower case was surprisingly square, doubtless due in part to the match-planing of the legs). The sides and top were then matched to this board and to each other as required. Two dados at once. To keep everything lined up, I prefer to dado both sides at once. The fronts are placed together so the plane exits at the back of the piece. A nailed-on piece of scrap wood serves as a fence. anatomy of a dado plane The dado plane is like an 18th-century woodworking machine. a brass adjusting screw allows for precise and reliable adjustment of the plane's integral depth stop. A single "nicker iron" with football-shaped ears scores the wood ahead of the skewed plane iron. So-called by tool collectors and dealers, BDS (brass depth stop) dado planes are available in a variety of widths. — AC Brass depth-stop adjusting screw Nicker iron - Skewed plane iron Depth stop popularwoodworking.com ■ 21 |


