Popular Woodworking 2007-12 № 166, страница 44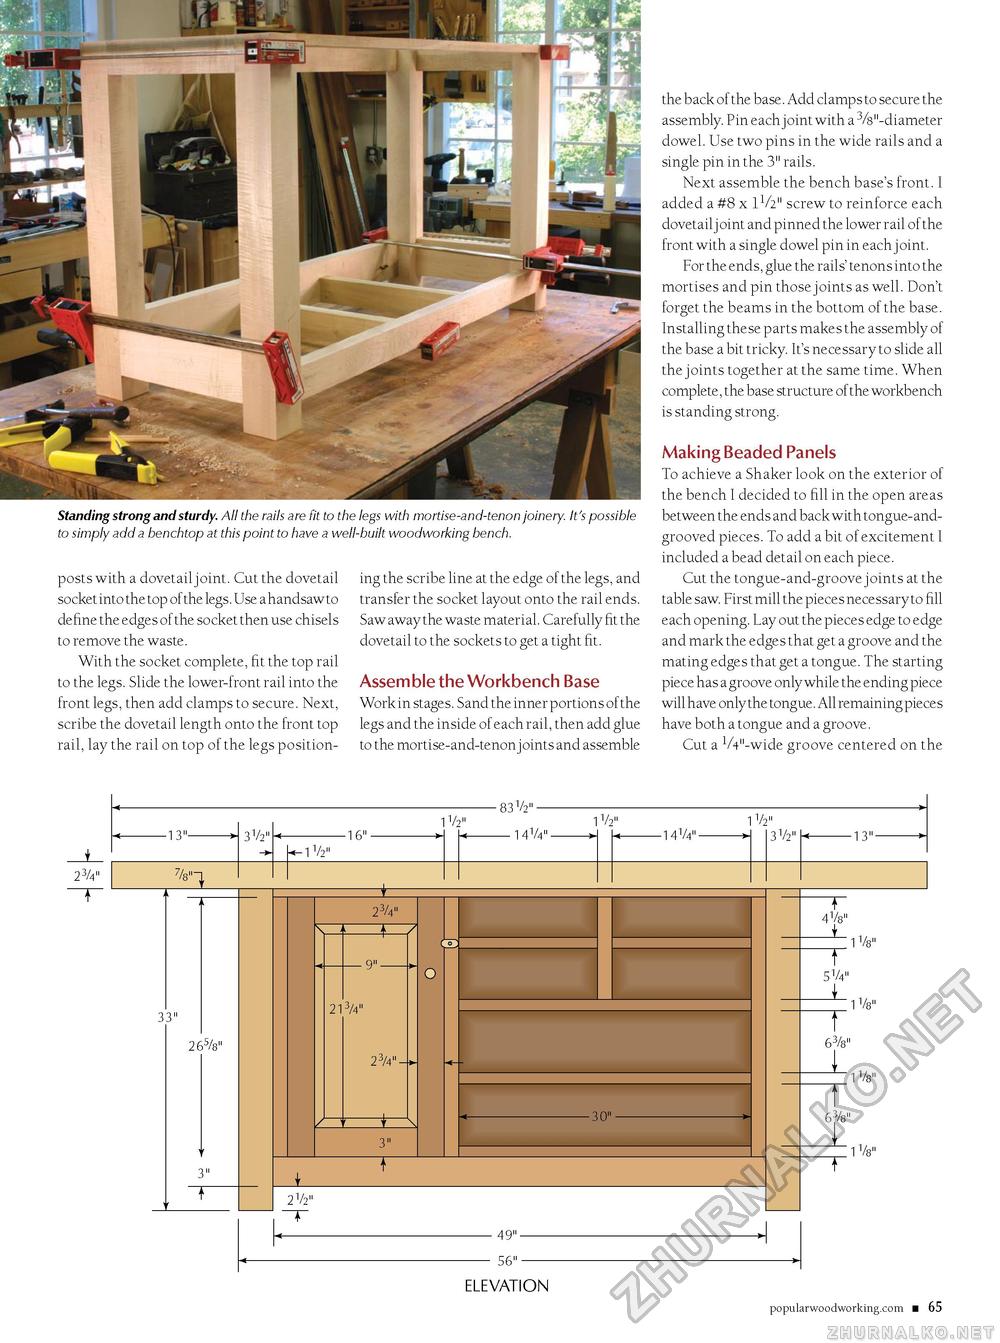
Standing strong and sturdy. All the rails are fit to the legs with mortise-and-tenon joinery. It's possible to simply add a benchtop at this point to have a well-built woodworking bench. posts with a dovetail joint. Cut the dovetail socket into the top of the legs. Use a handsaw to define the edges of the socket then use chisels to remove the waste. With the socket complete, fit the top rail to the legs. Slide the lower-front rail into the front legs, then add clamps to secure. Next, scribe the dovetail length onto the front top rail, lay the rail on top of the legs position- ing the scribe line at the edge of the legs, and transfer the socket layout onto the rail ends. Saw away the waste material. Carefully fit the dovetail to the sockets to get a tight fit. Assemble the Workbench Base Work in stages. Sand the inner portions of the legs and the inside of each rail, then add glue to the mortise-and-tenon joints and assemble the back of the base. Add clamps to secure the assembly. Pin each joint with a 3/8"-diameter dowel. Use two pins in the wide rails and a single pin in the 3" rails. Next assemble the bench base's front. I added a #8 x IV2" screw to reinforce each dovetail j oint and pinned the lower rail of the front with a single dowel pin in each joint. For the ends, glue the rails' tenons into the mortises and pin those joints as well. Don't forget the beams in the bottom of the base. Installing these parts makes the assembly of the base a bit tricky. It's necessary to slide all the j oints together at the same time. When complete, the base structure of the workbench is standing strong. Making Beaded Panels To achieve a Shaker look on the exterior of the bench I decided to fill in the open areas between the ends and back with tongue-and-grooved pieces. To add a bit of excitement I included a bead detail on each piece. Cut the tongue-and-groove joints at the table saw. First mill the pieces necessary to fill each opening. Lay out the pieces edge to edge and mark the edges that get a groove and the mating edges that get a tongue. The starting piece has a groove only while the ending piece will have only the tongue. All remaining pieces have both a tongue and a groove. Cut a V4"-wide groove centered on the 83V2" 14V4" 1V2" 1 V2" -14V4"-H 3V2" k-13" elevation popularwoodworking.com ■ 65 |


