Popular Woodworking 2007-12 № 166, страница 45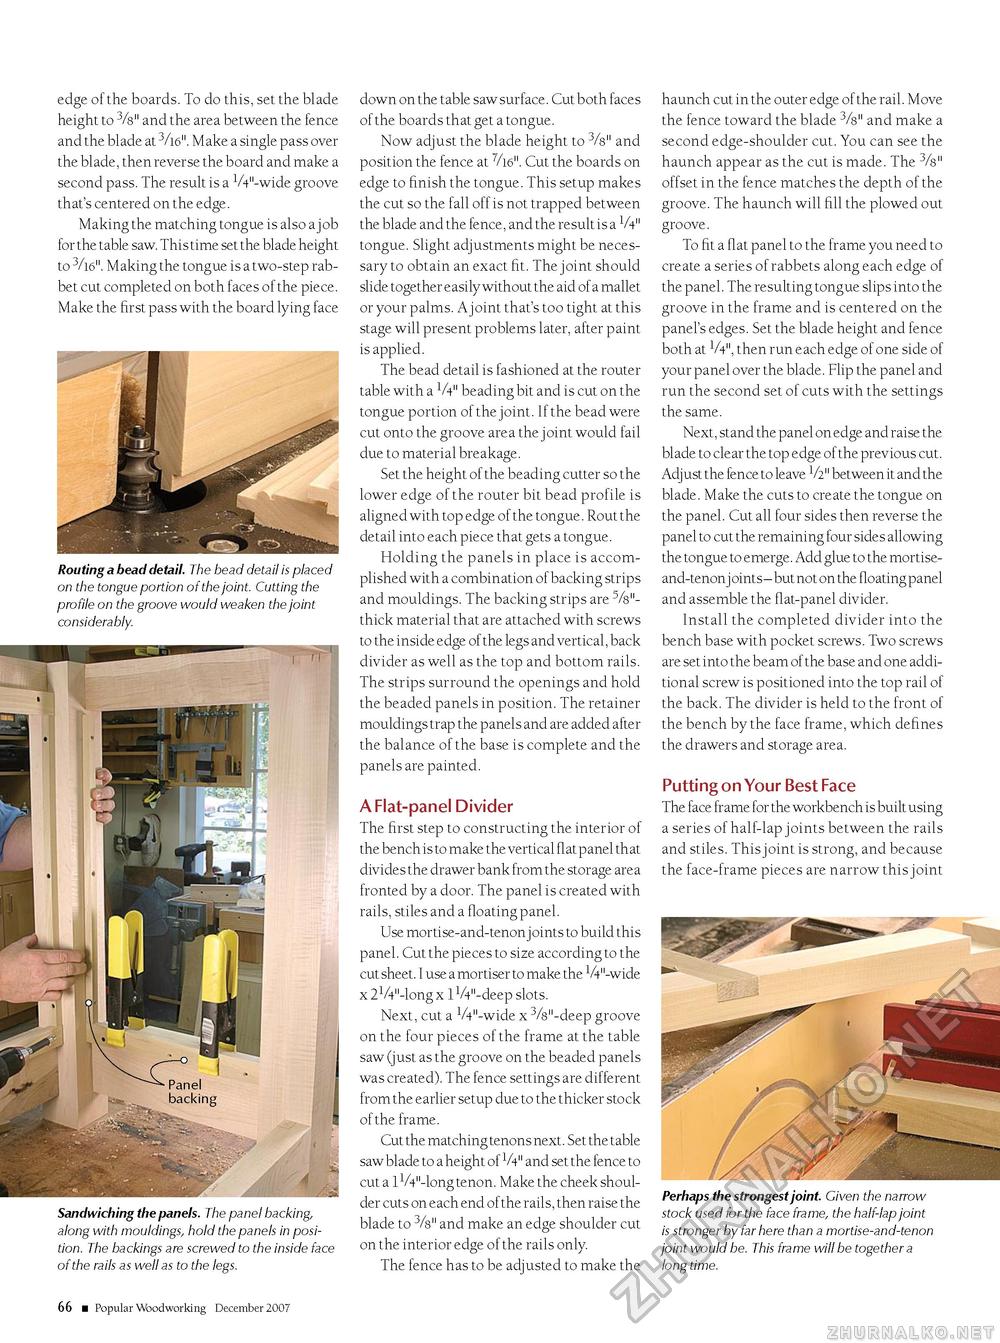
edge of the boards. To do this, set the blade height to 3/8" and the area between the fence and the blade at 3/16". Make a single pass over the blade, then reverse the board and make a second pass. The result is a V4"-wide groove that's centered on the edge. Making the matching tongue is also a j ob for the table saw. This time set the blade height to 3/16". Making the tongue is a two-step rabbet cut completed on both faces of the piece. Make the first pass with the board lying face Routing a bead detail. The bead detail is placed on the tongue portion of the joint. Cutting the profile on the groove would weaken the joint considerably. Sandwiching the panels. The panel backing, along with mouldings, hold the panels in position. The backings are screwed to the inside face of the rails as well as to the legs. down on the table saw surface. Cut both faces of the boards that get a tongue. Now adjust the blade height to 3/s" and position the fence at 7/16". Cut the boards on edge to finish the tongue. This setup makes the cut so the fall off is not trapped between the blade and the fence, and the result is a V4" tongue. Slight adjustments might be necessary to obtain an exact fit. The joint should slide together easily without the aid of a mallet or your palms. A joint that's too tight at this stage will present problems later, after paint is applied. The bead detail is fashioned at the router table with a V4" beading bit and is cut on the tongue portion of the joint. If the bead were cut onto the groove area the joint would fail due to material breakage. Set the height of the beading cutter so the lower edge of the router bit bead profile is aligned with top edge of the tongue. Rout the detail into each piece that gets a tongue. Holding the panels in place is accomplished with a combination of backing strips and mouldings. The backing strips are thick material that are attached with screws to the inside edge of the legs and vertical, back divider as well as the top and bottom rails. The strips surround the openings and hold the beaded panels in position. The retainer mouldings trap the panels and are added after the balance of the base is complete and the panels are painted. A Flat-panel Divider The first step to constructing the interior of the bench is to make the vertical flat panel that divides the drawer bank from the storage area fronted by a door. The panel is created with rails, stiles and a floating panel. Use mortise-and-tenon joints to build this panel. Cut the pieces to size according to the cut sheet. I use a mortiser to make the 1/4"-wide x 21/4"-long x 1 W'-deep slots. Next, cut a V4"-wide x 3/8"-deep groove on the four pieces of the frame at the table saw (just as the groove on the beaded panels was created). The fence settings are different from the earlier setup due to the thicker stock of the frame. Cut the matching tenons next. Set the table saw blade to a height of V4" and set the fence to cut a 1V4"-long tenon. Make the cheek shoulder cuts on each end of the rails, then raise the blade to 3/8" and make an edge shoulder cut on the interior edge of the rails only. The fence has to be adjusted to make the haunch cut in the outer edge of the rail. Move the fence toward the blade 3/8" and make a second edge-shoulder cut. You can see the haunch appear as the cut is made. The 3/8" offset in the fence matches the depth of the groove. The haunch will fill the plowed out groove. To fit a flat panel to the frame you need to create a series of rabbets along each edge of the panel. The resulting tongue slips into the groove in the frame and is centered on the panel's edges. Set the blade height and fence both at V4", then run each edge of one side of your panel over the blade. Flip the panel and run the second set of cuts with the settings the same. Next, stand the panel on edge and raise the blade to clear the top edge of the previous cut. Adjust the fence to leave V2" between it and the blade. Make the cuts to create the tongue on the panel. Cut all four sides then reverse the panel to cut the remaining four sides allowing the tongue to emerge. Add glue to the mortise-and-tenon j oints - but not on the floating panel and assemble the flat-panel divider. Install the completed divider into the bench base with pocket screws. Two screws are set into the beam of the base and one additional screw is positioned into the top rail of the back. The divider is held to the front of the bench by the face frame, which defines the drawers and storage area. Putting on Your Best Face The face frame for the workbench is built using a series of half-lap joints between the rails and stiles. This joint is strong, and because the face-frame pieces are narrow this joint Perhaps the strongest joint. Given the narrow stock used for the face frame, the half-lap joint is stronger by far here than a mortise-and-tenon joint would be. This frame will be together a long time. 66 ■ Popular Woodworking December 2007 |


