Popular Woodworking 2007-12 № 166, страница 46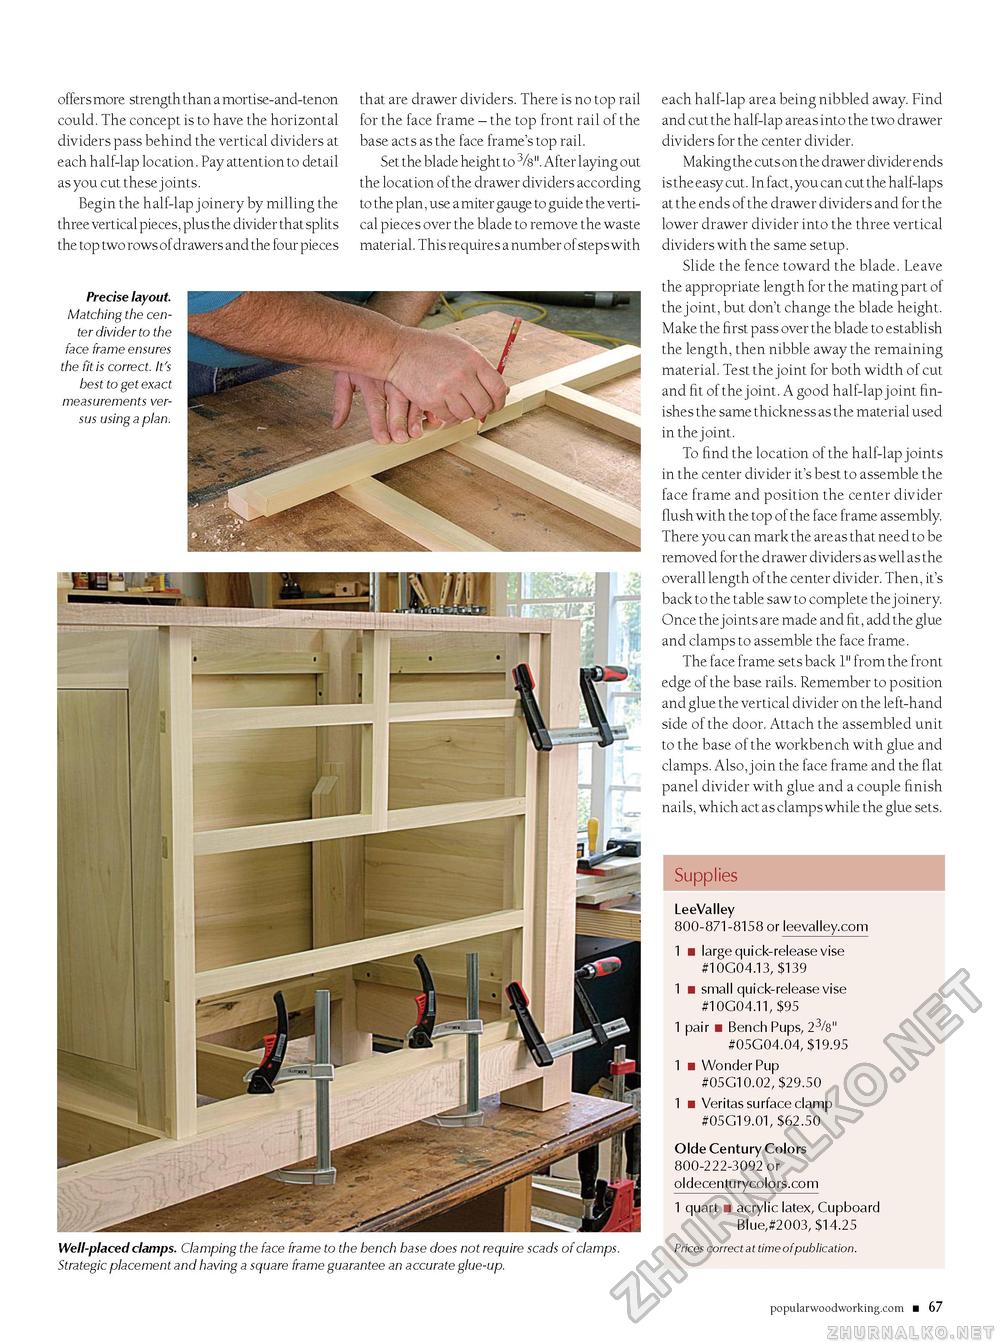
offers more strength than a mortise-and-tenon could. The concept is to have the horizontal dividers pass behind the vertical dividers at each half-lap location. Pay attention to detail as you cut these j oints. Begin the half-lap joinery by milling the three vertical pieces, plus the divider that splits the top two rows of drawers and the four pieces that are drawer dividers. There is no top rail for the face frame - the top front rail of the base acts as the face frame's top rail. Set the blade height to 3/8". After laying out the location of the drawer dividers according to the plan, use a miter gauge to guide the vertical pieces over the blade to remove the waste material. This requires a number of steps with each half-lap area being nibbled away. Find and cut the half-lap areas into the two drawer dividers for the center divider. Making the cuts on the drawer divider ends is the easy cut. In fact, you can cut the half-laps at the ends of the drawer dividers and for the lower drawer divider into the three vertical dividers with the same setup. Slide the fence toward the blade. Leave the appropriate length for the mating part of the joint, but don't change the blade height. Make the first pass over the blade to establish the length, then nibble away the remaining material. Test the joint for both width of cut and fit of the joint. A good half-lap joint finishes the same thickness as the material used in the joint. To find the location of the half-lap joints in the center divider it's best to assemble the face frame and position the center divider flush with the top of the face frame assembly. There you can mark the areas that need to be removed for the drawer dividers as well as the overall length of the center divider. Then, it's back to the table saw to complete the j oinery. Once the joints are made and fit, add the glue and clamps to assemble the face frame. The face frame sets back 1" from the front edge of the base rails. Remember to position and glue the vertical divider on the left-hand side of the door. Attach the assembled unit to the base of the workbench with glue and clamps. Also, join the face frame and the flat panel divider with glue and a couple finish nails, which act as clamps while the glue sets. Precise layout. Matching the center divider to the face frame ensures the fit is correct. It's best to get exact measurements versus using a plan. Supplies Well-placed clamps. Clamping the face frame to the bench base does not require scads of clamps. Strategic placement and having a square frame guarantee an accurate glue-up. LeeValley 800-871-8158 or leevalley.com 1 ■ large quick-release vise #10G04.13, $139 1 ■ small quick-release vise #10G04.11, $95 1 pair ■ Bench Pups, 23/8" #05G04.04, $19.95 1 ■ Wonder Pup #05G10.02, $29.50 1 ■ Veritas surface clamp #05G19.01, $62.50 Olde Century Colors 800-222-3092 or oldecentu rycolors.com 1 quart ■ acrylic latex, Cupboard Blue,#2003, $14.25 Prices correct at time of publication. popularwoodworking.com ■ 67 |


