40 - Vacuum Clamping System, страница 14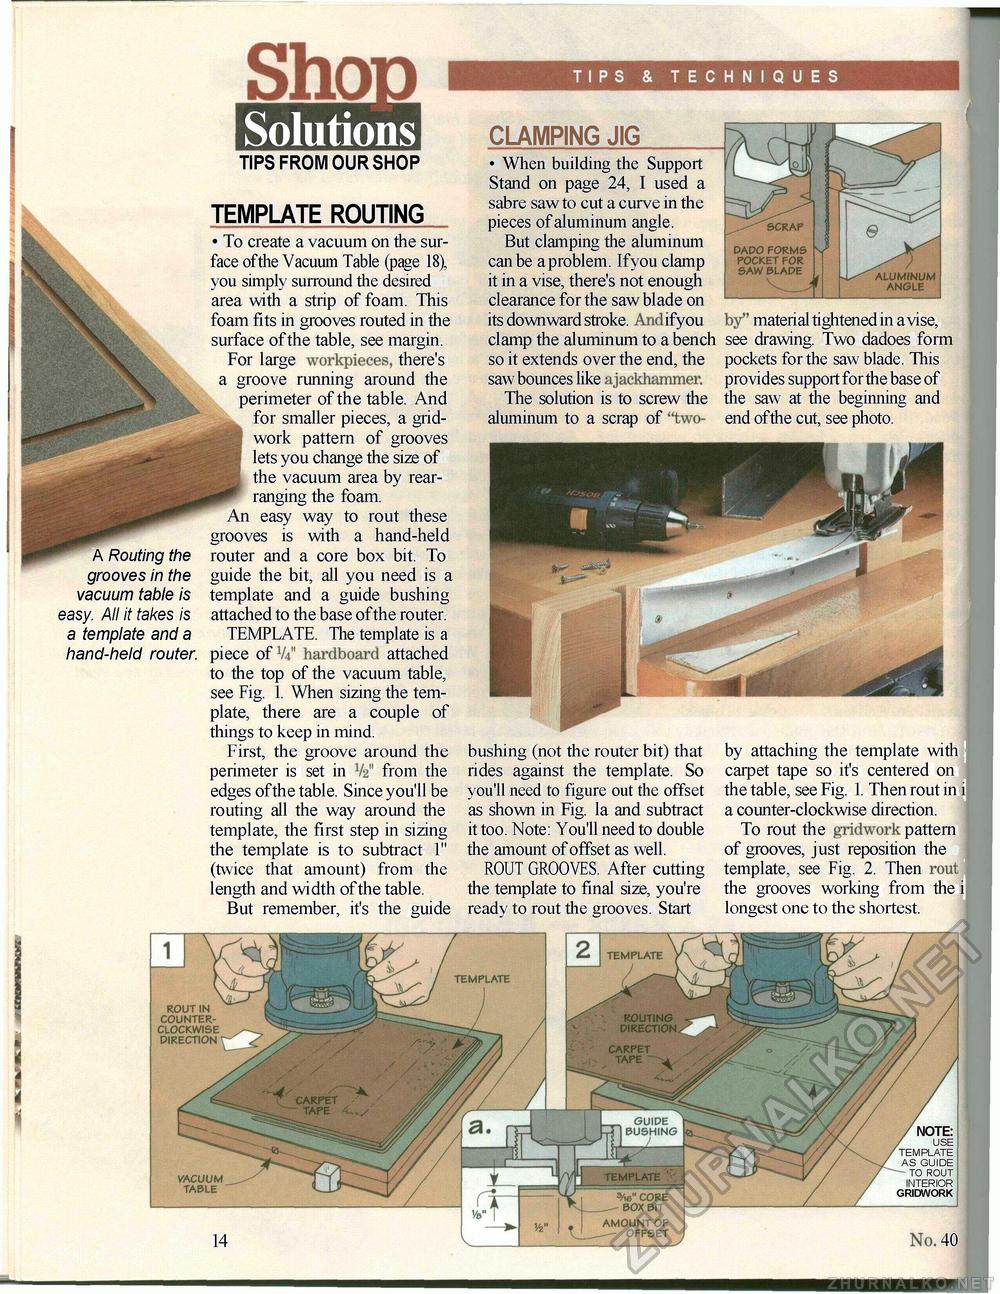
A Routing the grooves in the vacuum table is easy. All it takes is a template and a hand-held router. ShopSolutions TIPS FROM OUR SHOP TEMPLATE ROUTING • To create a vacuum on the surface ofthe Vacuum Table (page 18), you simply surround the desired area with a strip of foam. This foam fits in grooves routed in the surface ofthe table, see margin. For large workpieces, there's a groove running around the jj^ perimeter of the table. And for smaller pieces, a grid-work pattern of grooves lets you change the size of the vacuum area by rearranging the foam. An easy way to rout these grooves is with a hand-held router and a core box bit. To guide the bit, all you need is a template and a guide bushing attached to the base ofthe router. TEMPLATE. The template is a piece of V4" hardboard attached to the top of the vacuum table, see Fig. 1. When sizing the template, there are a couple of things to keep in mind. First, the groove around the perimeter is set in V2" from the edges ofthe table. Since you'll be routing all the way around the template, the first step in sizing the template is to subtract 1" (twice that amount) from the length and width ofthe table. But remember, it's the guide TIPS & TECHNIQUES CLAMPING JIG • When building the Support Stand on page 24, I used a sabre saw to cut a curve in the pieces of aluminum angle. But clamping the aluminum can be a problem. If you clamp it in a vise, there's not enough clearance for the saw blade on its downward stroke. Andifyou clamp the aluminum to a bench so it extends over the end, the saw bounces like ajackhammer. The solution is to screw the aluminum to a scrap of "two- material tightened in a vise, see drawing. Two dadoes form pockets for the saw blade. This provides support for the base of the saw at the beginning and end ofthe cut, see photo. bushing (not the router bit) that rides against the template. So you'll need to figure out the offset as shown in Fig. la and subtract it too. Note: You'll need to double the amount of offset as well. ROUT GROOVES. After cutting the template to final size, you're ready to rout the grooves. Start by attaching the template with carpet tape so it's centered on the table, see Fig. 1. Then rout in i a counter-clockwise direction. To rout the gridwork pattern of grooves, just reposition the template, see Fig. 2. Then rout the grooves working from the i longest one to the shortest. 40 |


