40 - Vacuum Clamping System, страница 15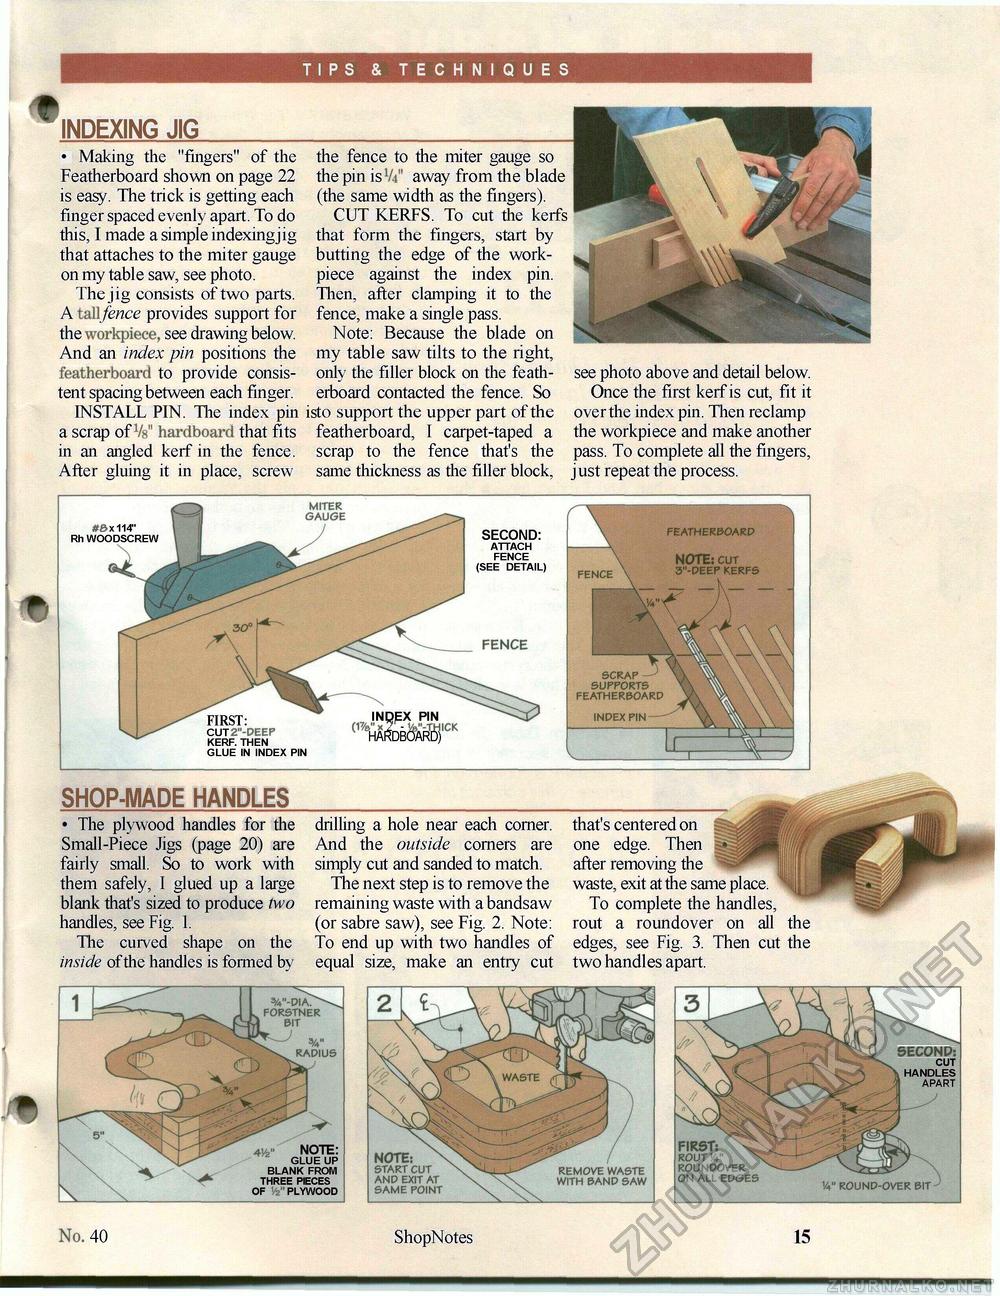
TIPS & TECHNIQUES INDEXING JIG • Making the "fingers" of the Featherboard shown on page 22 is easy. The trick is getting each finger spaced evenly apart. To do this, I made a simple indexing jig that attaches to the miter gauge on my table saw, see photo. The jig consists of two parts. A tallfence provides support for the workpiece, see drawing below. And an index pin positions the featherboard to provide consistent spacing between each finger. INSTALL PIN. The index pin a scrap of Vs" hardboard that fits in an angled kerf in the fence. After gluing it in place, screw the fence to the miter gauge so the pin is1// away from the blade (the same width as the fingers). CUT KERFS. To cut the kerfs that form the fingers, start by butting the edge of the work- piece against the index pin. Then, after clamping it to the fence, make a single pass. Note: Because the blade on my table saw tilts to the right, only the filler block on the feath- erboard contacted the fence. So isto support the upper part of the featherboard, I carpet-taped a scrap to the fence that's the same thickness as the filler block,
see photo above and detail below. Once the first kerf is cut, fit it over the index pin. Then reclamp the workpiece and make another pass. To complete all the fingers, just repeat the process. #e> x 114" Rh WOODSCREW second: ATTACH FENCE (SEE DETAIL) FIRST: CUT2"-DEEP KERF. THEN GLUE IN INDEX PIN SHOP-MADE HANDLES • The plywood handles for the Small-Piece Jigs (page 20) are fairly small. So to work with them safely, I glued up a large blank that's sized to produce two handles, see Fig. 1. The curved shape on the inside of the handles is formed by drilling a hole near each corner. And the outside corners are simply cut and sanded to match. The next step is to remove the remaining waste with a bandsaw (or sabre saw), see Fig. 2. Note: To end up with two handles of equal size, make an entry cut that's centered on one edge. Then after removing the waste, exit at the same place. To complete the handles, rout a roundover on all the edges, see Fig. 3. Then cut the two handles apart. FIRST: ROUT >4 ROUNPOVER ON ALL EDGES %" ROUND-OVER BIT 40 ShopNotes 15 |


