40 - Vacuum Clamping System, страница 16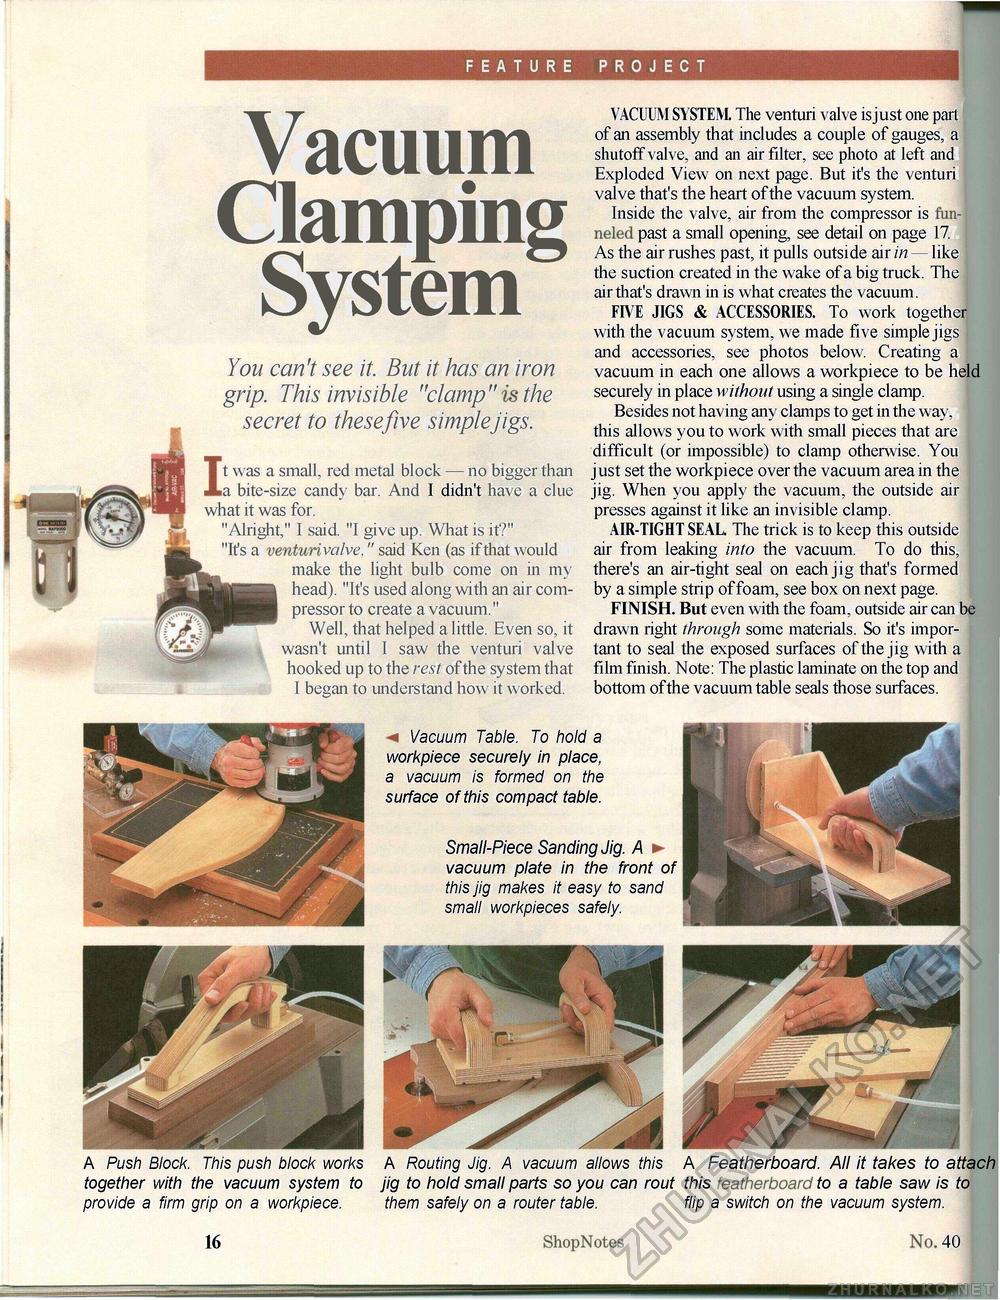
FEATURE PROJECT Vacuum Clamping SystemYou can't see it. But it has an iron grip. This invisible "clamp"is the secret to these five simple jigs. It was a small, red metal block — no bigger than a bite-size candy bar. And I didn't have a clue what it was for. "Alright," I said. "I give up. What is it?" "It's a venturivcilve," said Ken (as if that would make the light bulb come on in my head). "It's used along with an air compressor to create a vacuum." Well, that helped a little. Even so, it wasn't until I saw the venturi valve hooked up to the rest ofthe system that I began to understand how it worked. VACUUM SYSTEM. The venturi valve isjust one part of an assembly that includes a couple of gauges, a shutoff valve, and an air filter, see photo at left and Exploded View on next page. But it's the venturi valve that's the heart ofthe vacuum system. Inside the valve, air from the compressor is fun-neled past a small opening, see detail on page 17. As the air rushes past, it pulls outside air in — like the suction created in the wake of a big truck. The air that's drawn in is what creates the vacuum. FIVE JIGS & ACCESSORIES. To work together with the vacuum system, we made five simple jigs and accessories, see photos below. Creating a vacuum in each one allows a workpiece to be held securely in place without using a single clamp. Besides not having any clamps to get in the way, this allows you to work with small pieces that are difficult (or impossible) to clamp otherwise. You just set the workpiece over the vacuum area in the jig. When you apply the vacuum, the outside air presses against it like an invisible clamp. AIR-TIGHT SEAL. The trick is to keep this outside air from leaking into the vacuum. To do this, there's an air-tight seal on each jig that's formed by a simple strip of foam, see box on next page. FINISH. But even with the foam, outside air can be drawn right through some materials. So it's important to seal the exposed surfaces of the jig with a film finish. Note: The plastic laminate on the top and bottom ofthe vacuum table seals those surfaces. < Vacuum Table. To hold a workpiece securely in place, a vacuum is formed on the surface of this compact table. Small-Piece Sanding Jig. A ► vacuum plate in the front of this jig makes it easy to sand small workpieces safely. A Push Block. This push block works together with the vacuum system to provide a firm grip on a workpiece. 16 A Routing Jig. A vacuum allows this A Featherboard. All it takes to attach jig to hold small parts so you can rout this featherboard to a table saw is to them safely on a router table. flip a switch on the vacuum system. ShopNotes 40 5 |


