44 - Grinding Station, страница 20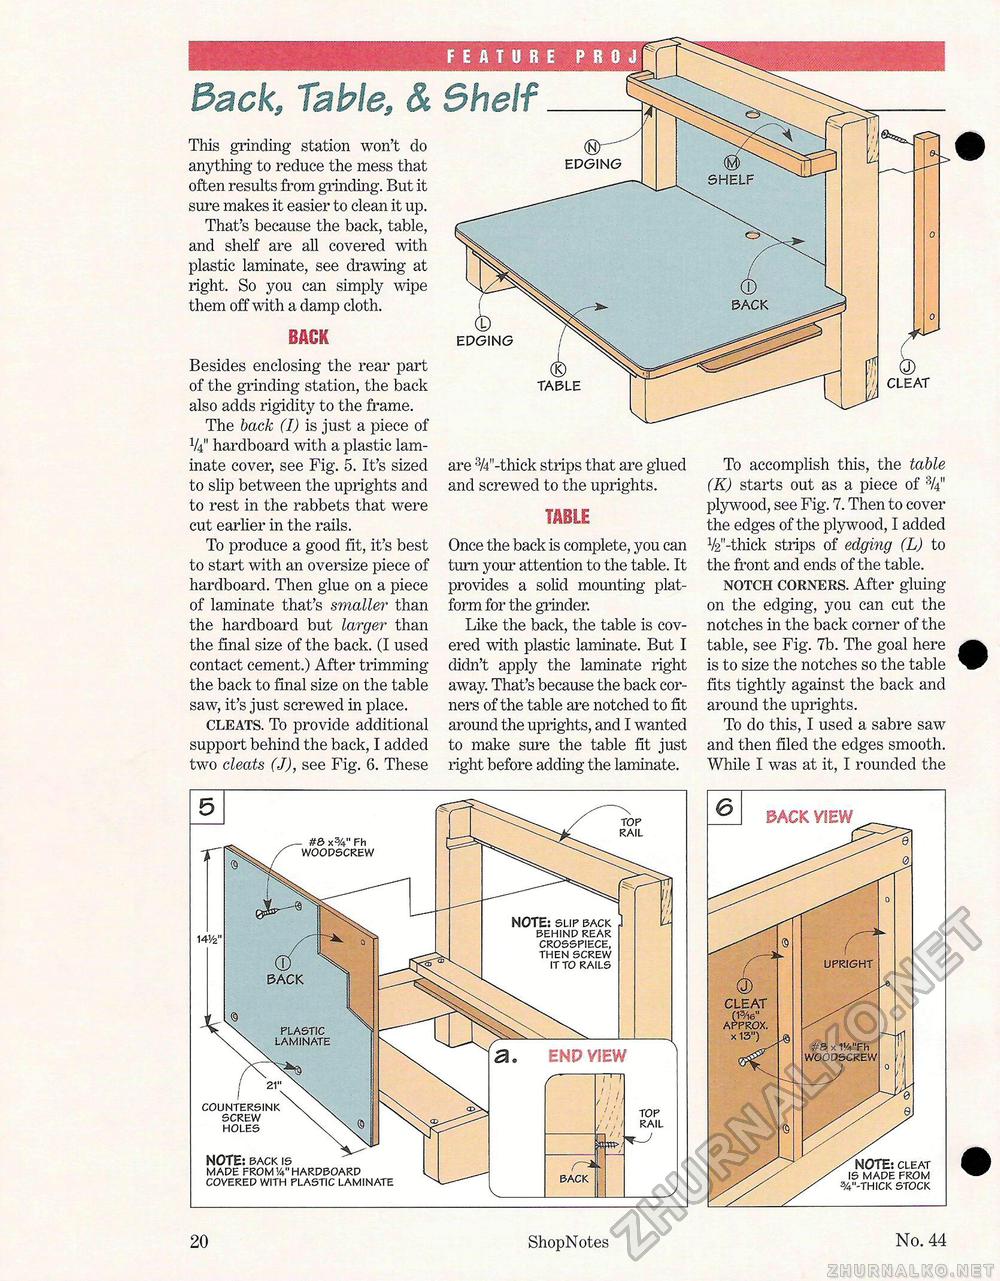
FEATURE PRQJ EDGING Back, 'Table, & Shelf This grinding station won't do anything to reduce the mess that often results from grinding. But it sure makes it easier to clean it up. That's because the back, table, and shelf are all covered with plastic laminate, see drawing at right. So you can simply wipe them off with a damp cloth. BACK Besides enclosing the rear part of the grinding station, the back also adds rigidity to the frame. The back (I) is just a piece of V4" hardboard with a plastic laminate cover, see Fig. 5. It's sized to slip between the uprights and to rest in the rabbets that were cut earlier in the rails. To produce a good fit, it's best to start with an oversize piece of hardboard. Then glue on a piece of laminate that's smaller than the hardboard but larger than the final size of the back. (I used contact cement.) After trimming the back to final size on the table saw, it's just screwed in place. cleats. To provide additional support behind the back, I added two cleats (J), see Fig. 6. These (S TABLE are 'W'-thick strips that are glued and screwed to the uprights. TABLE Once the back is complete, you can turn your attention to the table. It provides a solid mounting platform for the grinder. Like the back, the table is covered with plastic laminate. But I didn't apply the laminate right away. That's because the back corners of the table are notched to fit around the uprights, and I wanted to make sure the table fit just right before adding the laminate. To accomplish this, the table (K) starts out as a piece of %" plywood, see Fig. 7. Then to cover the edges of the plywood, I added V2"-thick strips of edging (L) to the front and ends of the table. notch corners. After gluing on the edging, you can cut the notches in the back corner of the table, see Fig. 7b. The goal here is to size the notches so the table fits tightly against the back and around the uprights. To do this, I used a sabre saw and then filed the edges smooth. While I was at it, I rounded the 20 ShopNotes No. 44 |


