44 - Grinding Station, страница 23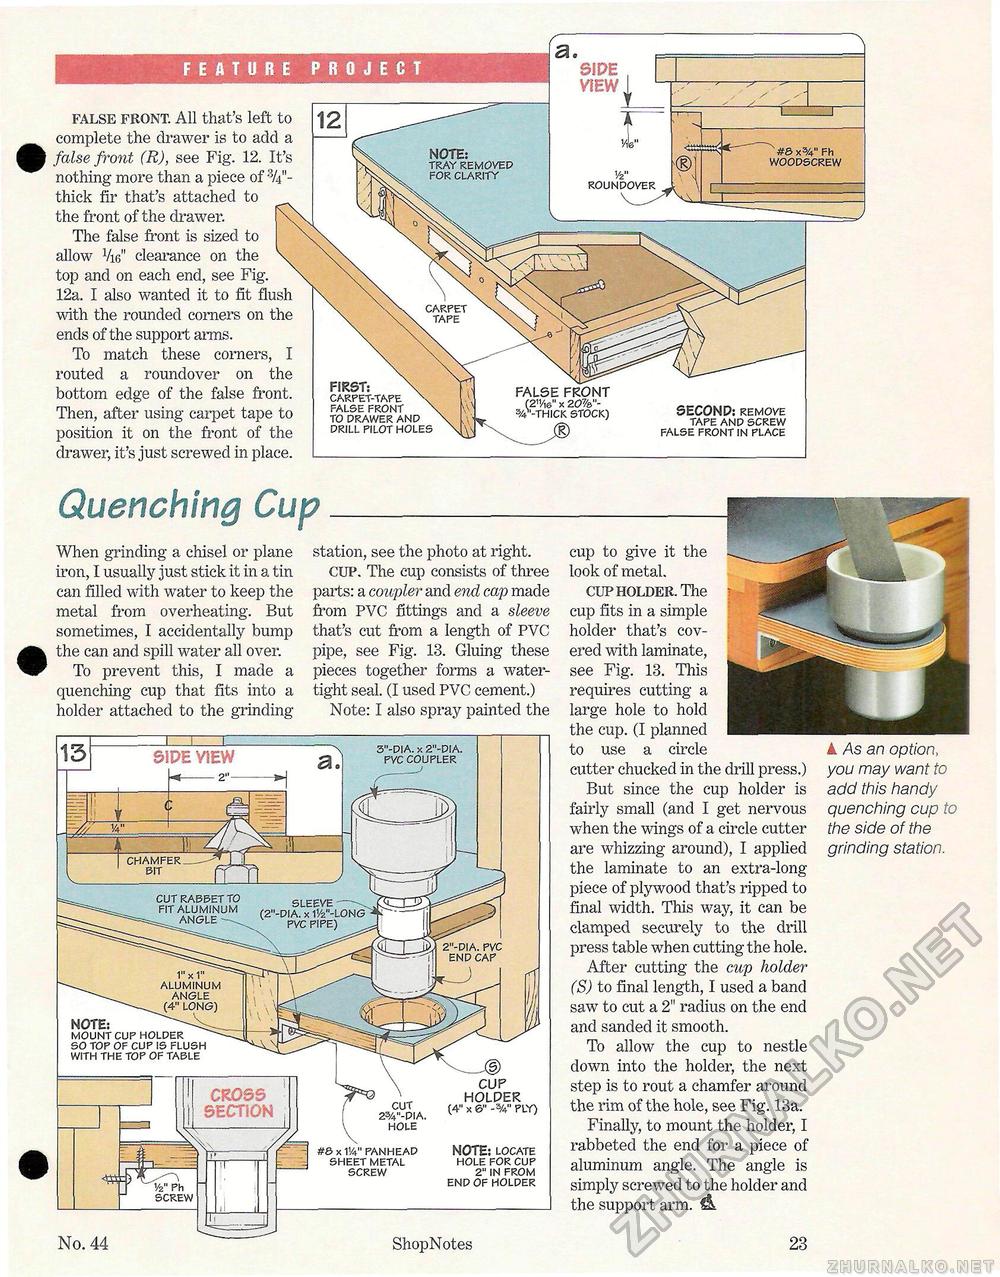
Quenching CupWhen grinding a chisel or plane iron, I usually just stick it in a tin can filled with water to keep the metal from overheating. But sometimes, I accidentally bump the can and spill water all over. To prevent this, I made a quenching cup that fits into a holder attached to the grinding station, see the photo at right. CUP. The cup consists of three parts: a coupler and end cap made from PVC fittings and a sleeve that's cut from a length of PVC pipe, see Fig. 13. Gluing these pieces together forms a watertight seal. (I used PVC cement.) Note: I also spray painted the carpet tape FALSE FRONT (2"/i6" x 20%"-% -thick stock) SECOND: remove tape anp screw false front in place feature project false front. All that's left to complete the drawer is to add a false front (R), see Fig. 12. It's nothing more than a piece of thick fir that's attached to the front of the drawer. The false front is sized to allow Vie" clearance on the top and on each end, see Fig. 12a. I also wanted it to fit flush with the rounded corners on the ends of the support arms. To match these corners, I routed a roundover on the bottom edge of the false front. Then, after using carpet tape to position it on the front of the drawer, it's just screwed in place. SIDE VIEW #& x%" Fh woodscrew NOTE: tray removed for clarity '2 roundover FIRST: carpet-tape false front to prawer anp prill pilot holes cut rabbet to fit aluminum _ angle sleeve ---\ (2"-pia. x 11/2"-long" pvc pipe) CROSS SECTION No. 44 ShopNotes 3"-pia. x 2"-pia. pvc coupler chamfer bit 2 -pia. pvc end cap 1" x 1" aluminum angle long) NOTE: mount cup holder ^ so top of cup is flush with the top of table cut 2%"-dia hole #6xW pan head sheet metal screw cup HOLPER (4" x & -%" PLY) NOTE: locate hole for cup 2" in from end of holder SIDE VIEW cup to give it the look of metal. cup holder. The cup fits in a simple holder that's covered with laminate, see Fig. 13. This requires cutting a large hole to hold the cup. (I planned to use a circle cutter chucked in the drill press.) But since the cup holder is fairly small (and I get nervous when the wings of a circle cutter are whizzing around), I applied the laminate to an extra-long piece of plywood that's ripped to final width. This way, it can be clamped securely to the drill press table when cutting the hole. After cutting the cup holder (S) to final length, I used a band saw to cut a 2" radius on the end and sanded it smooth. To allow the cup to nestle down into the holder, the next step is to rout a chamfer around the rim of the hole, see Fig. 13a. Finally, to mount the holder, I rabbeted the end for a piece of aluminum angle. The angle is simply screwed to the holder and the support arm. A k As an option, you may want to add this handy quenching cup to the side of the grinding station. 23 |


