47 - Build Your Own Mortising Machine , страница 14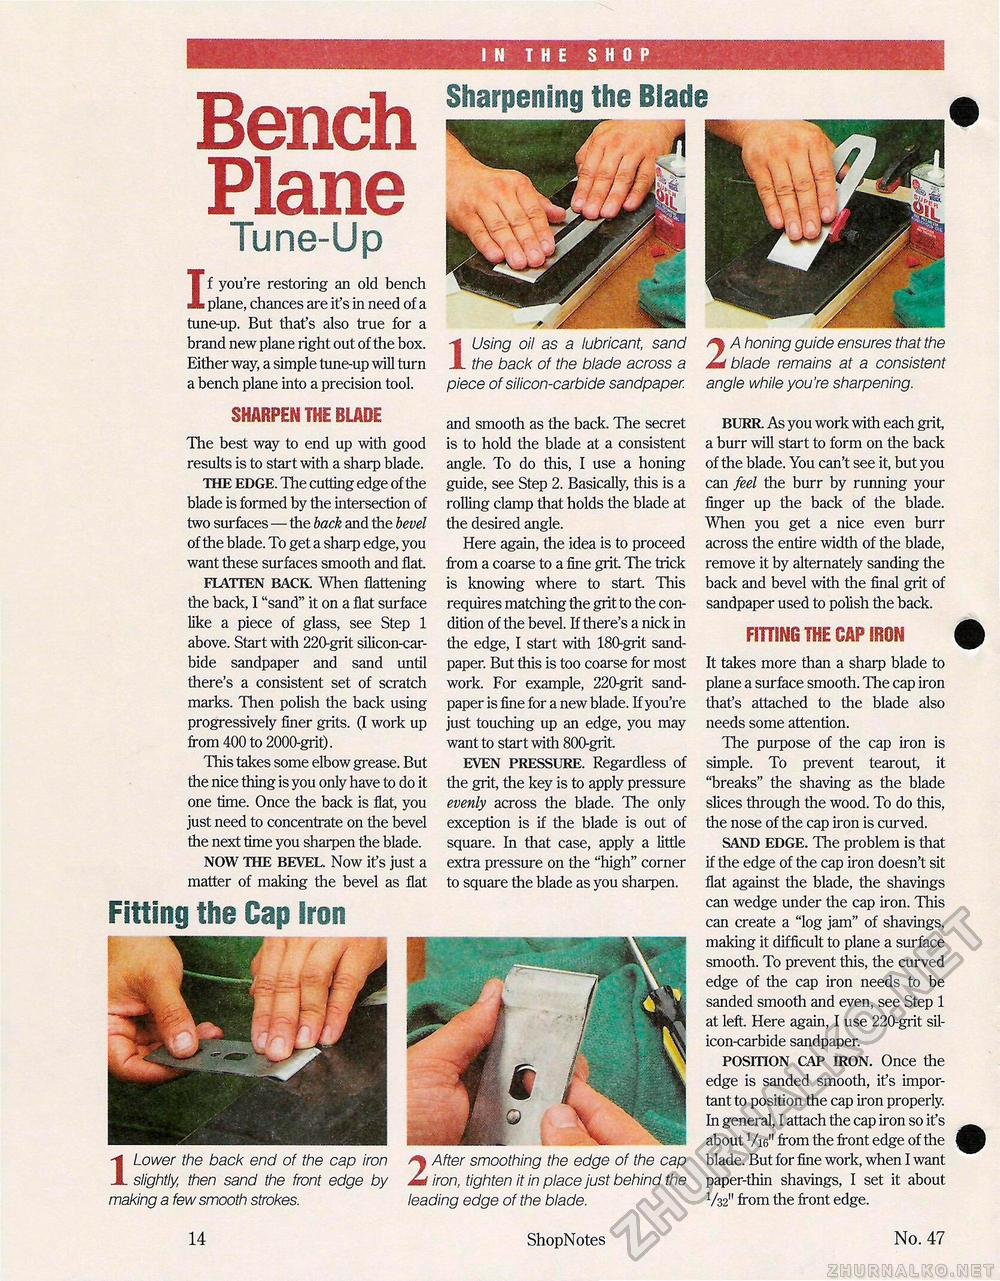
IN THE SHOP Bench PlaneTune-Up If you're restoring an old bench plane, chances are it's in need of a tune-up. But that's also true for a brand new plane right out of the box. Either way, a simple tune-up will turn a bench plane into a precision tool. SHARPEN THE BLADE The best way to end up with good results is to start with a sharp blade. THE EDGE. The cutting edge of the blade is formed by the intersection of two surfaces—the back and the bevel of the blade. To get a sharp edge, you want these surfaces smooth and flat FLATTEN BACK When flattening the back, I "sand" it on a flat surface like a piece of glass, see Step 1 above. Start with 220-grit silicon-car-bide sandpaper and sand until there's a consistent set of scratch marks. Then polish the back using progressively finer grits. (I work up from 400 to 2000-grit). This takes some elbow grease. But the nice thing is you only have to do it one time. Once the back is flat, you just need to concentrate on the bevel the next time you sharpen the blade. NOW THE BEVEL. Now it's just a matter of making the bevel as flat Fitting the Cap iron Sharpening the Blade Using oil as a lubricant, sand the back of the blade across a A honing guide ensures that the ' blade remains at a consistent piece of silicon-carbide sandpaper, angle while you 're sharpening. and smooth as the back. The secret is to hold the blade at a consistent angle. To do this, I use a honing guide, see Step 2. Basically, this is a rolling clamp that holds the blade at the desired angle. Here again, the idea is to proceed from a coarse to a fine grit. The trick is knowing where to start This requires matching the grit to the condition of the bevel. If there's a nick in the edge, I start with 180-grit sandpaper. But this is too coarse for most work. For example, 220-grit sandpaper is fine for a new blade. If you're just touching up an edge, you may want to start with 800-grit. EVEN PRESSURE. Regardless of the grit, the key is to apply pressure evenly across the blade. The only exception is if the blade is out of square. In that case, apply a little extra pressure on the "high" corner to square the blade as you sharpen. 1 Lower the back end of the cap iron slightly, then sand the front edge by making a few smooth strokes. 2 After smoothing the edge of the cap iron, tighten it in place just behind the leading edge of the blade. BURR. As you work with each grit a burr will start to form on the back of the blade. You can't see it, but you can feel the burr by running your finger up the back of the blade. When you get a nice even burr across the entire width of the blade, remove it by alternately sanding the back and bevel with the final grit of sandpaper used to polish the back. FITTING THE CAP IB8N It takes more than a sharp blade to plane a surface smooth. The cap iron that's attached to the blade also needs some attention. The purpose of the cap iron is simple. To prevent tearout, it "breaks" the shaving as the blade slices through the wood. To do this, the nose of the cap iron is curved. SAND EDGE. The problem is that if the edge of the cap iron doesn't sit flat against the blade, the shavings can wedge under the cap iron. This can create a "log jam" of shavings, making it difficult to plane a surface smooth. To prevent this, the curved edge of the cap iron needs to be sanded smooth and even, see Step 1 at left. Here again, I use 220-grit silicon-carbide sandpaper. POSITION CAP IRON. Once the edge is sanded smooth, it's important to position the cap iron properly. In general, I attach the cap iron so it's about Vis" from the front edge of the blade. But for fine work, when I want paper-thin shavings, I set it about V32" from the front edge. 14 ShopNotes No. 47 |


