47 - Build Your Own Mortising Machine , страница 16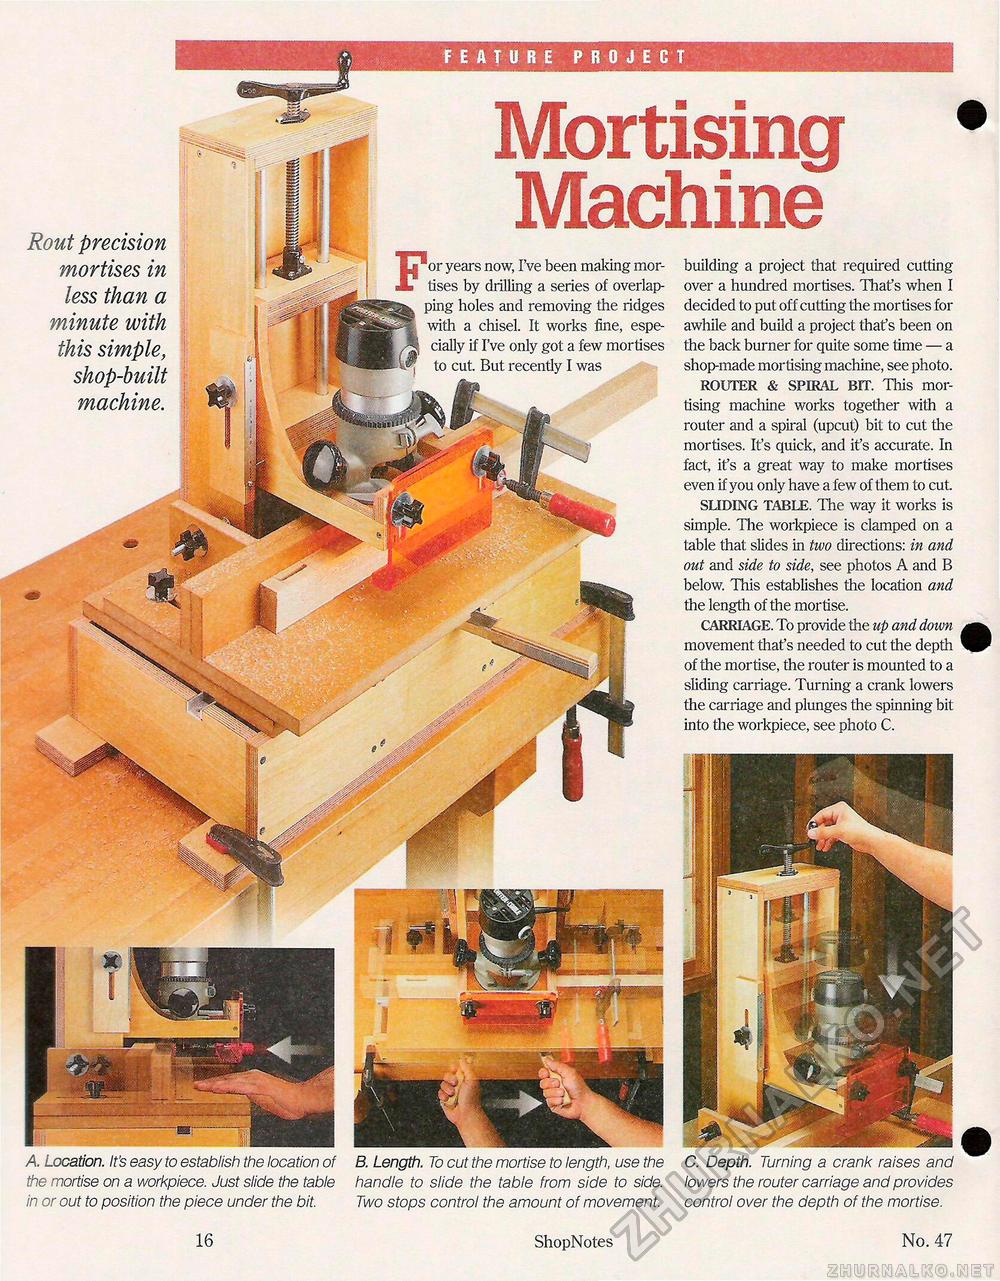
F EAT U R E PRO J E C T C. Depth. Turning a crank raises and lowers the router carriage and provides control over the depth of the mortise. Rout precision mortises in less than a minute with this simple, shop-built machine. Mortising • Machine For years now, I've been making mortises by drilling a series of overlapping holes and removing the ridges with a chisel. It works fine, especially if I've only got a few mortises to cut. But recently I was building a project that required cutting over a hundred mortises. That's when I decided to put off cutting the mortises for awhile and build a project that's been on the back burner for quite some time — a shop-made mortising machine, see photo. ROUTER & SPIRAL BIT. This mortising machine works together with a router and a spiral (upcut) bit to cut the mortises. It's quick, and it's accurate. In fact, it's a great way to make mortises even if you only have a few of them to cut SLIDING TABLE. The way it works is simple. The workpiece is clamped on a table that slides in two directions: in and out and side to side, see photos A and B below. This establishes the location and the length of the mortise. CARRIAGE. To provide the up and down movement that's needed to cut the depth of the mortise, the router is mounted to a sliding carriage. Turning a crank lowers the carriage and plunges the spinning bit into the workpiece, see photo C. A Location. It's easy to establish the location of the mortise on a workpiece. Just slide the table in or out to position the piece under the bit. B. Length. To cut the mortise to length, use the handle to slide the table from side to side. Two stops control the amount of movement. 16 ShopNotes No. 47 |


