47 - Build Your Own Mortising Machine , страница 15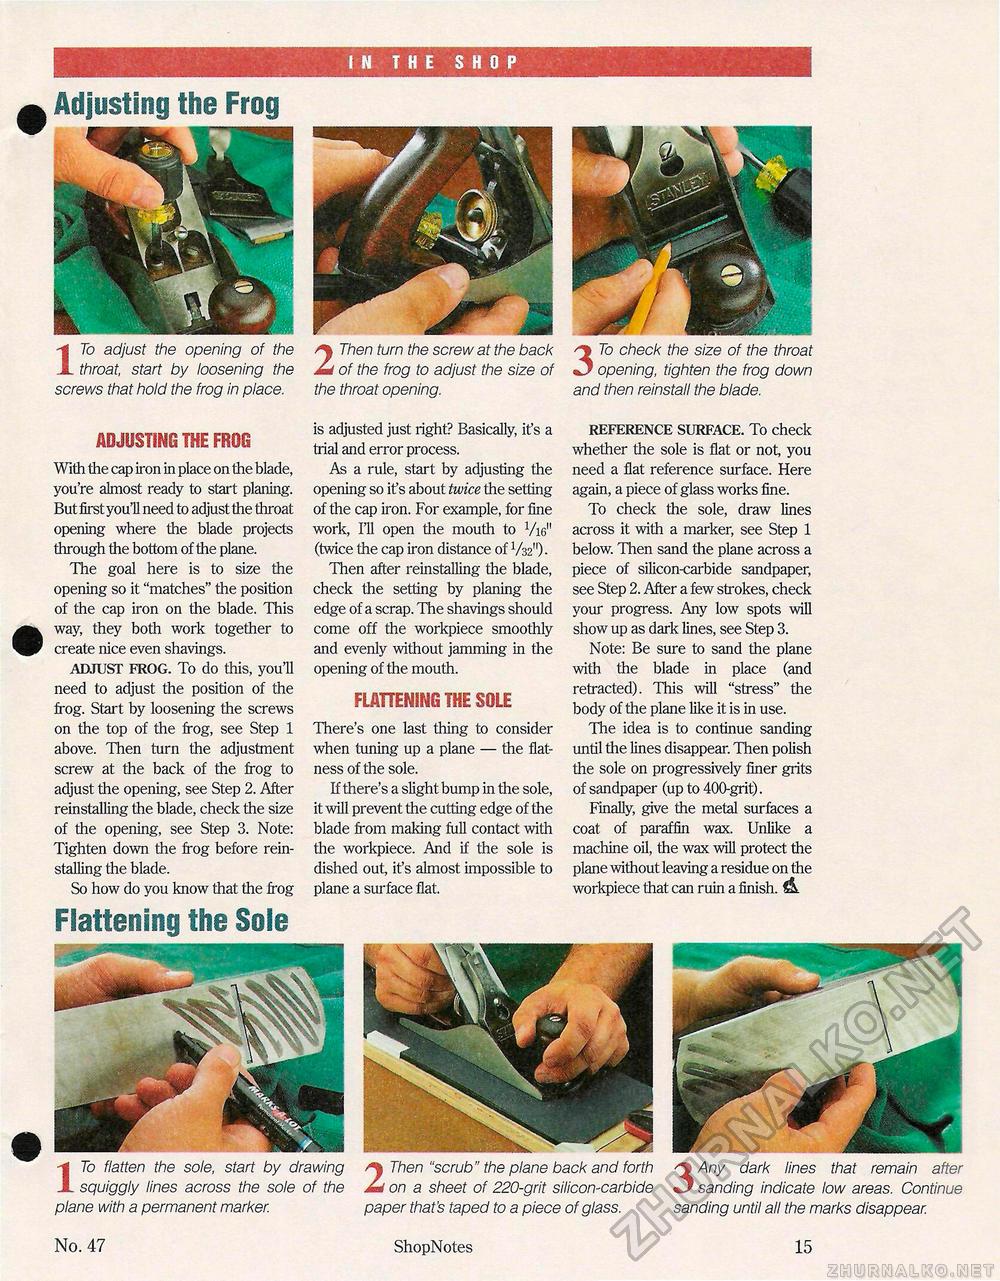
2Theri turn the screw at the back of the frog to adjust the size of the throat opening. 3 To check the size of the throat opening, tighten the frog down and then reinstall the blade. Adjusting the Frog 17o adjust the opening of the throat, start by loosening the screws that hold the frog in place. ADJUSTING THE FROG With the cap iron in place on the blade, you're almost ready to start planing. But first youH need to adjust the throat opening where the blade projects through the bottom of the plane. The goal here is to size the opening so it "matches" the position of the cap iron on the blade. This way, they both work together to create nice even shavings. ADJUST FROG. To do this, you'll need to adjust the position of the frog. Start by loosening the screws on the top of the frog, see Step 1 above. Then turn the adjustment screw at the back of the frog to adjust the opening, see Step 2. After reinstalling the blade, check the size of the opening, see Step 3. Note: Tighten down the frog before reinstalling the blade. So how do you know that the frog Flattening the Sole is adjusted just right? Basically, it's a trial and error process. As a rule, start by adjusting the opening so it's about twice the setting of the cap iron. For example, for fine work, I'll open the mouth to Vie" (twice the cap iron distance of VW1). Then after reinstalling the blade, check the setting by planing the edge of a scrap. The shavings should come off the workpiece smoothly and evenly without jamming in the opening of the mouth. FLATTENING THE SOLE There's one last thing to consider when tuning up a plane — the flatness of the sole. If there's a slight bump in the sole, it will prevent the cutting edge of the blade from making full contact with the workpiece. And if the sole is dished out, it's almost impossible to plane a surface flat. REFERENCE SURFACE. To check whether the sole is flat or not, you need a flat reference surface. Here again, a piece of glass works fine. To check the sole, draw lines across it with a marker, see Step 1 below. Then sand the plane across a piece of silicon-carbide sandpaper, see Step 2. After a few strokes, check your progress. Any low spots will show up as dark lines, see Step 3. Note: Be sure to sand the plane with the blade in place (and retracted). This will "stress" the body of the plane like it is in use. The idea is to continue sanding until the lines disappear. Then polish the sole on progressively finer grits of sandpaper (up to 400-grit). Finally, give the metal surfaces a coat of paraffin wax. Unlike a machine oil, the wax will protect the plane without leaving a residue on the workpiece that can ruin a finish. 17o flatten the sole, start by drawing squiggly lines across the sole of the plane with a permanent marker. 2 Then "scrub" the plane back and forth on a sheet of 220-grit silicon-carbide paper that's taped to a piece of glass. 3 Any dark lines that remain after sanding indicate low areas. Continue sanding until all the marks disappear. No. 47 ShopNotes 15 |


