49 - Cabinet Maker's Tool Chest, страница 26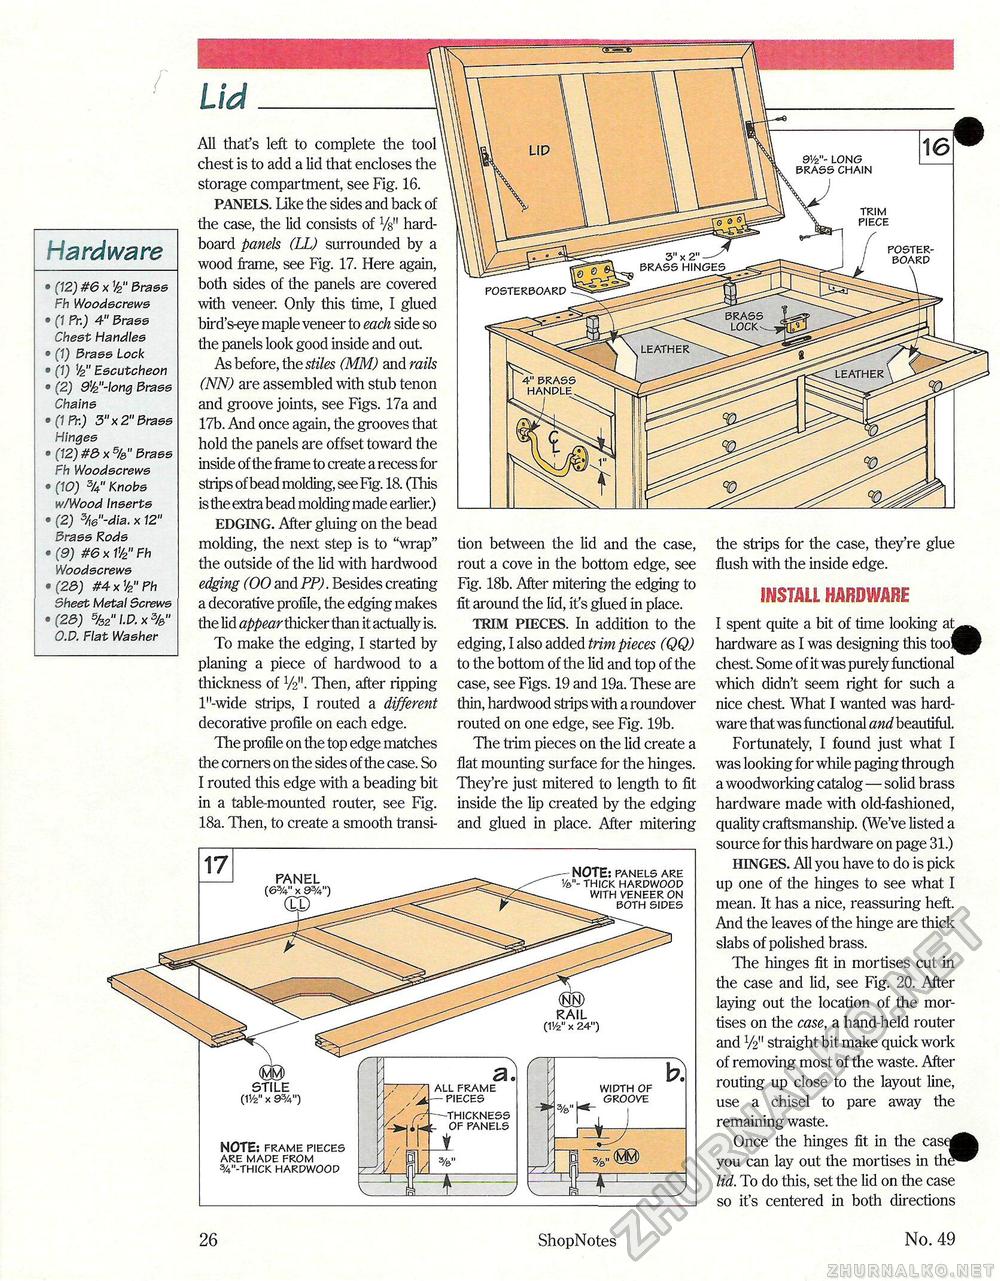
Hardware • (12) #& x V2" Brass Fh Woodscrews • (1 Pr.) 4" Brass Chest Handles • (1) Brass Lock • (?) Escutcheon • (2) 9W-long brass Chains • (1Pr.) 3" x 2" Brass Hinges • (72) #3 x %" Brass Fh Woodscrews • (tC9 Knobs w/Wood Inserts • (2} 3/w"-dia. x 72" Brass Rods • (9) #6 x f'/2" Fh Woodscrews •(23) #4xV2"Ph Sheet Metal Screws •(23) O.P. F/at Washer All that's left to complete the tool chest is to add a lid that encloses the storage compartment, see Fig. 16. PANELS. like the sides and back of the case, the lid consists of Vs" hard-board panels (IX) surrounded by a wood frame, see Fig. 17. Here again, both sides of the panels are covered with veneer. Only this time, I glued bird's-eye maple veneer to each side so the panels look good inside and out As before, the stiles (MM) and rails (NN) are assembled with stub tenon and groove joints, see Figs. 17a and 17b. And once again, the grooves that hold the panels are offset toward the inside of the frame to create a recess for strips of bead molding, see Fig. 18. (This is the extra bead molding made earlier.) edging. After gluing on the bead molding, the next step is to "wrap" the outside of the lid with hardwood edging (00 and PP). Besides creating a decorative profile, the edging makes the lid appear thicker than it actually is. To make the edging, I started by planing a piece of hardwood to a thickness of V2". Then, after ripping l"-wide strips, I routed a different decorative profile on each edge. The profile on the top edge matches the corners on the sides of the case. So I routed this edge with a beading bit in a table-mounted router, see Fig. 18a. Then, to create a smooth transi tion between the lid and the case, rout a cove in the bottom edge, see Fig. 18b. After mitering the edging to fit around the lid, it's glued in place. TRIM PIECES. In addition to the edging, I also added trim pieces (QQ) to the bottom of the lid and top of the case, see Figs. 19 and 19a. These are thin, hardwood strips with a roundover routed on one edge, see Fig. 19b. The trim pieces on the lid create a flat mounting surface for the hinges. They're just mitered to length to fit inside the lip created by the edging and glued in place. After mitering - NOTE: panels are ve"- thick hardwood with veneer on both sides STILE (11/2" X 9%") NOTE: frame pieces are made from w-thick hardwood rf--thickness i^j of panels J the strips for the case, they're glue flush with the inside edge. INSTALL HARDWARE I spent quite a bit of time looking at^^ hardware as I was designing this too^P chest Some of it was purely functional which didn't seem right for such a nice chest. What I wanted was hardware that was functional and beautiful. Fortunately, I found just what I was looking for while paging through a woodworking catalog—solid brass hardware made with old-fashioned, quality craftsmanship. (We've listed a source for this hardware on page 31.) hinges. All you have to do is pick up one of the hinges to see what I mean. It has a nice, reassuring heft. And the leaves of the hinge are thick slabs of polished brass. The hinges fit in mortises cut in the case and lid, see Fig. 20. After laying out the location of the mortises on the case, a hand-held router and V2" straight bit make quick work of removing most of the waste. After routing up close to the layout line, use a chisel to pare away the remaining waste. Once the hinges fit in the case^^ you can lay out the mortises in th^^ lid. To do this, set the lid on the case so it's centered in both directions 26 ShopNotes No. 49 |


