65 - Our Best Bench Yet, страница 16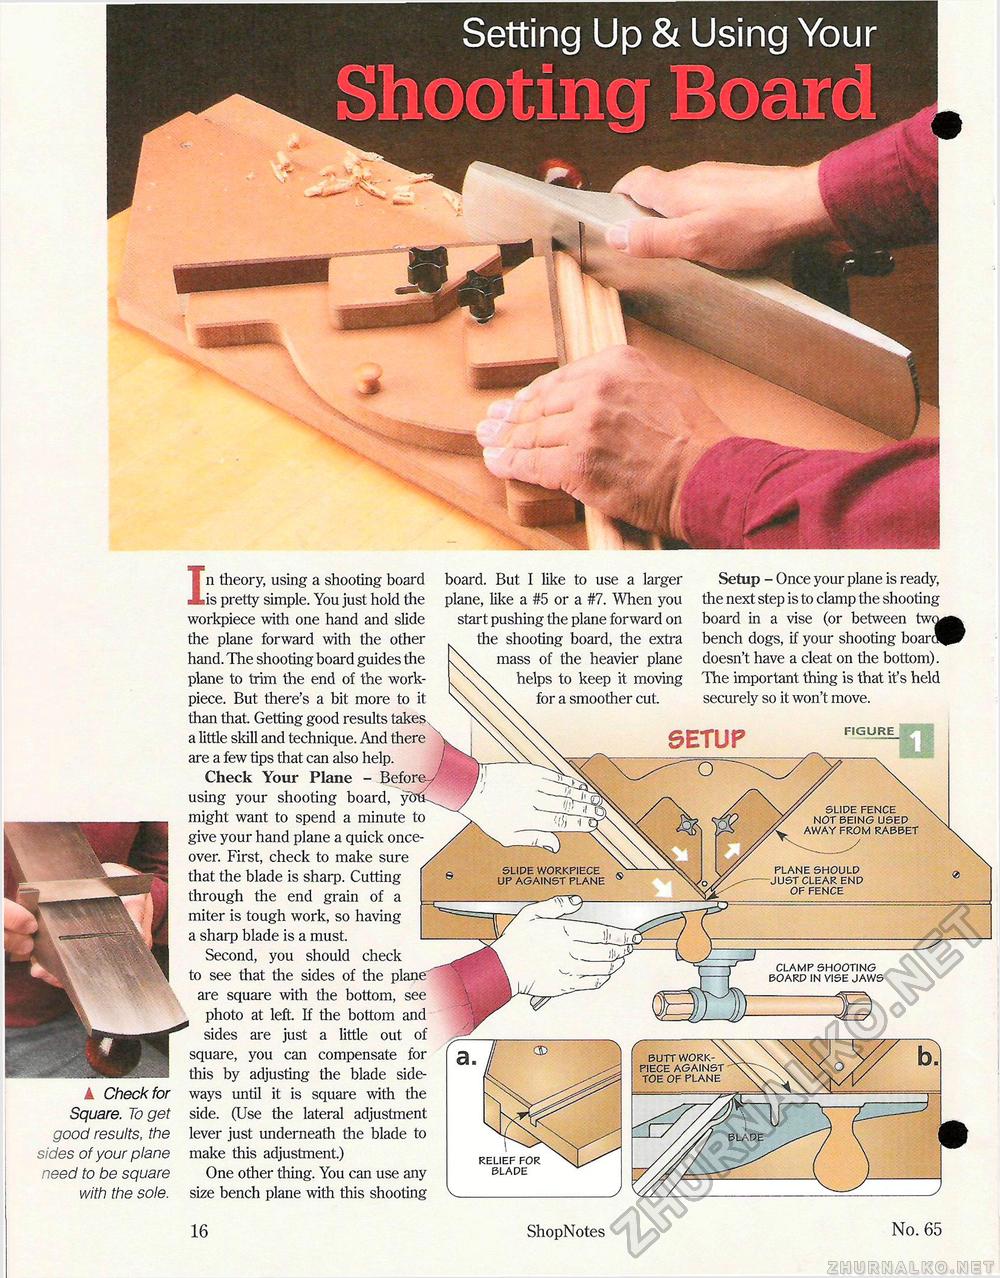
Setting Up & Using Your Shooting Board Setup - Once your plane is ready, the next step is to clamp the shooting board in a vise (or between twa bench dogs, if your shooting boar " doesn't have a cleat on the bottom). The important thing is that it's held securely so it won't move. In theory, using a shooting board board. But I like to use a larger is pretty simple. You just hold the plane, like a #5 or a #7. When you workpiece with one hand and slide start pushing the plane forward on the plane forward with the other the shooting board, the extra hand. The shooting board guides the mass of the heavier plane plane to trim the end of the work- \\ helps to keep it moving piece. But there's a bit more to it \\ for a smoother cut than that. Getting good results takes, a little skill and technique. And there "V are a few tips that can also help. / • Check Your Plane - Before/ using your shooting board, you^ / might want to spend a minute to N ■ give your hand plane a quick once-over. First, check to make sure that the blade is sharp. Cutting © —tmMIRkil through the end grain of a S|k ■ I miter is tough work, so having I jgj a sharp blade is a must. L- Second, you should check ^ 1 to see that the sides of the plane '"' are square with the bottom, see photo at left. If the bottom and Wftopm^g*^^ sides are just a little out of ' jBp " square, you can compensate for [ gj mnHHI this by adjusting the blade side-A Check for ways until it is square with the Square. To get side. (Use the lateral adjustment good results, the lever just underneath the blade to sides of your plane make this adjustment.) relief for need to be square One other thing. You can use any blade with the sole, size bench plane with this shooting V_ SETUP slide fence not being used away from rabbet plane should just clear end of fence slide workpiece up against plane clamp shooting board in vise jaws butt work-piece against toe of plane 16 & ShopNotes No. 65 |


