65 - Our Best Bench Yet, страница 17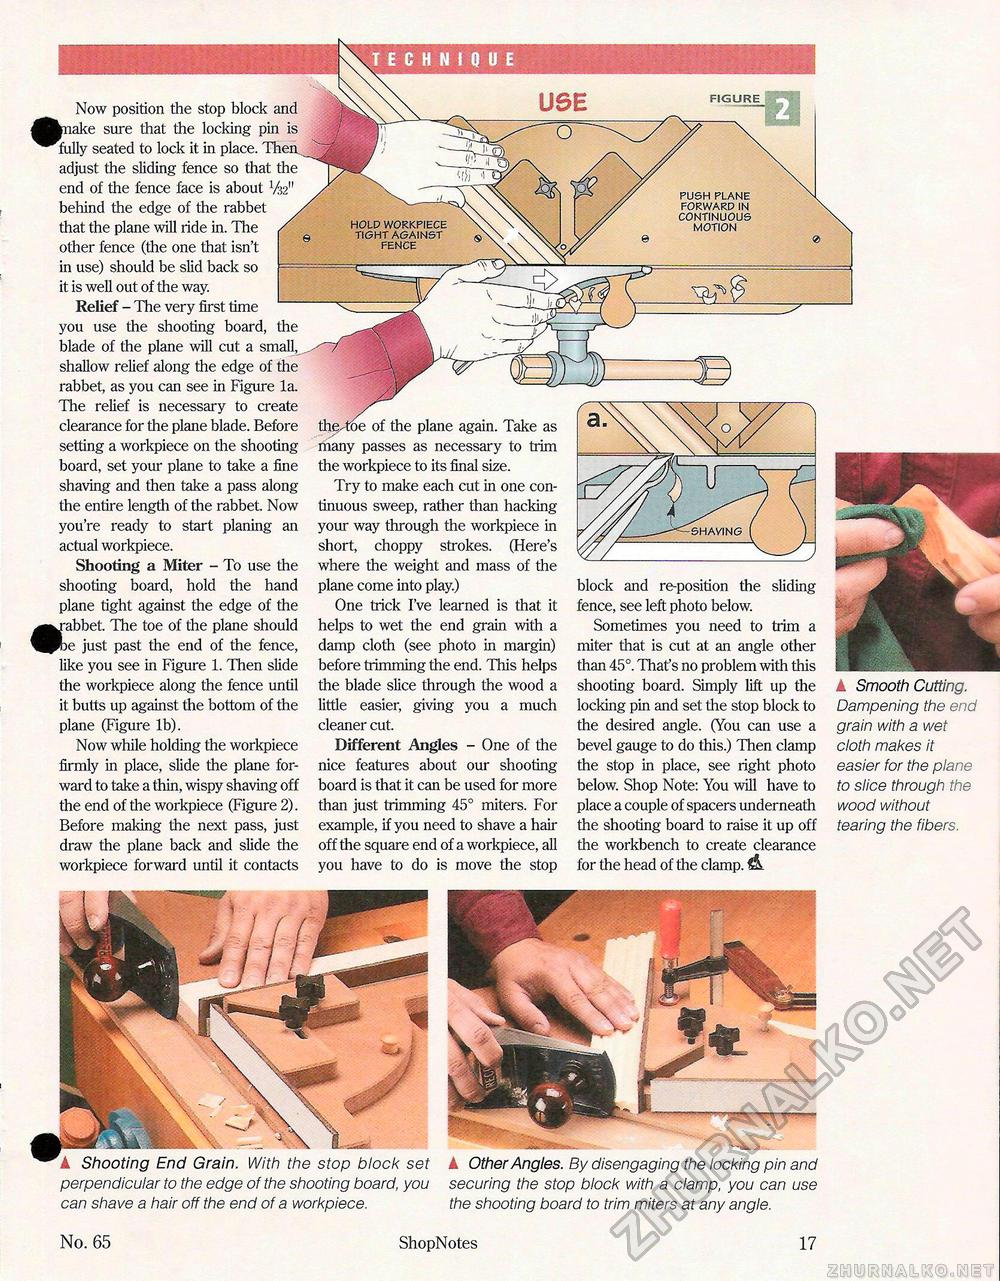
TECHNIQUE behind the edge of the rabbet that the plane will ride in. The other fence (the one that isn't in use) should be slid back so it is well out of the way. Relief - The very first time you use the shooting board, the blade of the plane will cut a small, shallow relief along the edge of the rabbet, as you can see in Figure la. The relief is necessary to create clearance for the plane blade. Before setting a workpiece on the shooting board, set your plane to take a fine shaving and then take a pass along the entire length of the rabbet. Now you're ready to start planing an actual workpiece. Shooting a Miter - To use the shooting board, hold the hand plane tight against the edge of the ^^rabbet. The toe of the plane should ^^De just past the end of the fence, like you see in Figure 1. Then slide the workpiece along the fence until it butts up against the bottom of the plane (Figure lb). Now while holding the workpiece firmly in place, slide the plane forward to take a thin, wispy shaving off the end of the workpiece (Figure 2). Before making the next pass, just draw the plane back and slide the workpiece forward until it contacts theAoe of the plane again. Take as many passes as necessary to trim the workpiece to its final size. Try to make each cut in one continuous sweep, rather than hacking your way through the workpiece in short, choppy strokes. (Here's where the weight and mass of the plane come into play.) One trick I've learned is that it helps to wet the end grain with a damp cloth (see photo in margin) before trimming the end. This helps the blade slice through the wood a little easier, giving you a much cleaner cut. Different Angles - One of the nice features about our shooting board is that it can be used for more than just trimming 45° miters. For example, if you need to shave a hair off the square end of a workpiece, all you have to do is move the stop block and re-position the sliding fence, see left photo below. Sometimes you need to trim a miter that is cut at an angle other than 45°. That's no problem with this shooting board. Simply lift up the locking pin and set the stop block to the desired angle. (You can use a bevel gauge to do this.) Then clamp the stop in place, see right photo below. Shop Note: You will have to place a couple of spacers underneath the shooting board to raise it up off the workbench to create clearance for the head of the clamp. A Smooth Cutting. Dampening the end grain with a wet cloth makes it easier for the plane to slice through the wood without tearing the fibers. No. 65 ShopNotes 17 A Shooting End Grain. With the stop block set perpendicular to the edge of the shooting board, you can shave a hair off the end of a workpiece. A Other Angles. By disengaging the locking pin and securing the stop block with a clamp, you can use the shooting board to trim miters at any angle. |


