65 - Our Best Bench Yet, страница 29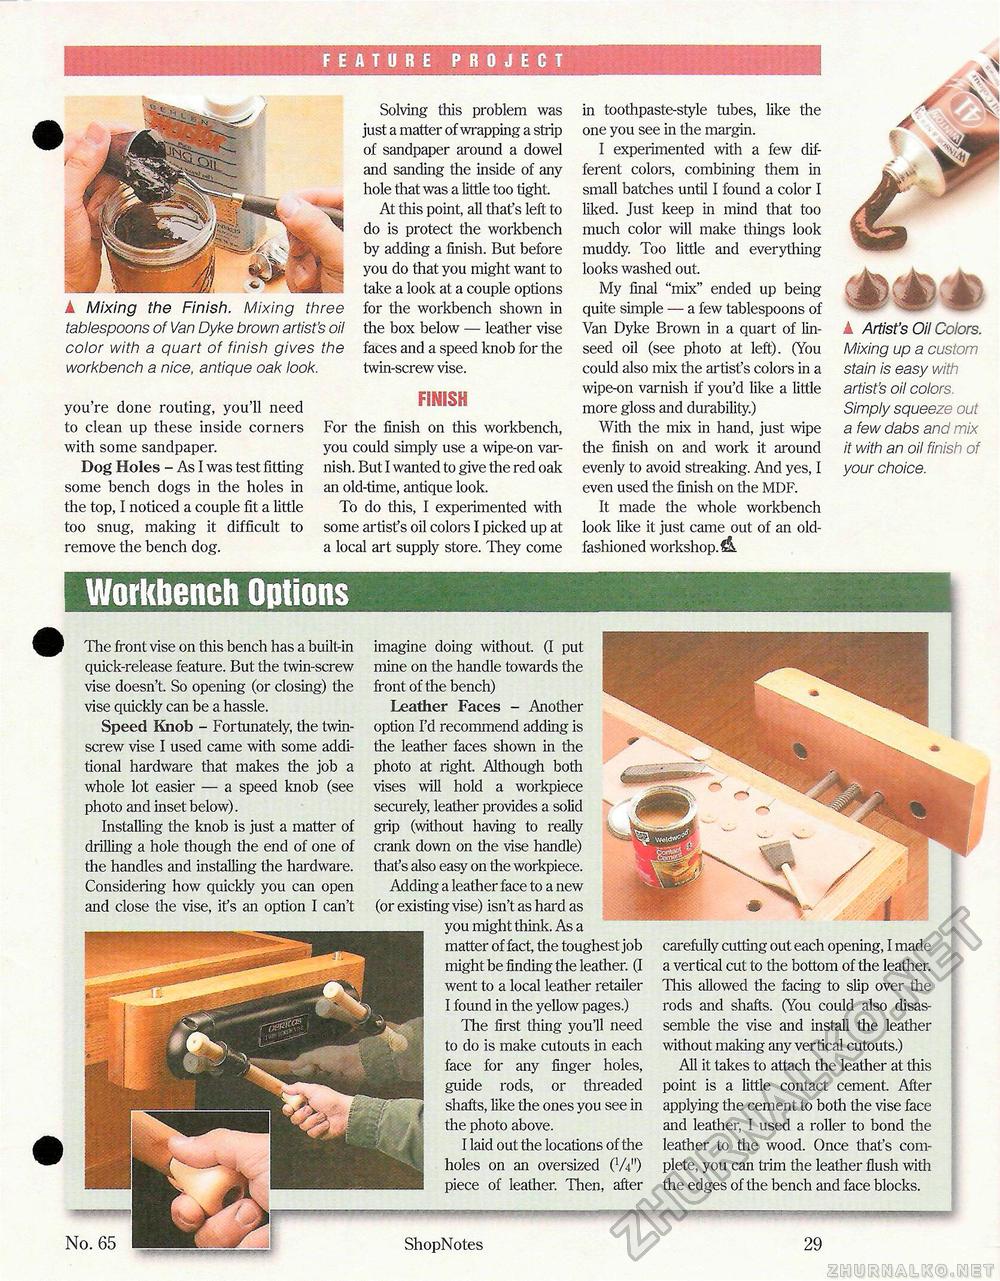
FEATURE PROJECT in toothpaste-style tubes, like the one you see in the margin. I experimented with a few different colors, combining them in small batches until I found a color I liked. Just keep in mind that too much color will make things look muddy. Too little and everything looks washed out. My final "mix" ended up being quite simple — a few tablespoons of Van Dyke Brown in a quart of linseed oil (see photo at left). (You could also mix the artist's colors in a wipe-on varnish if you'd like a little more gloss and durability.) With the mix in hand, just wipe the finish on and work it around evenly to avoid streaking. And yes, I even used the finish on the MDF. It made the whole workbench look like it just came out of an old-fashioned workshop.^. a Artist's Oil Colors. Mixing up a custom stain is easy with artist's oil colors. Simply squeeze out a few dabs and mix it with an oil finish of your choice. you're done routing, you'll need to clean up these inside corners with some sandpaper. Dog Holes - As I was test fitting-some bench dogs in the holes in the top, I noticed a couple fit a little too snug, making it difficult to remove the bench dog. FINISH For the finish on this workbench, you could simply use a wipe-on varnish. But I wanted to give the red oak an old-time, antique look. To do this, I experimented with some artist's oil colors I picked up at a local art supply store. They come A Mixing the Finish. Mixing three tablespoons of Van Dyke brown artist's oil color with a quart of finish gives the workbench a nice, antique oak look. Solving this problem was just a matter of wrapping a strip of sandpaper around a dowel and sanding the inside of any hole that was a little too tight At this point, all that's left to do is protect the workbench by adding a finish. But before you do that you might want to take a look at a couple options for the workbench shown in the box below — leather vise faces and a speed knob for the twin-screw vise. Workbench OptionsThe front vise on this bench has a built-in quick-release feature. But the twin-screw vise doesn't. So opening (or closing) the vise quickly can be a hassle. Speed Knob - Fortunately, the twin-screw vise I used came with some additional hardware that makes the job a whole lot easier — a speed knob (see photo and inset below). Installing the knob is just a matter of drilling a hole though the end of one of the handles and installing the hardware. Considering how quickly you can open and close the vise, it's an option I can't imagine doing without. (I put mine on the handle towards the front of the bench) Leather Faces - Another option I'd recommend adding is the leather faces shown in the photo at right. Although both vises will hold a workpiece securely, leather provides a solid grip (without having to really crank down on the vise handle) that's also easy on the workpiece. Adding a leather face to a new (or existing vise) isn't as hard as you might think. As a matter of fact, the toughest job might be finding the leather. (I went to a local leather retailer I found in the yellow pages.) The first thing you'll need to do is make cutouts in each face for any finger holes, guide rods, or threaded shafts, like the ones you see in the photo above. I laid out the locations of the holes on an oversized (WO piece of leather. Then, after carefully cutting out each opening, I made a vertical cut to the bottom of the leather. This allowed the facing to slip over the rods and shafts. (You could also disassemble the vise and install the leather without making any vertical cutouts.) All it takes to attach the leather at this point is a little contact cement After applying the cement to both the vise face and leather, I used a roller to bond the leather to the wood. Once that's complete, you can trim the leather flush with the edges of the bench and face blocks. No. 65 ShopNotes 29 |


