69 - Bench Top Storage System, страница 20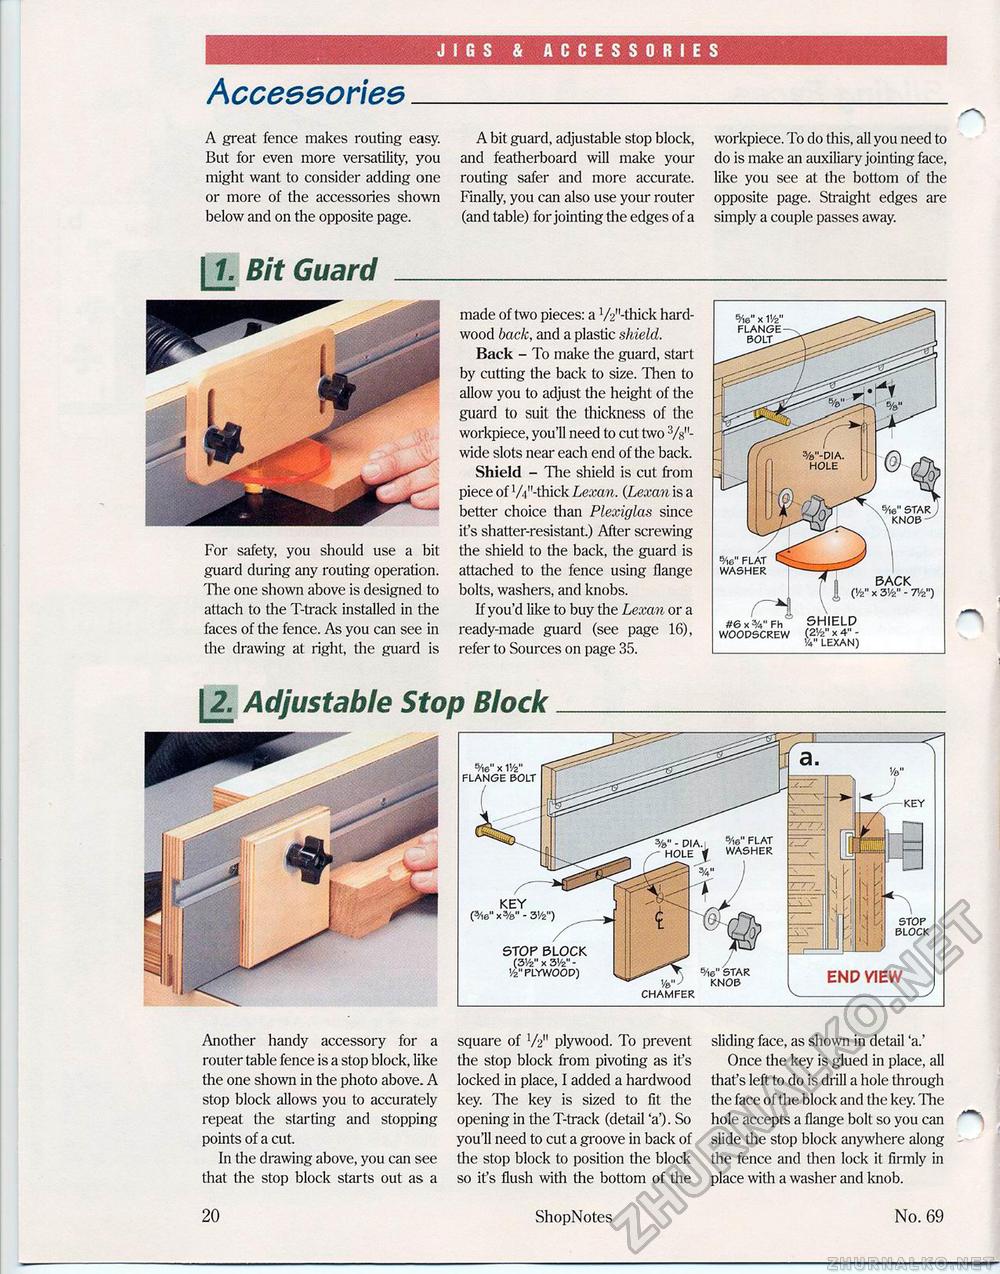
JIGS & ACCESSORIES Acceesoriee_a A great fence makes routing easy. But for even more versatility, you might want to consider adding one or more of the accessories shown below and on the opposite page. A bit guard, adjustable stop block, and featherboard will make your routing safer and more accurate. Finally, you can also use your router (and table) for jointing the edges of a workpiece. To do this, all you need to do is make an auxiliary jointing face, like you see at the bottom of the opposite page. Straight edges are simply a couple passes away. LL Bit GuardFor safety, you should use a bit guard during any routing operation. 'ITie one shown above is designed to attach to the T-track installed in the faces of the fence. As you can see in the drawing at right, the guard is made of two pieces: a V2n-thick hardwood back, and a plastic shield. Back - To make the guard, start by cutting the back to size. Then to allow you to adjust the height of the guard to suit the thickness of the workpiece, you'll need to cut two 3/g"-wide slots near each end of the back. Shield - The shield is cut from piece of W'-thick Lexan. (Lexan is a better choice than Plexiglas since it's shatter-resistant.) After screwing the shield to the back, the guard is attached to the fence using flange bolts, washers, and knobs. If you'd like to buy the Lexan or a ready-made guard (see page 16), refer to Sources on page 35. 5Ae" STAR KNOB /\6 FLAT WASHER BACK ('/2" x 3'/2" - T/z") #6x%" Fh WOOPSCREW 12. Adjustable Stop BlockEND VIEW _y KEY (3Ae" x%" - 3'/2") STOP BLOCK (3V2" x 3V2" -Vz" FLYWOOP) CHAMFER STOP BLOCK s/ie" x 1V2" FLANGE BOLT Another handy accessory for a router table fence is a stop block, like the one shown in the photo above. A stop block allows you to accurately repeat the starting and stopping points of a cut. In the drawing above, you can see that the stop block starts out as a square of V2" plywood. To prevent the stop block from pivoting as it's locked in place, I added a hardwood key. The key is sized to lit the opening in the T-track (detail 'a'). So you'll need to cut a groove in back of the stop block to position the block so it's flush with the bottom of the sliding face, as shown in detail 'a.' Once the key is glued in place, all that's left to do is drill a hole through the face of the block and the key. The hole accepts a flange bolt so you can slide the stop block anywhere along the fence and then lock it firmly in place with a washer and knob. 20 ShopNotes No. 69 |


