81 - Ultimate Sharpening Station, страница 20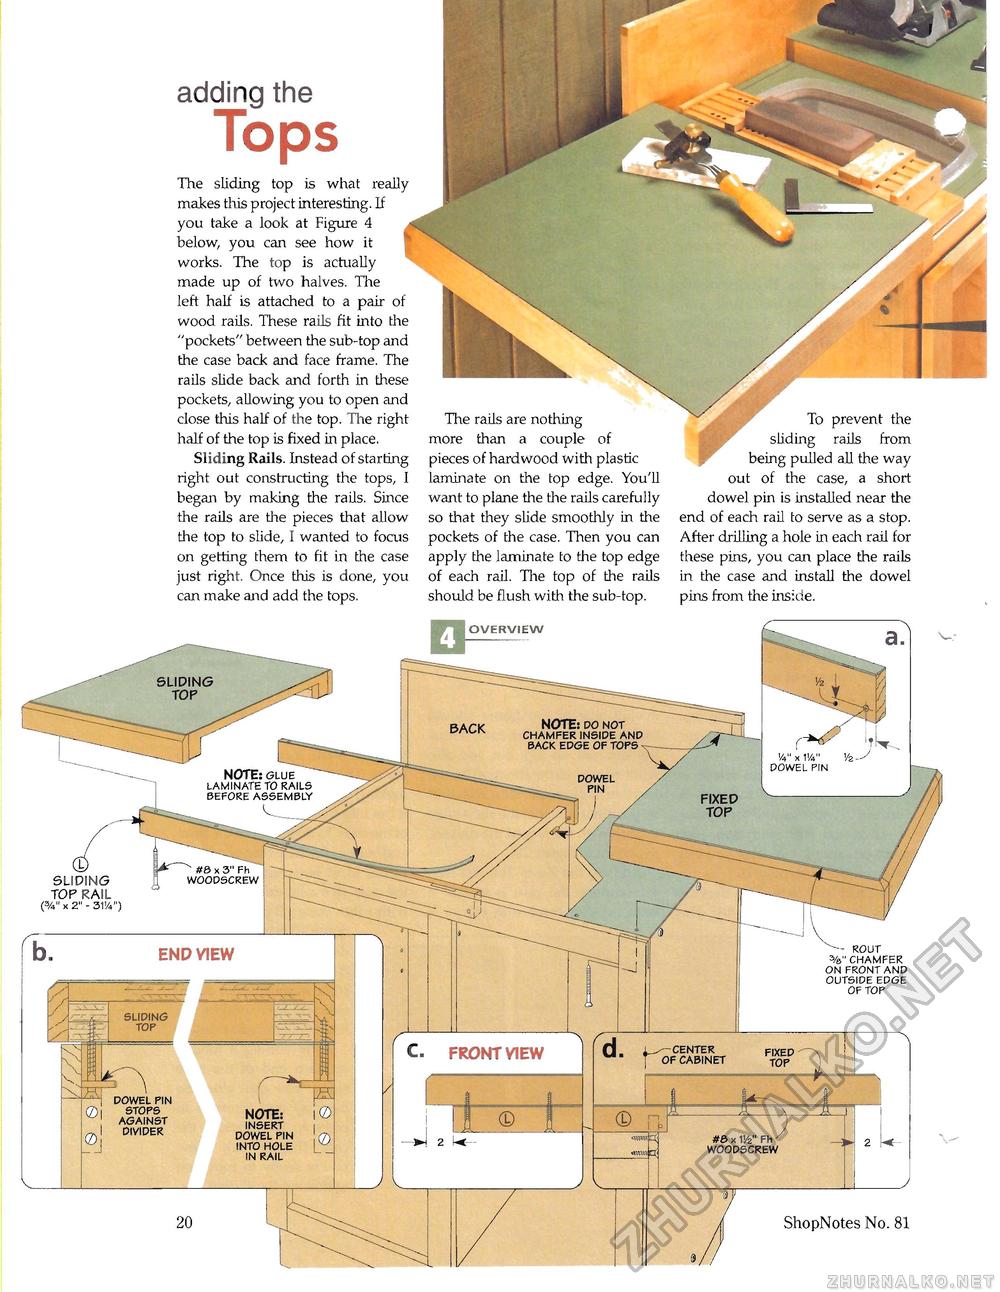
adding the TopsThe sliding top is what really makes this project interesting. If you take a look at Figure 4 below, you can see how it works. The top is actually made up of two halves. The left half is attached to a pair of wood rails. These rails fit into the "pockets" between the sub-top and the case back and face frame. The rails slide back and forth in these pockets, allowing you to open and close this half of the top. The right half of the top is fixed in place. Sliding Rails. Instead of starting right out constructing the tops, I began by making the rails. Since the rails are the pieces that allow the top to slide, I wanted to focus on getting them to fit in the case just right. Once this is done, you can make and add the tops. The rails are nothing more than a couple of pieces of hardwood with plastic laminate on the top edge. You'll want to plane the the rails carefully so that they slide smoothly in the pockets of the case. Then you can apply the laminate to the top edge of each rail. The top of the rails should be flush with the sub-top. To prevent the r sliding rails from being pulled all the way out of the case, a short dowel pin is installed near the end of each rail to serve as a stop. After drilling a hole in each rail for these pins, you can place the rails in the case and install the dowel pins from the inside. SLIDING TOP NOTE: do not chamfer inside and back edge of tops - BACK •A" x W Vz DOWEL PIN NOTE: glue laminate to rails before assembly dowel pin ~~ #0 x 3" Fh WOODSCREW SLIDING TOP RAIL (%" x 2" - 3114") c. front view
-H 2 [<- -H 2 [<- end view OVERVIEW ROUT CHAMFER ON FRONT AND OUTSIDE EDGE OF TOP ®! against rr i divider irJ NOTE: insert dowel pin into hole in rail 1—' center f|xed j of cabinet t0p x 1 Vz" Fh ^ woodscrew |
||||||||


