84, страница 12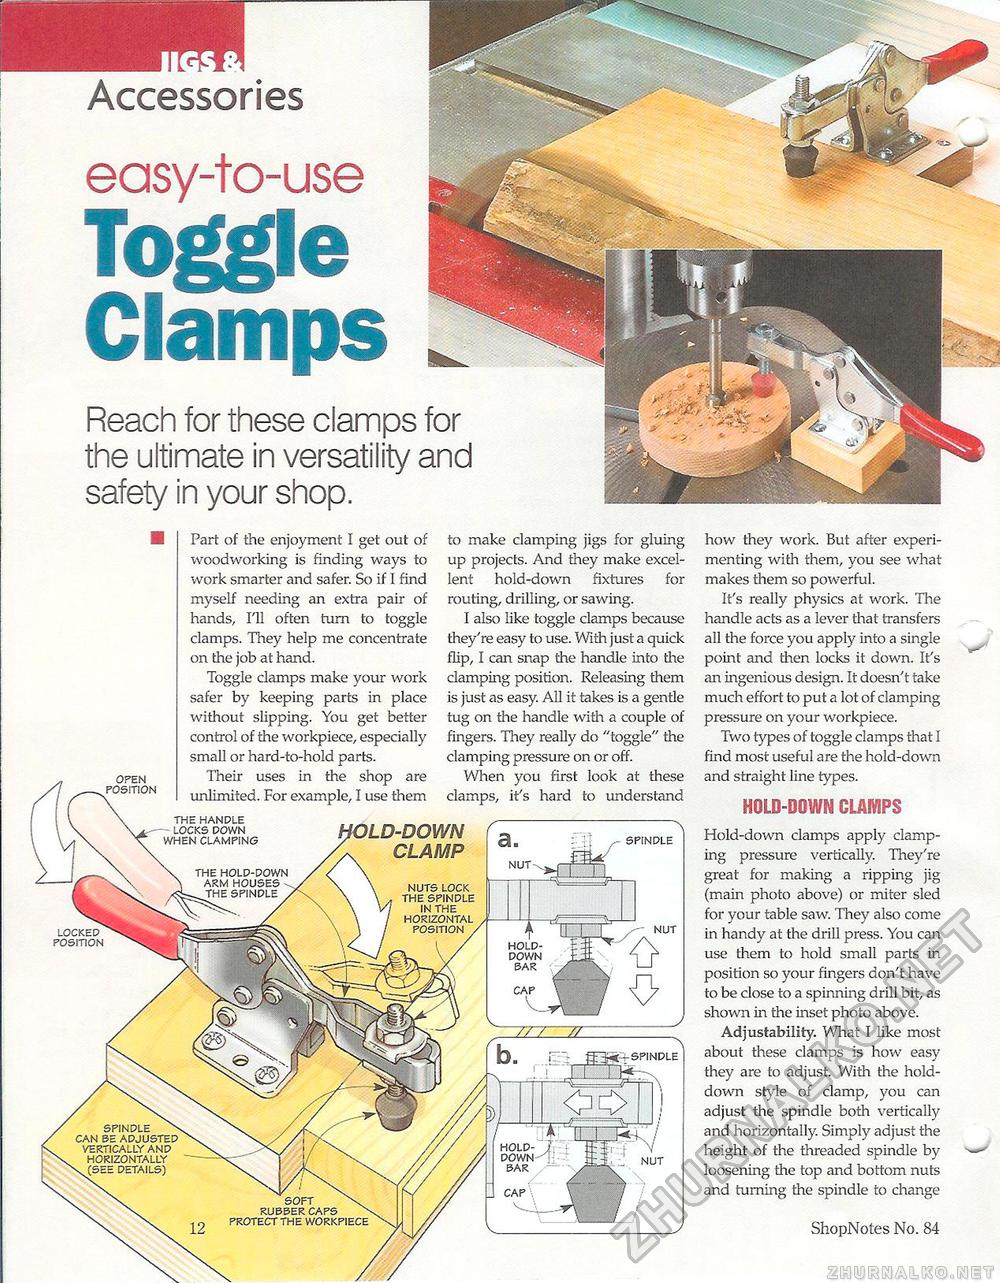
Accessories easy-to-use Toggle ClampsReach for these clamps for the ultimate in versatility and safety in your shop. Part of the enjoyment I get out of woodworking is finding ways to work smarter and safer. So if I find myself needing an extra pair of hands, I'll often turn to toggle clamps. They help me concentrate on the job at hand. Toggle clamps make your work safer by keeping parts in place without slipping. You get better control of the workpiece, especially small or hard-to-hold parts. Their uses in the shop are unlimited. For example, I use them to make clamping jigs for gluing up projects. And they make excellent hold-down fixtures for routing, drilling, or sawing. I also like toggle clamps because they're easy to use. With just a quick flip, I can snap the handle into die clamping position. Releasing them is just as easy. All it takes is a gentle tug on the handle with a couple of fingers. They really do "toggle" the clamping pressure on or off. When you first look at these clamps, it's hard to understand how they work. But after experimenting with them, you see what makes them so powerful. It's really physics at work. The handle acts as a lever that transfers all the force you apply into a single point and then locks it down. It's an ingenious design. It doesn't take much effort to put a lot of clamping pressure on your workpiece. Two types of toggle clamps that I find most useful are the hold-down and straight line types. HOLD-DOWN CLAMPS Hold-down clamps apply clamping pressure vertically. They're great for making a ripping jig (main photo above) or miter sled for your table saw. They also come in handy at the drill press. You can use them to hold small parts in position so your fingers don't have to be close to a spinning drill bit, as shown in the inset photo above. Adjustability. What I like most about these clamps is how easy they are to adjust. With the hold-down style of clamp, you can adjust the spindle both vertically and horizontally. Simply adjust the height of the threaded spindle by loosening the top and bottom nuts and turning the spindle to change 12 ShopNotes No. 84 |


