84, страница 21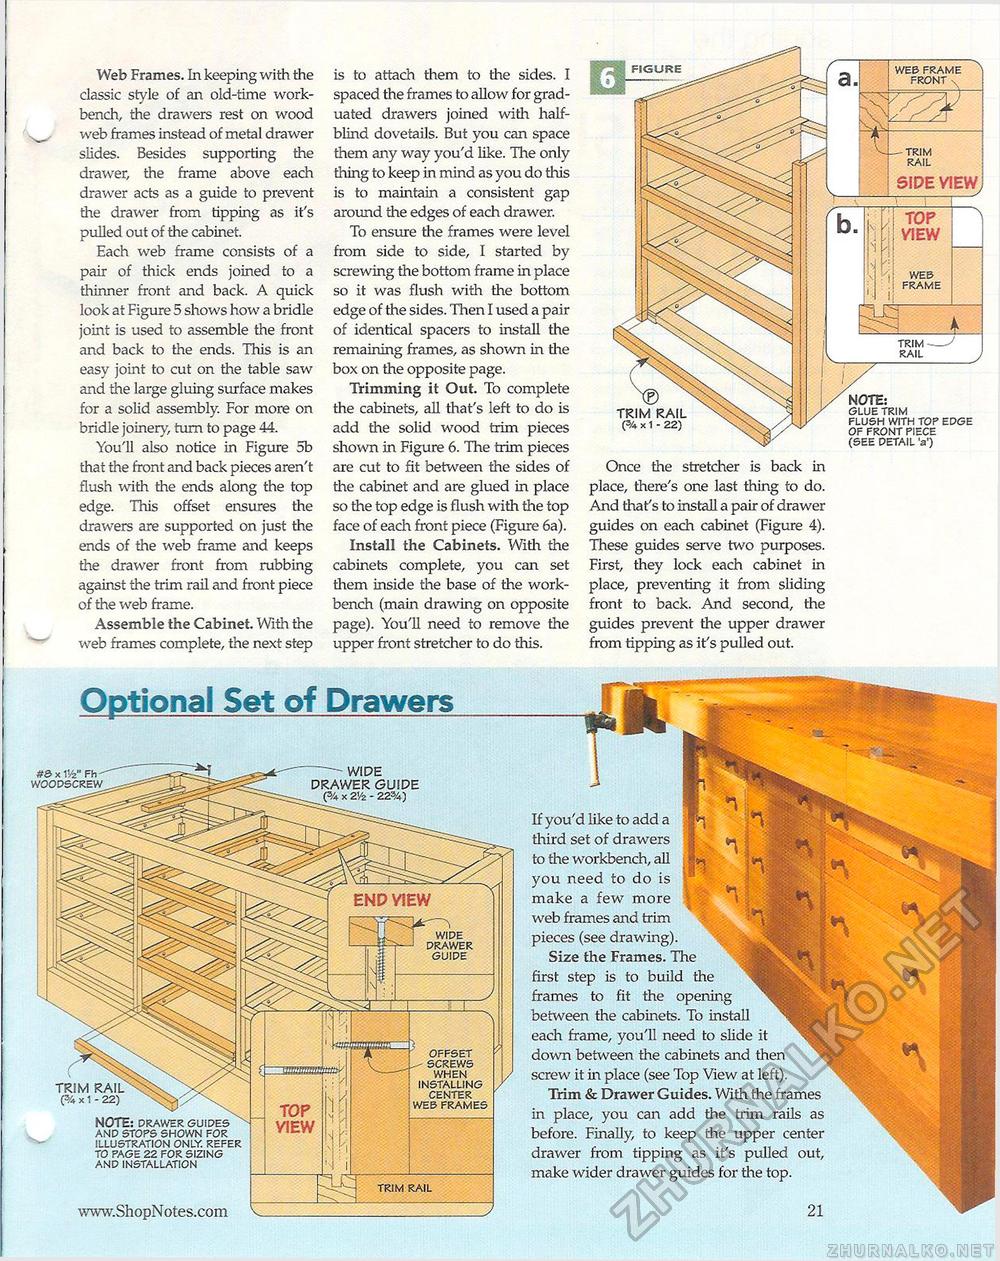
Web Frames. In keeping with the classic style of an old-time workbench, the drawers rest on wood web frames instead of metal drawer slides. Besides supporting the drawer, the frame above each drawer acts as a guide to prevent the drawer from tipping as it's pulled out of the cabinet. Each web frame consists of a pair of thick ends joined to a thinner front and back. A quick look at Figure 5 shows how a bridle joint is used to assemble the front and back to the ends. This is an easy joint to cut on the table saw and the large gluing surface makes for a solid assembly. For more on bridle joinery, turn to page 44. You'll also notice in Figure 5b that the front and back pieces aren't flush with the ends along the top edge. This offset ensures the drawers are supported on just the ends of the web frame and keeps the drawer front from rubbing against the trim rail and front piece of the web frame. Assemble the Cabinet. With the web frames complete, the next step is to attach them to the sides. I spaced the frames to allow for graduated drawers joined with half-blind dovetails. But you can space them any way you'd like. The only thing to keep in mind as you do this is to maintain a consistent gap around the edges of each drawer. To ensure the frames were level from side to side, I started by screwing the bottom frame in place so it was flush with the bottom edge of the sides. Then I used a pair of identical spacers to install the remaining frames, as shown in the box on the opposite page. Trimming it Out. To complete the cabinets, all that's left to do is add the solid wood trim pieces shown in Figure 6. The trim pieces are cut to fit between the sides of the cabinet and are glued in place so the top edge is flush with the top face of each front piece (Figure 6a). Install the Cabinets. With the cabinets complete, you can set them inside the base of the workbench (main drawing on opposite page). You'll need to remove the upper front stretcher to do this. trim rail (3A x 1 - 22) Once the stretcher is back in place, there's one last thing to do. And that's to install a pair of drawer guides on each cabinet (Figure 4). These guides serve two purposes. First, they lock each cabinet in place, preventing it from sliding front to back. And second, the guides prevent the upper drawer from tipping as it's pulled out. END VIEW WIDE DRAWER GUIDE Optional Set of Drawers OFFSET -- SCREWS WHEN INSTALLING CENTER WEB FRAMES trim kail trim rail (% x 1 - 22) note: DRAWER GUIDES AND STOPS SHOWN FOR ILLUSTRATION ONLY. REFER TO PAGE 22 FOR SIZING AND INSTALLATION tts> x 1V2" Fh WOODSCREW wipe drawer guide (% x 2'/2 - 22%) If you'd like to add a third set of drawers to the workbench, all you need to do is make a few more web frames and trim pieces (see drawing). Size the Frames. The first step is to build the frames to fit the opening between the cabinets. To install each frame, you'll need to slide it down between the cabinets and then screw it in place (see Top View at left). Trim & Drawer Guides. With the frames in place, you can add the trim rails as before. Finally, to keep the upper center drawer from tipping as it's pulled out, make wider drawer guides for the top. |


