86, страница 21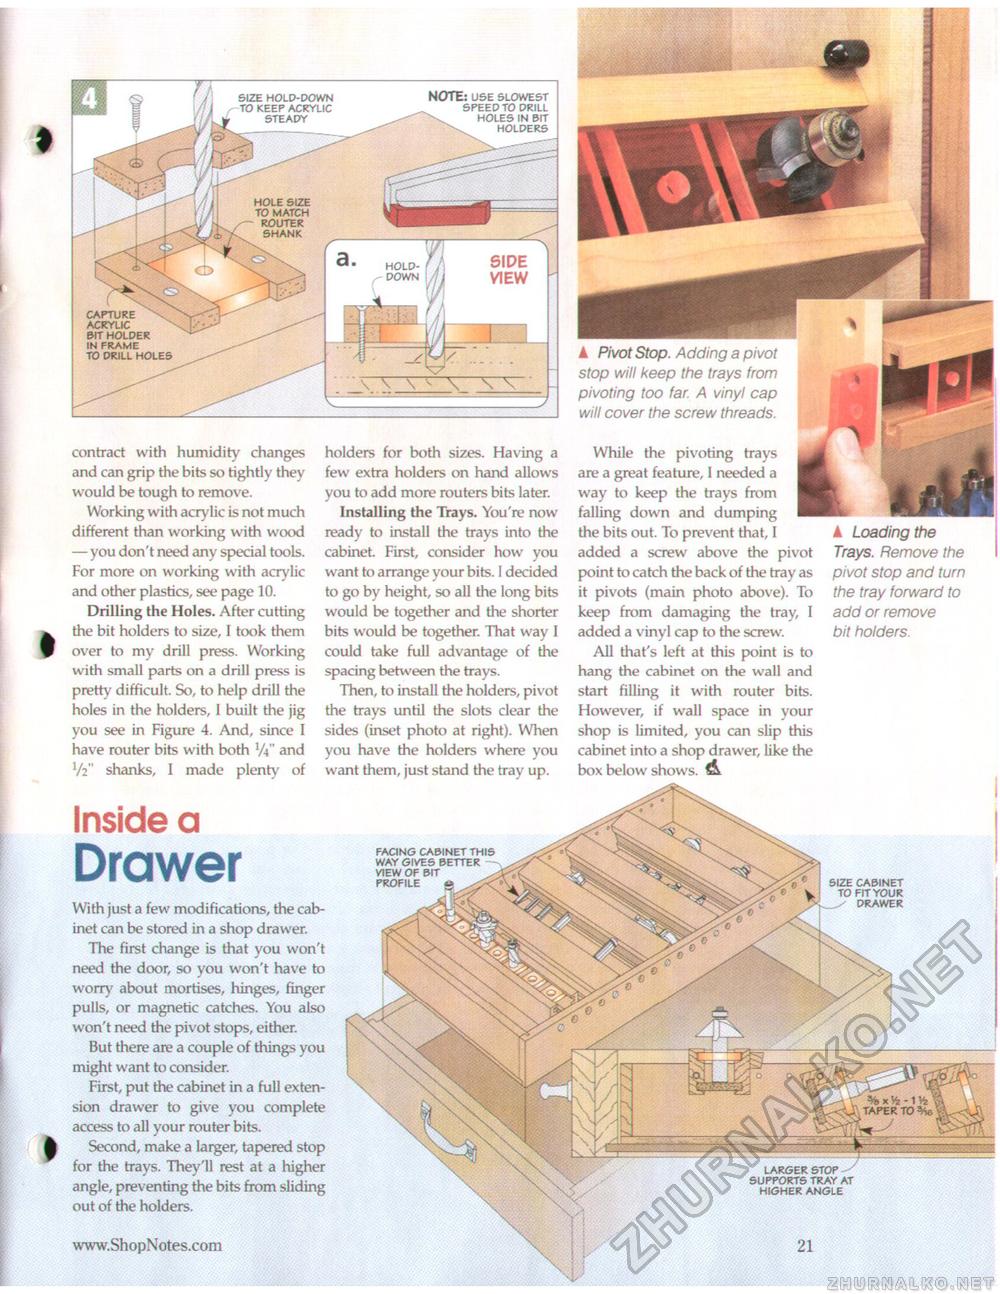
NOTE: USE SLOWEST SPEED TO DRILL HOLES IN PIT HOLDERS contract with humidity changes and can grip the bits so tightly they would be tough to remove. Working with acrylic is not much different than working with wood — you don't need any special tools. For more on working with acrylic and other plastics, see page 10. Drilling the Holes. After cutting the bit holders to size, I took them over to my drill press. Working with small parts on a drill press is pretty difficult. So, to help drill the holes in the holders, 1 built the jig you see in Figure 4. And, since I have router bits with both x/\ and V2" shanks, I made plenty of Inside aDrawerholders for both sizes. Having a few extra holders on hand allows you to add more routers bits later. Installing the Trays. You're now ready to install the trays into the cabinet. First, consider how you want to arrange your bits. I decided to go by height, so all the long bits would be together and the shorter bits would be together. That way I could take full advantage of the spacing between the trays. Then, to install the holders, pivot the trays until the slots dear the sides (inset photo at right). When you have the holders where you want them, just stand the tray up. facing cabinet this way gives better view of bit profile g A Pivot Stop. Adding a pivot stop will keep the trays from pivoting too far. A vinyl cap will cover the screw threads. While the pivoting trays are a great feature, I needed a way to keep the trays from falling down and dumping the bits out. To prevent that, I added a screw above the pivot point to catch the back of the tray as it pivots (main photo above). To keep from damaging the tray, I added a vinyl cap to the screw. All that's left at this point is to hang the cabinet on the wall and start filling it with router bits. However, if wall space in your shop is limited, you can slip this cabinet into a shop drawer, like the box below shows. A A Loading the Trays. Remove the pivot stop and turn the tray forward to add or remove bit holders. With just a few modifications, the cabinet can be stored in a shop drawer. The first change is that you won't need the door, so you won't have to worry about mortises, hinges, finger pulls, or magnetic catches. You also won't need the pivot stops, either. But there are a couple of things you might want to consider. First, put the cabinet in a full extension drawer to give you complete access to all your router bits. Second, make a larger, tapered stop for the trays. They'll rest at a higher angle, preventing the bits from sliding out of the holders. |


