94, страница 41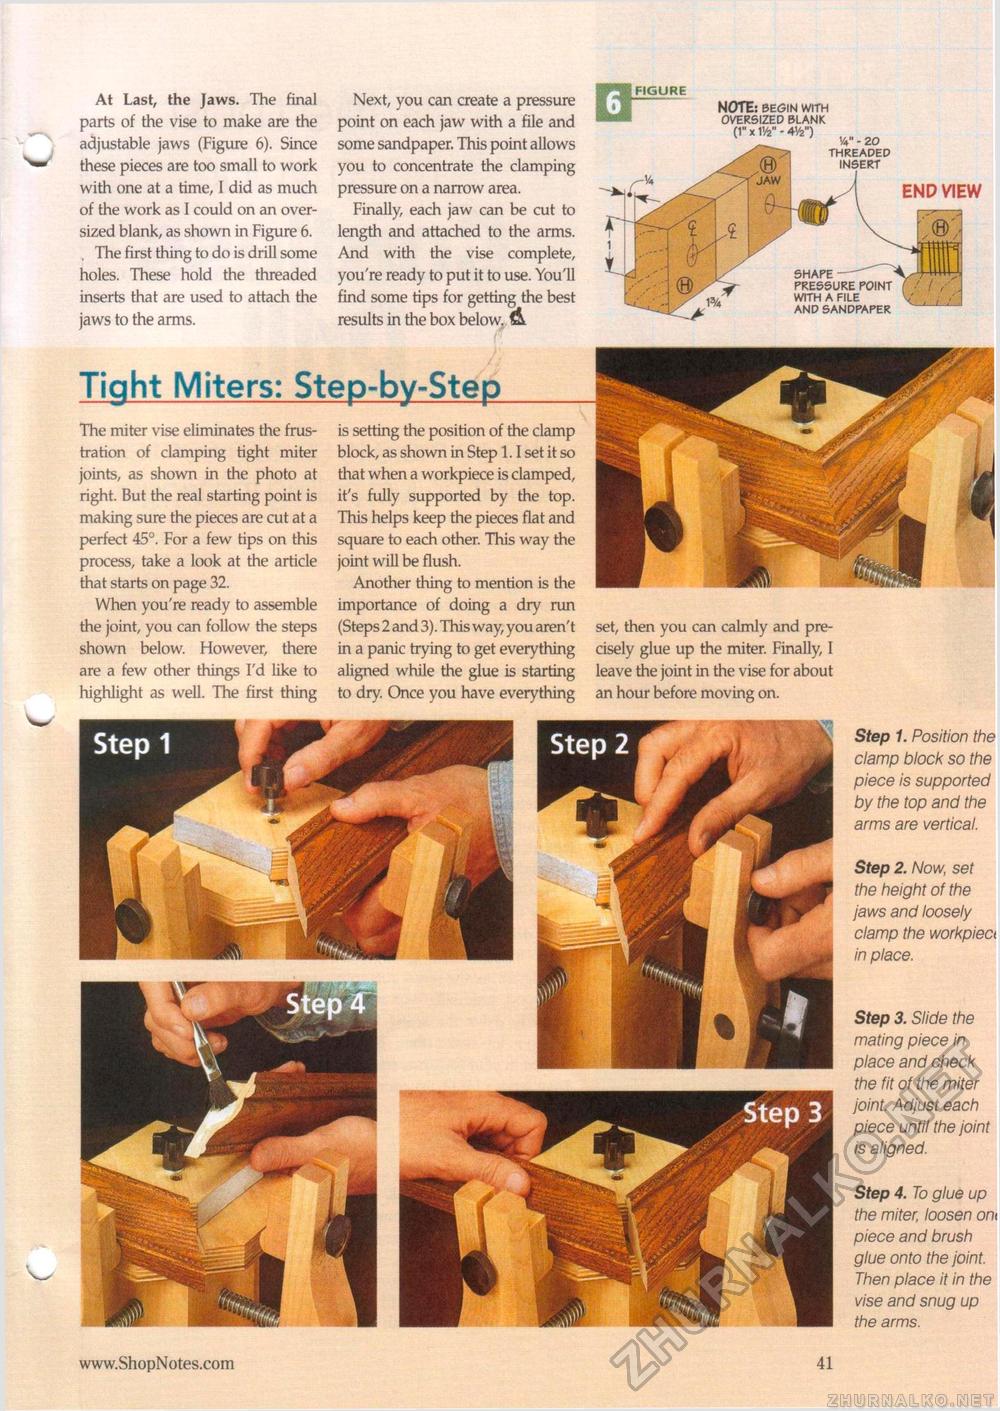
NOTE: BEGIN WITH OVERSIZED BLANK (1U x 1Vfc" - 41/2") V - 20 THREADED INSERT SHAPE — PRESSURE POINT WITH A FILE AND SANDPAPER END VIEW At Last, the Jaws. The final parts of the vise to make are the adjustable jaws (Figure 6). Since these pieces are too small to work with one at a time, I did as much of the work as I could on an oversized blank, as shown in Figure 6. , The first thing to do is drill some holes. These hold the threaded inserts that are used to attach the jaws to the arms. Next, you can create a pressure point on each jaw with a file and some sandpaper. This point allows you to concentrate the clamping pressure on a narrow area. Finally, each jaw can be cut to length and attached to the arms. And with the vise complete, you're ready to put it to use. You'll find some tips for getting the best results in the box below, & Tight Miters: Step-by-Step FIGURE The miter vise eliminates the frustration of clamping tight miter joints, as shown in the photo at right. But the real starting point is making sure the pieces are cut at a perfect 45°. For a few tips on this process, take a look at the article that starts on page 32. When you're ready to assemble the joint, you can follow the steps shown below. However, there are a few other things I'd like to highlight as well. The first thing is setting the position of the clamp block, as shown in Step 1.1 set it so that when a workpiece is clamped, it's fully supported by the top. This helps keep the pieces flat and square to each other. This way the joint will be flush. Another thing to mention is the importance of doing a dry run (Steps 2 and 3). This way, you aren't in a panic trying to get everything aligned while the glue is starting to dry. Once you have everything set, then you can calmly and precisely glue up the miter. Finally, I leave the joint in the vise for about an hour before moving on. www.ShopNotes.com • 41 Step 1. Position the clamp block so the piece is supported by the top and the arms are vertical. Step 2. Now, set the height of the jaws and loosely clamp the workpiect in place. Step 3. Slide the mating piece in place and check the fit of the miter joint. Adjust each piece until the joint is aligned. Step 4. To glue up the miter, loosen om piece and brush glue onto the joint. Then place it in the vise and snug up the arms. |


