Woodworker's Journal 101-Projects-for-Woodworkers, страница 112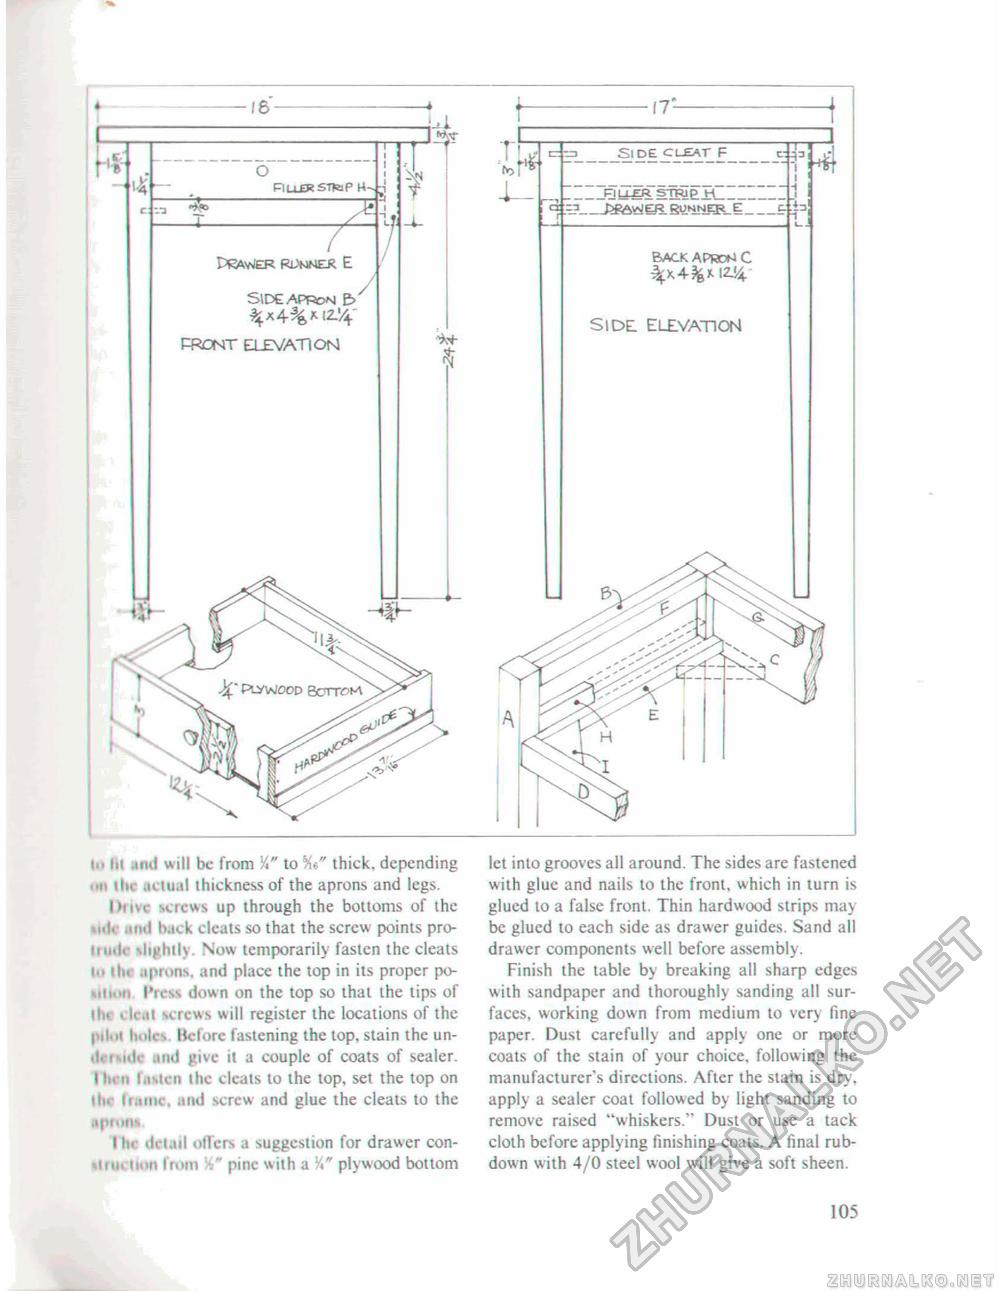
16 M FlLtfRSTtaP H- 2 I PRAvJER RUNNER E Side apfon e>' PRCNT ELEVATION t __nU^R STFUP_H____ I I -1 j Fj back apron c i ■ lii iml will be from V*" to thick, depending .m Mu .atual thickness of the aprons and legs. I»hm- screws up through the bottoms of the tiiK mil back cleats so that the screw points pro....... sligluk Now temporarily fasten the cleats i>> ih< .iprons, and place the top in its proper po-iih.ii Press down on the top so that the tips of ih. , k,ti screws will register the locations of the p.). li. ilc. He fore fastening the top, stain the un-■ li mtlc and give it a couple of coats of sealer, t In it fasten the cleats to the top, set the top on iltr ti.unc and screw and glue the cleats to the apn>n» I in ilrt.nl offers a suggestion for drawer con..........t from pine with a plywood bottom let into grooves all around. The sides are fastened with glue and nails lo the front, which in turn is glued to a false front. Thin hardwood strips may be glued to each side as drawer guides. Sand all drawer components well before assembly. Finish the table by breaking all sharp edges with sandpaper and thoroughly sanding all surfaces, working down from medium to very fine paper. Dust carefully and apply one or more coats of the stain of your choice, following the manufacturer's directions. After the stain is dry, apply a sealer coat followed by light sanding to remove raised "whiskers." Dust or use a tack cloth before applying finishing coats. A final rub-down with 4/0 steel wool will give a soft sheen. 105 |


