Woodworker's Journal 1984-8-1, страница 43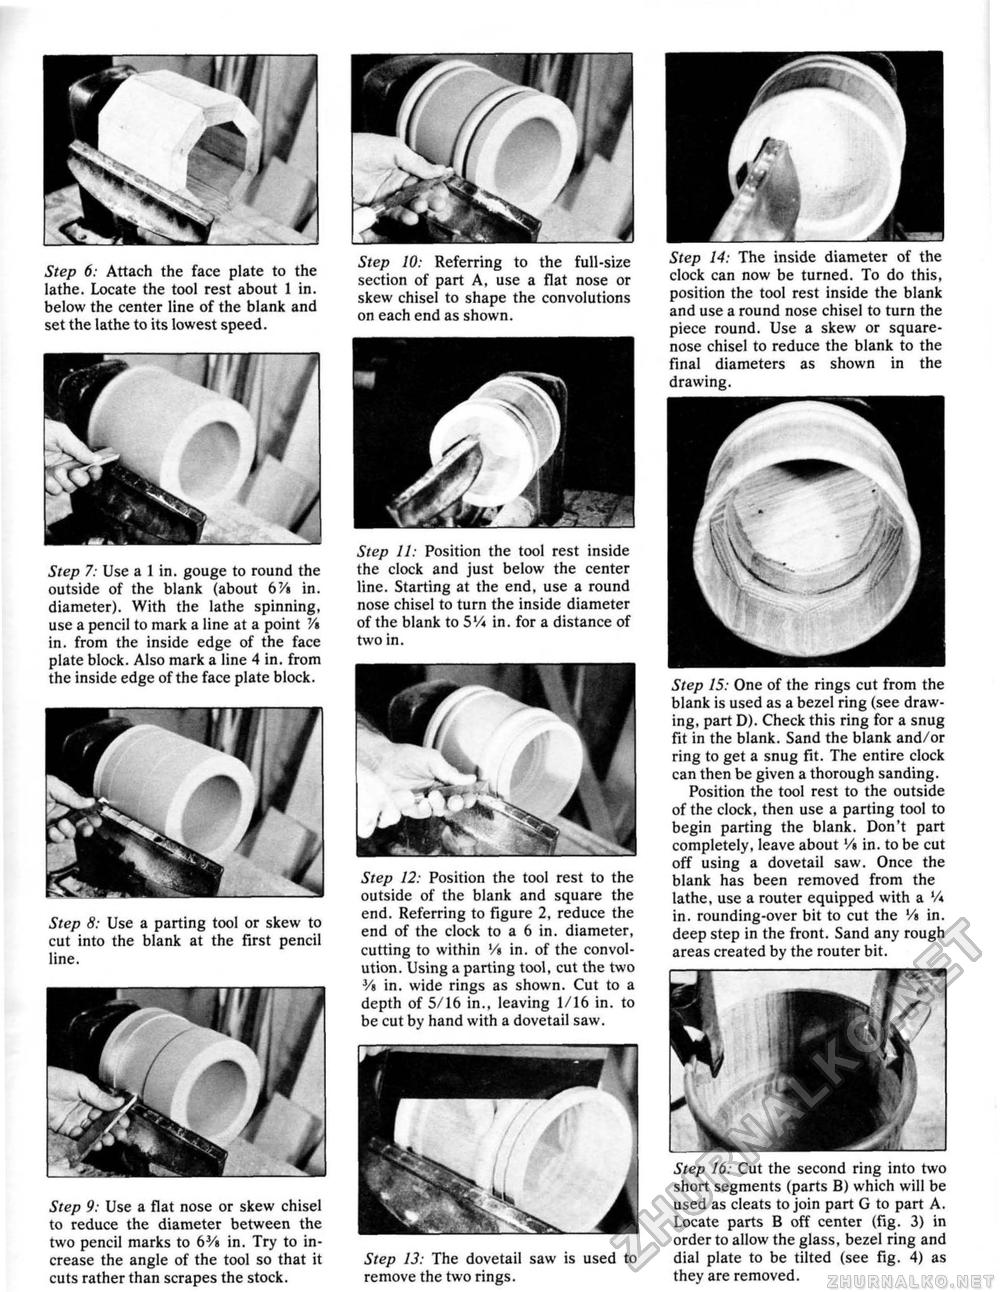
Step 6: Attach the face plate to the lathe. Locate the tool rest about 1 in. below the center line of the blank and set the lathe to its lowest speed. Step 10: Referring to the full-size section of part A, use a flat nose or skew chisel to shape the convolutions on each end as shown. Step 16: Cut the second ring into two short segments (parts B) which will be used as cleats to join part G to part A. Locate parts B off center (fig. 3) in order to allow the glass, bezel ring and dial plate to be tilted (see fig. 4) as they are removed. Step 7: Use a 1 in. gouge to round the outside of the blank (about bVt in. diameter). With the lathe spinning, use a pencil to mark a line at a point V> in. from the inside edge of the face plate block. Also mark a line 4 in. from the inside edge of the face plate block. Step 11: Position the tool rest inside the clock and just below the center line. Starting at the end, use a round nose chisel to turn the inside diameter of the blank to 5V* in, for a distance of two in. Step 8: Use a parting tool or skew to cut into the blank at the first pencil line. Step 12: Position the tool rest to the outside of the blank and square the end. Referring to figure 2, reduce the end of the clock to a 6 in. diameter, cutting to within Vt in, of the convolution. Using a parting tool, cut the two Vt in. wide rings as shown. Cut to a depth of 5/16 in., leaving 1/16 in. to be cut by hand with a dovetail saw. Step 9: Use a flat nose or skew chisel to reduce the diameter between the two pencil marks to bVt in. Try to increase the angle of the tool so that it cuts rather than scrapes the stock. Step 13: The dovetail saw is used to remove the two rings. Step 14: The inside diameter of the clock can now be turned. To do this, position the tool rest inside the blank and use a round nose chisel to turn the piece round. Use a skew or square-nose chisel to reduce the blank to the final diameters as shown in the drawing. Step 15: One of the rings cut from the blank is used as a bezel ring (see drawing, part D). Check this ring for a snug fit in the blank. Sand the blank and/or ring to get a snug fit. The entire clock can then be given a thorough sanding. Position the tool rest to the outside of the clock, then use a parting tool to begin parting the blank. Don't part completely, leave about Vt in. to be cut off using a dovetail saw. Once the blank has been removed from the lathe, use a router equipped with a '/* in. rounding-over bit to cut the Vt in. deep step in the front. Sand any rough areas created by the router bit. |


