Woodworker's Journal 1984-8-1, страница 46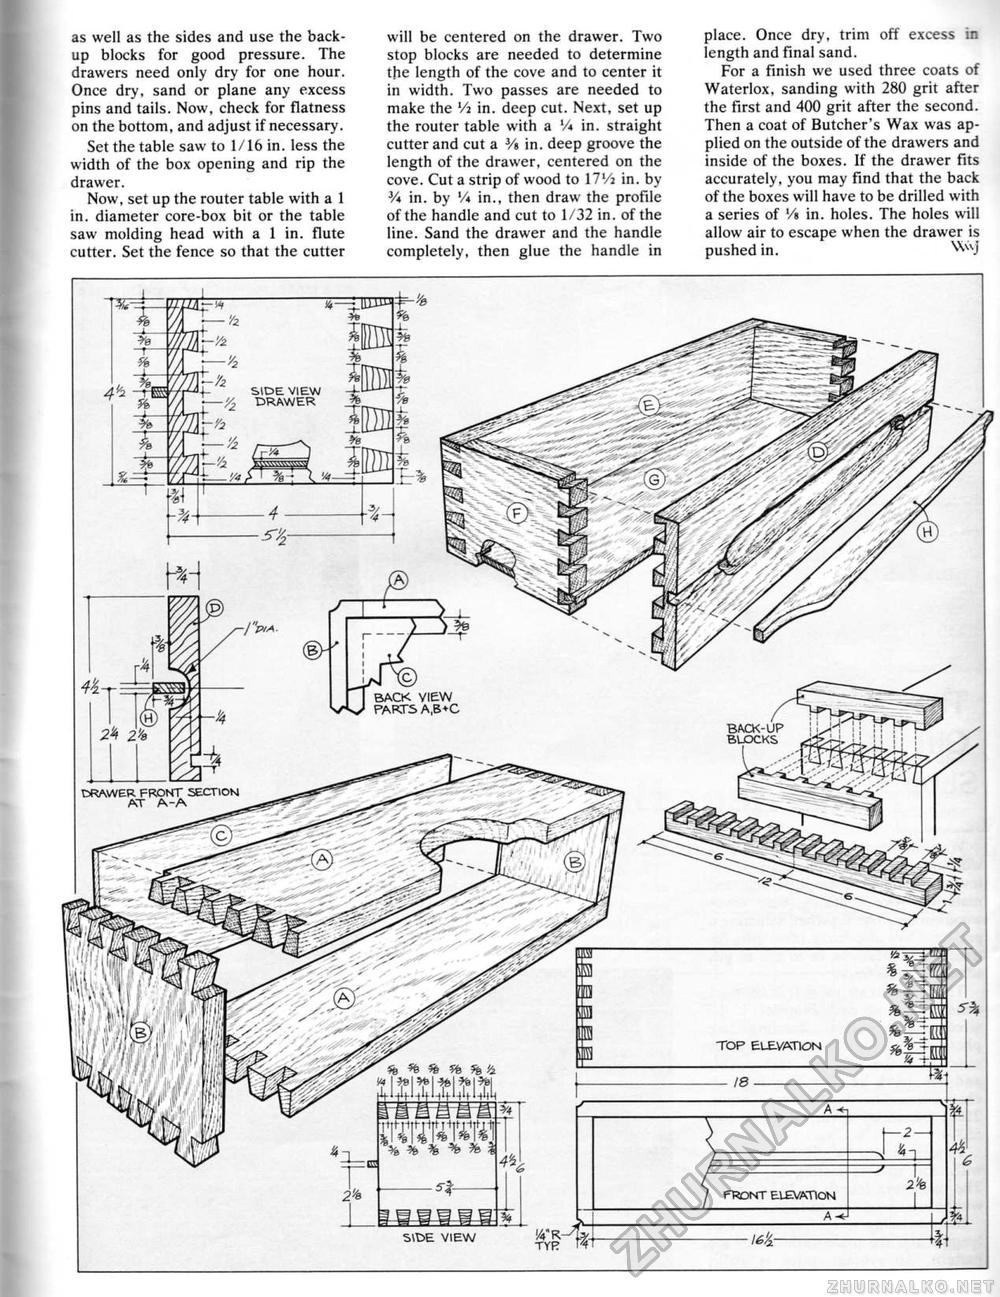
as well as the sides and use the backup blocks for good pressure. The drawers need only dry for one hour. Once dry, sand or plane any excess pins and tails. Now, check for flatness on the bottom, and adjust if necessary. Set the table saw to 1/16 in. less the width of the box opening and rip the drawer. Now, set up the router table with a 1 in. diameter core-box bit or the table saw molding head with a 1 in. flute cutter. Set the fence so that the cutter will be centered on the drawer. Two stop blocks are needed to determine the length of the cove and to center it in width. Two passes are needed to make the Vi in. deep cut. Next, set up the router table with a % in. straight cutter and cut a Vt in. deep groove the length of the drawer, centered on the cove. Cut a strip of wood to 17'/a in. by V* in. by '/* in,, then draw the profile of the handle and cut to 1/32 in. of the line. Sand the drawer and the handle completely, then glue the handle in place. Once dry, trim off excess in length and final sand. For a finish we used three coats of Waterlox. sanding with 280 grit after the first and 400 grit after the second. Then a coat of Butcher's Wax was applied on the outside of the drawers and inside of the boxes. If the drawer fits accurately, you may find that the back of the boxes will have to be drilled with a series of Vt in. holes. The holes will allow air to escape when the drawer is pushed in. Wvj SIDE VIEW >A DRAWER back view pafxs a.b+c drawer front section at a-a 5>t>e view |


