Woodworker's Journal 1994-18-2, страница 14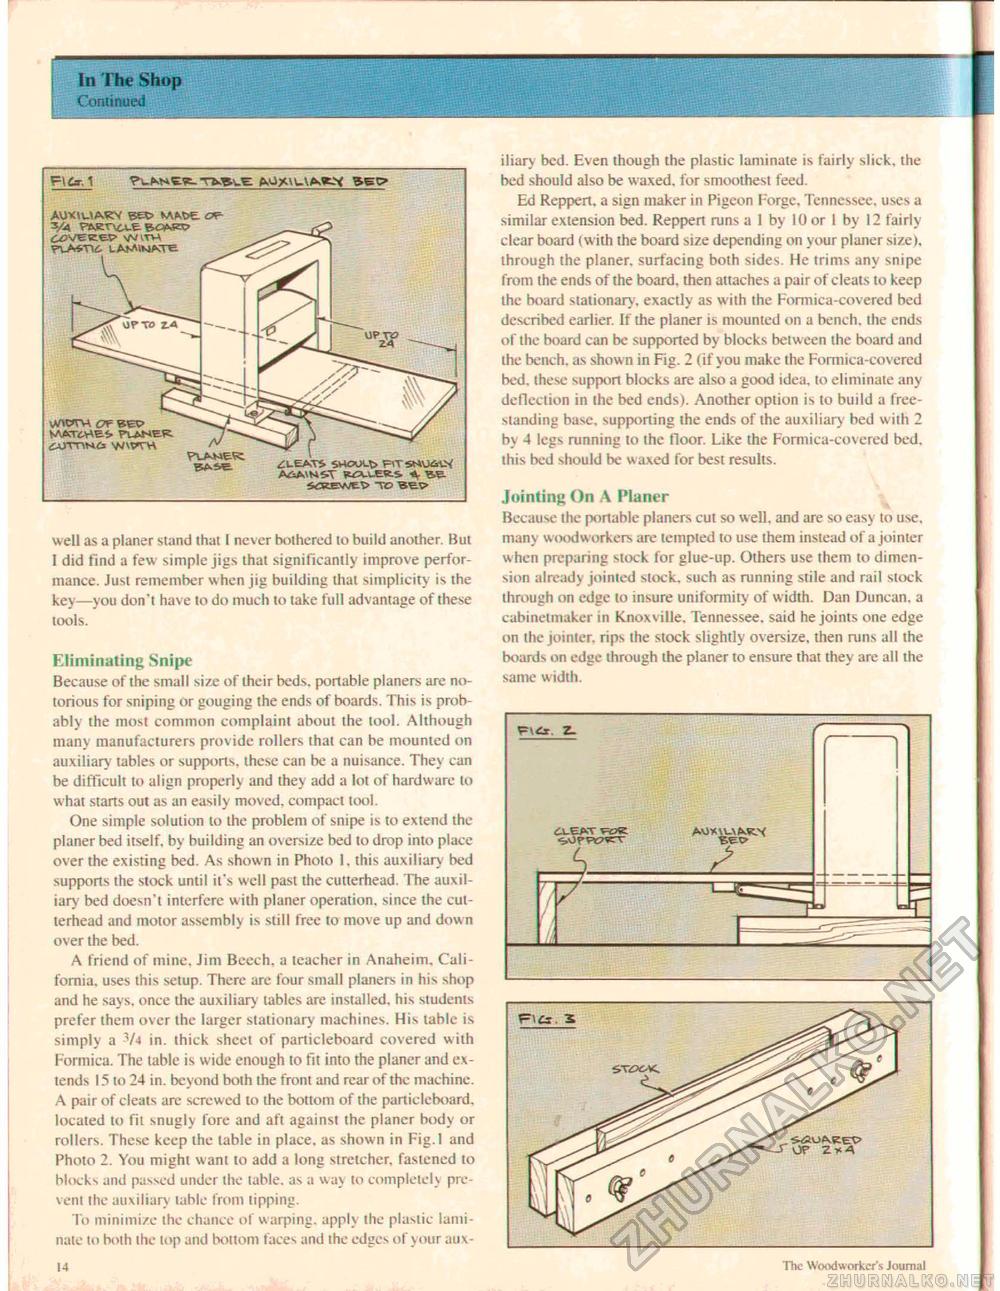
In The Shop Continued 1 TV^ig SEP V-4 swerve MATTES- ?UHEK W-Sfc well as a planer stand that I never bothered to build another. But 1 did find a few simple jigs that significantly improve performance. Just remember w hen jig building that simplicity is the key—you don't have to do much to take full advantage of these tools. Eliminating Snipe Because of the small size of their beds, portable planers are notorious for sniping or gouging the ends of boards. This is probably the most common complaint about the tool. Although many manufacturers provide rollers that can be mounted on auxiliary tables or supports, these can be a nuisance. They can be difficult to align properly and they add a lot of hardware to what starts out as an easily moved, compact tool. One simple solution to the problem of snipe is to extend the planer bed itself, by building an oversize bed lo drop into place over the existing bed. As shown in Photo 1. this auxiliary bed supports the stock until it's well past the cutterhead. The auxiliary bed doesn't interfere with planer operation, since the cutterhead and motor asscmhly is still free to move up and down over the bed. A friend of mine. Jim Beech, a teacher in Anaheim. California, uses this setup. There arc four small planers in his shop and he says, once the auxiliary tables are installed, his students prefer them over the larger stationary machines. His table is simply a Vj in. thick sheet of particleboard covered w ith Formica. The table is wide enough to fit into the planer and extends 15 to 24 in. beyond both the front and rear of the machine. A pair of cleats are screwed to the bottom of the particleboard, located lo fit snugly fore and aft against the planer body or rollers. These keep the table in place, as shown in Fig.l and Photo 2. You might want to add a long stretcher, fastened to blocks and passed under the table, as a way to completely prevent the auxiliary table from lipping. To minimize the chance of warping, apply the plastic laminate to both the lop and bottom faces and the edges of your aux iliary bed. Even though the plastic laminate is fairly slick, the bed should also be waxed, for smoothest feed. Ed Reppert. a sign maker in Pigeon Forge. Tennessee, uses a similar extension bed. Reppert runs a 1 by 10 or I by 12 fairly clear board (with the board size depending on your planer size), through the planer, surfacing both sides. He trims any snipe from the ends of the board, then attaches a pair of cleats to keep the board stationary, exactly as with the Formica-covered bed described earlier. If the planer is mounted on a bench, the ends of the board can be supported by blocks between the board and the bench, as shown in Fig. 2 (if you make the Formica-covered bed, these support blocks are also a good idea, lo eliminate any deflection in ihe bed ends). Another option is to build a freestanding base, supporting the ends of the auxiliary bed with 2 by 4 legs running lo the floor. Like the Formica-covered bed. this bed should be waxed for best results. Jointing On A Planer Because the portable planers cut so well, and are so easy to use, many woodworkers are tempted to use them instead of a jointer when preparing stock for glue-up. Others use them to dimension already jointed stock, such as running stile and rail stoek through on edge to insure uniformity of width. Dan Duncan, a cabinetmaker in Knoxville. Tennessee, said he joints one edge on the jointer, rips the stock slightly oversize, then runs all the boards on edge through the planer to ensure that they are all the same width. Z- AVIXU-VAKX 14 t he Woodworker's Journal |


