Woodworker's Journal 1994-18-2, страница 30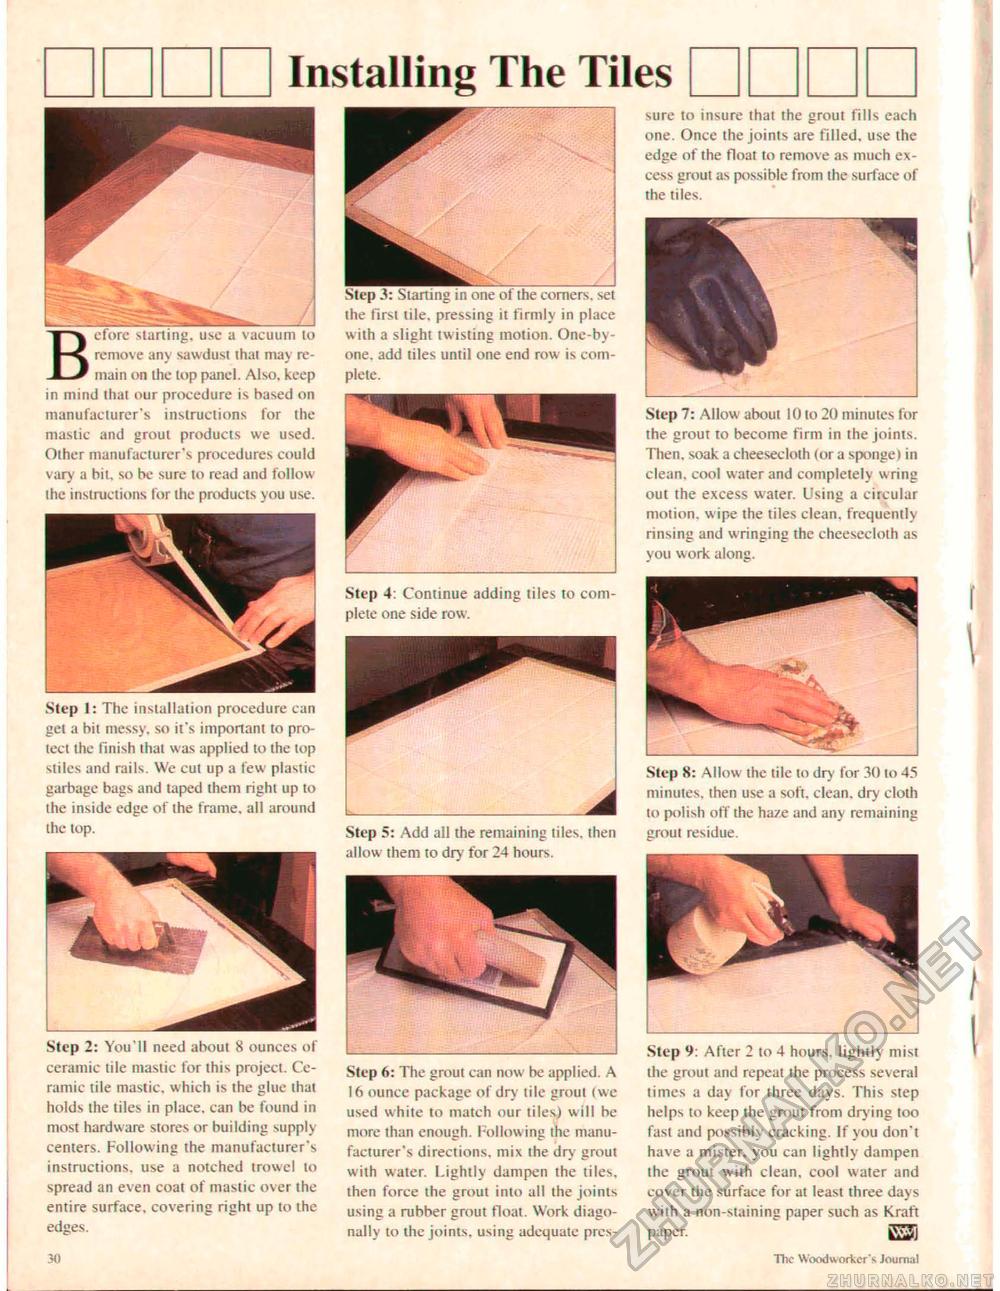
Installing The Tiles sure to insure that the grout fills each one. Once the joints are filled, use the edge of the float to remove as much excess grout as possible from the surface of the tiles. Before starting, use a vacuum to remove any sawdust that may remain on the top panel. Also, keep in mind that our procedure is based on manufacturer's instructions for Ihe mastic and grout products we used. Other manufacturer's procedures could vary a bit, so be sure to read and follow the instructions for the products you use. Step 3: Starting in one of the comers, set the first tile, pressing it firmly in place with a slight twisting motion. One-by-one. add tiles until one end row is complete. Step 7: Allow about l(J to 20 minutes for the grout to become firm in the joints. Then, soak a cheesecloth (or a sponge) in clean, cool water and completely wring out the excess water. Using a circular motion, wipe the tiles clean, frequently rinsing and wringing the cheesecloth as you work along. Step 4: Continue adding tiles to com piete one side row. Step I: The installation procedure can get a bit messy, so it's important to protect the finish thai was applied to the top stiles and rails. We cut up a few plastic garbage bags and taped them right up to the inside edge of the frame, all around the lop. Step 5: Add all the remaining tiles, then allow them to dry for 24 hours. Step 8: Allow the tile to dry for 30 to 45 minutes, then use a soft, clean, dry cloth to polish off the haze and any remaining grout residue- Step 2: You'll need about 8 ounces of ceramic tile mastic for this project. Ceramic tile mastic, which is the glue that holds the tiles in place, can be found in most hardware stores or building supply centers. Following the manufacturer's instructions, use a notched trowel lo spread an even coat of mastic over the entire surface, covering right up lo the edges. Step 6: The grout can now be applied. A 16 ounce package of dry tile grout (we used white to match our tiles.) will be more than enough. Following the manufacturer's directions, mix the dry grout with water. Lightly dampen the tiles, then force the grout into all the joints using a rubber grout float. Work diagonally to the joints, using adequate pres- Slep 9: After 2 to 4 hours, lightly mist the grout and repeat the process several times a day for three days. This step helps to keep the grout from drying loo fast and possibly cracking. If you don't have a mister, you can lightly dampen the grout with clean, cool water and cover the surface for at least three days with a non-staining paper such as Kraft paper. tiVJ I 30 t he Woodworker's Journal |


