Woodworker's Journal 1994-18-2, страница 28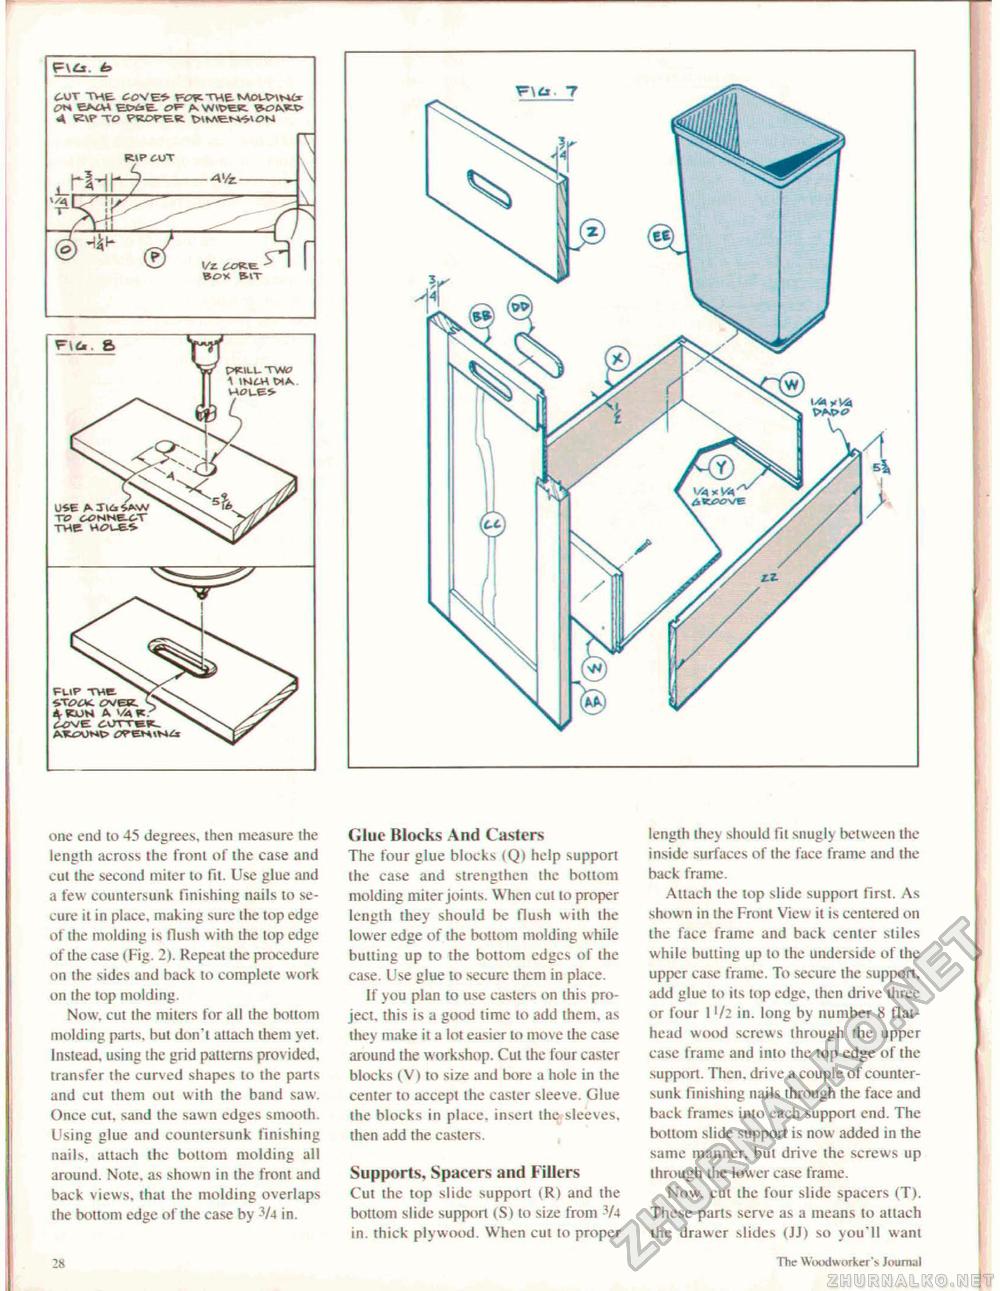
one end to 45 degrees, then measure the length across the front of the case and cut the second miter to fit. Use glue and a few countersunk finishing nails to secure it in place, making sure the top edge of the molding is flush with the top edge of die case (Pig. 2). Repeat the procedure on the sides and hack lo complete work on the top molding. Now. cut the miters for all the bottom molding parts, but don't attach them yet. Instead, using the grid patterns provided, transfer the curved shapes to the pans and cut them out with the band saw. Once cut. sand the sawn edges smooth. Using glue and countersunk finishing nails, attach the bollom molding ail around. Note, as shown in the front and back views, that the molding overlaps the bottom edge of the case by -V-t in. Glue Blocks And Casters The four glue blocks (Q) help support ihe case and strengthen the bonom molding miter joints. When cut to proper length they should be flush with the lower edge of the bottom molding while butting up to the bottom edges of the case. Use glue to secure them in place. If you plan to use casters on this project. this is a good time to add them, as they make it a lot easier to move the case around the workshop. Cut the four caster blocks (V) to size and bore a hole in the center to accept the caster sleeve. Glue the blocks in place, insert the sleeves, then add the casters. Supports, Spacers and Fillers Cut the top slide support (R) and the bottom slide support (S) to size from V4 in. thick plywood. When cut to proper length they should fit snugly between the inside surfaces of the face frame and the back frame. Attach the top slide support first. As shown in the Front View it is centered on the face frame and back center stiles while butting up to the underside of the upper case frame. To secure the support, add glue to its lop edge, then drive three or four l'/2 in. long by number 8 flat-head wood screws through the upper case frame and into the top edge of the support. Then, drive a couple of countersunk finishing nails through the face and back frames into each support end. The bottom slide support is now added in the same manner, but drive the screws up through the lower case frame. Now, cut the four slide spacers (T), These parts serve as a means to attach the drawer slides (JJ) so you'll want FUP TWt 28 t he Woodworker's Journal |


