Woodworker's Journal 2008-32-4, страница 27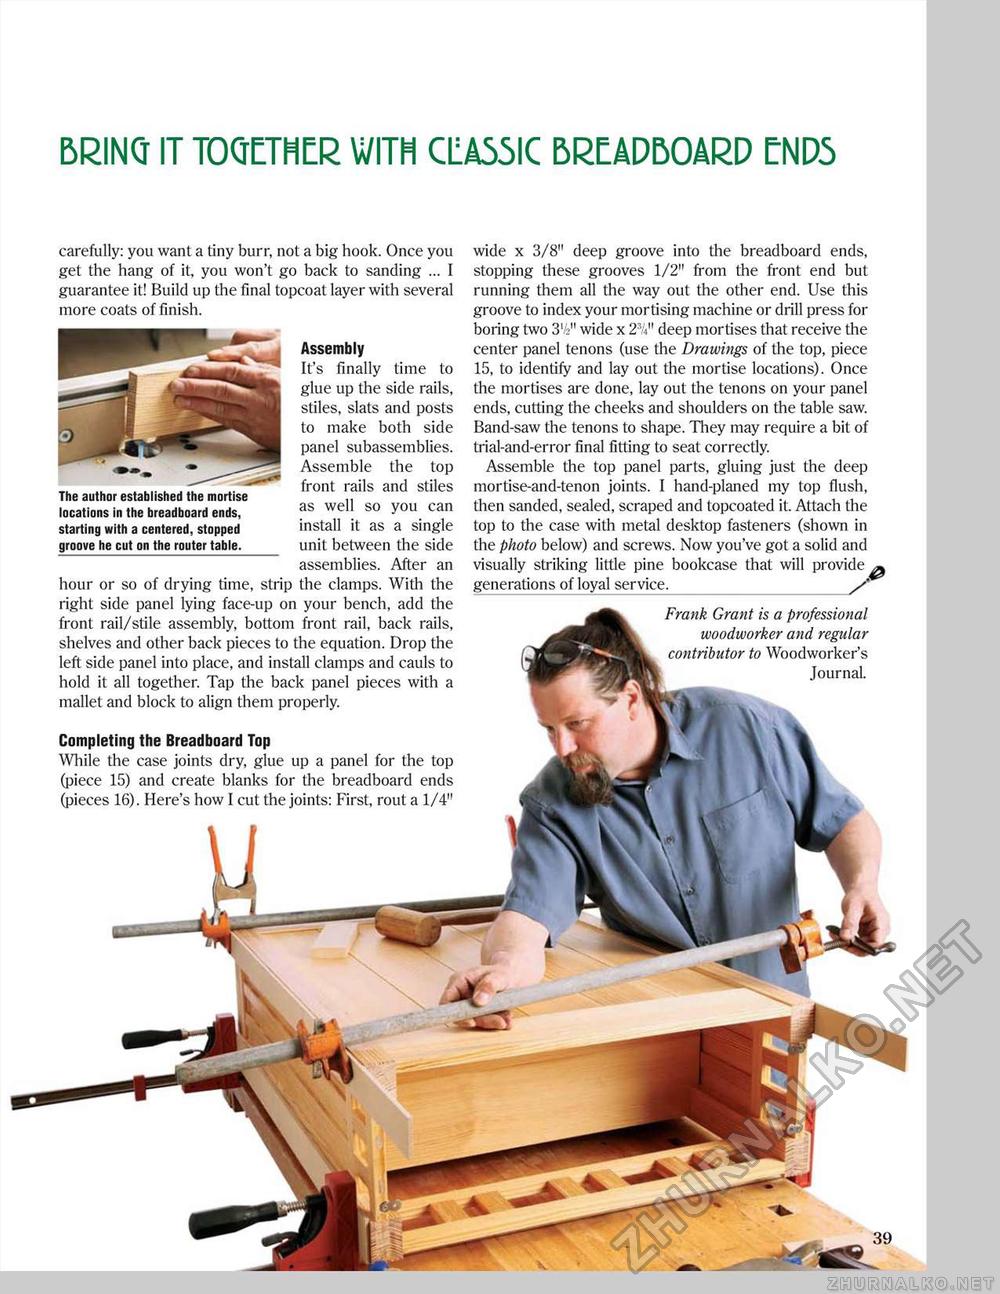
BRING IT TOGETHER WITH CLA55IC BREADBOARD END5 wide x 3/8" deep groove into the breadboard ends, stopping these grooves 1/2" from the front end but running them all the way out the other end. Use this groove to index your mortising machine or drill press for boring two 3V2" wide x 2V deep mortises that receive the center panel tenons (use the Drawings of the top, piece 15, to identify and lay out the mortise locations). Once the mortises are done, lay out the tenons on your panel ends, cutting the cheeks and shoulders on the table saw. Band-saw the tenons to shape. They may require a bit of trial-and-error final fitting to seat correctly. Assemble the top panel parts, gluing just the deep mortise-and-tenon joints. I hand-planed my top flush, then sanded, sealed, scraped and topcoated it. Attach the top to the case with metal desktop fasteners (shown in the photo below) and screws. Now you've got a solid and visually striking little pine bookcase that will provide generations of loyal service. carefully: you want a tiny burr, not a big hook. Once you get the hang of it, you won't go back to sanding ... I guarantee it! Build up the final topcoat layer with several more coats of finish. Assembly It's finally time to glue up the side rails, stiles, slats and posts to make both side panel subassemblies. Assemble the top front rails and stiles as well so you can install it as a single unit between the side assemblies. After an hour or so of drying time, strip the clamps. With the right side panel lying face-up on your bench, add the front rail/stile assembly, bottom front rail, back rails, shelves and other back pieces to the equation. Drop the left side panel into place, and install clamps and cauls to hold it all together. Tap the back panel pieces with a mallet and block to align them properly. The author established the mortise locations in the breadboard ends, starting with a centered, stopped groove he cut on the router table. Completing the Breadboard Top While the case joints dry, glue up a panel for the top (piece 15) and create blanks for the breadboard ends (pieces 16). Here's how I cut the joints: First, rout a 1/4" Frank Grant is a professional woodworker and regular contributor to Woodworker's Journal. |


