Woodworker's Journal 2010-34-2, страница 29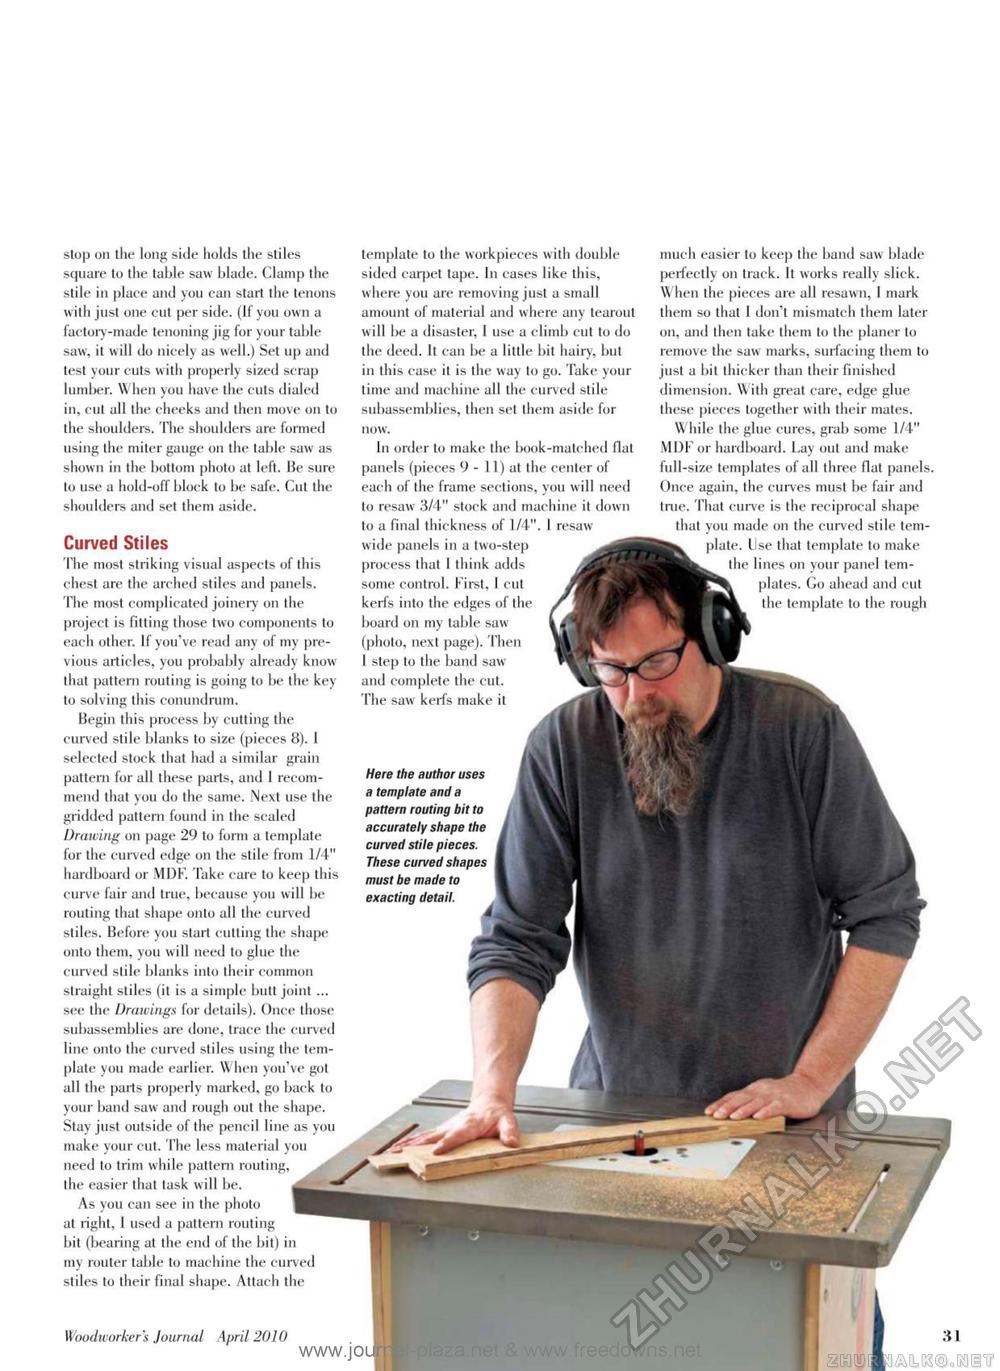
Woodworker's Journal April 2010 much easier to keep the band saw blade perfectly on track. It works really slick. When the pieces are all resawn, I mark them so that 1 don't mismatch them later on, and then take them to the planer to remove the saw; marks, surfacing them lo just a bit thicker than their finished dimension. With great care, edge glue these pieces together with their mates. W hile the glue cures, grab some 1/4" MDF or hardboard. Lay out and make full-size templates of all three flat panels, Once again, the curves must be fair and tme. That curve is the reciprocal shape that you made on the curved stile template. Use that template to make the lines on your panel templates. Go ahead and cut the template to the rough stop oil the long side holds the stiles square to the table saw blade. Clamp the stile in place and you can start the tenons with just one cut per side. (If you own a factory-made tenoning jig for your table saw, it will do nicely as well.) Set up and test your cuts with properly sized scrap lumber. When you have the cuts dialed in, cut all the cheeks and then move on to the shoulders. The shoulders are formed using the miter gauge on the table saw as shown in the bottom photo at left. He sure lo use a hold-off block to be safe. Cut the shoulders and set them aside. Curved Stiles The most striking visual aspects of this chest are the arched stiles and panels. The most complicated joinery on the project is fitting those two components to each other. II you've read any of my previous articles, you probably already know that pattern routing is going to be the key to solving this conundrum. Hegin this process by cutting the curved stile blanks to size (pieces 8). I selected stock that had a similar grain pattern for all these parts, and 1 recommend that you do the same. Next use the gridded pattern found in the scaled Drawing on page 29 to form a template for the curved edge oil the stile from 1/4" hardboard or MDF. Take care to keep this curve fair and true, because you will be routing that shape onto all the curved stiles. Before you slart cutting the shape onto them, you will need to glue the curved stile blanks into their common straight sliles (it is a simple bull joint ... see the Drawings for details). Once those subassemblies are done, trace the curved line onto the curved stiles using the template you made earlier. W hen you've got all the parts properly marked, go back to your band saw and rough out the shape. Stay just outside of the pencil line as you make your cut. The less material you need to trim while pattern routing, the easier that task will be. As you can see in the photo at right, 1 used a pattern routing bit (bearing at the end of the bit) in my router table to machine the curved stiles to their final shape. Attach the template to the workpieces with double sided carpet tape. In cases like this, where you are removing just a small amount of material and where any tearout will be a disaster, 1 use a climb cut to do the deed. It can be a little bit hairy, but in this case it is the way to go. Take your time and machine all the curved stile subassemblies, then set ihem aside for now. In order lo make the book-matched flat panels (pieces 9 - 11) at the center of each of the frame sections, you will need to resaw 3/4" stock and machine it down to a final thickness of 1/4". I resaw wide panels in a two-step process that I think adds some control. First, I cut kerfs into the edges of the board on my table saw (photo, next page). Then 1 step to the band saw and complete the cut. The saw kerfs make it Here the author uses a template and a pattern routing bit to accurately shape the curved stile pieces. These curved shapes must be made to exacting detail. |


