Woodworker's Journal 2010-34-2, страница 31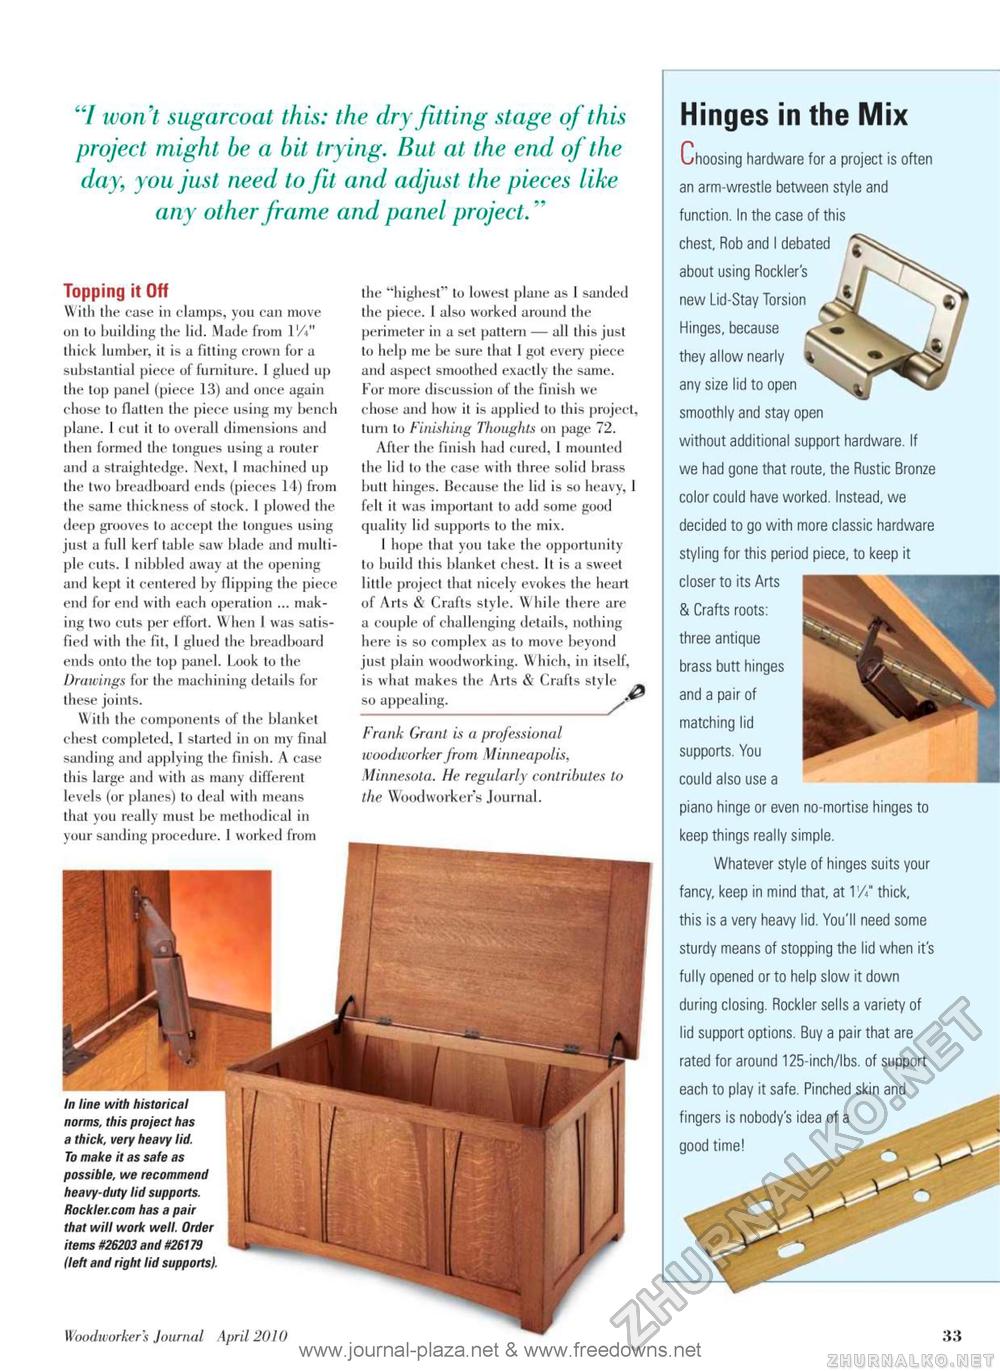
'7 won't sugarcoat this: the dry fitting stage of this project might be a bit trying. But at the end of the day, you just need to fit and adjust the pieces like any other fra me and panel project." Topping it Off With the case in clamps, you can move 011 to building the lid. Made from 1 Vt" thick lumber, it is a fitting crown for a substantial piece of furniture. 1 glued up the top panel (piece 13) and once again chose to flatten the piece using my bench plane. 1 cut it lo overall dimensions and then formed the tongues using a router and a straightedge. Next, I machined up the two breadboard ends (pieces 14) from the same thickness of stock. I plowed the deep grooves to accept the tongues using just a full kerf table saw blade and multiple cuts. I nibbled away at the opening and kept it centered by flipping the piece end for end with each operation ... making two cuts per effort. When 1 was satisfied with the fit, I glued the breadboard ends onto the top panel. Look to the Drawings for the machining details for these joints. With the components of the blanket chest completed, I started in 011 my final sanding and applying the finish. A case this large and with as many different levels (or planes) to deal with means that you really must be methodical in your sanding procedure. 1 worked from the "highest" to lowest plane as 1 sanded the piece. 1 also worked around the perimeter in a set pattern — all this just to help me be sure that I got every piece and aspect smoothed exactly the same. For more discussion of the finish we chose and how it is applied to this project, turn to Finishing Thoughts 011 page 72. After the finish had cured, 1 mounted the lid to the case with three solid brass butt hinges. Because the lid is so heavy, 1 fell it was important to add some good quality lid supports to the mix. I hope that you take the opportunity to build this blanket chest. It is a sweet little project that nicely evokes the heart of Arts & Crafts style. While there are a couple of challenging details, nothing here is so complex as to move beyond just plain woodworking. Which, in itself, is what makes the Arts & Crafts stvle so appealing. Frank Grant is a professional woodworker from Minneapolis, Minnesota. He regularly contributes to the Woodworker's Journal. In line with historical norms, this project has a thick, very heavy lid. To make it as safe as possible, we recommend heavy-duty lid supports. Rockler.com has a pair that will work well. Order items #26203 and #26179 (left and right lid supports). Woodworker's Journal April 2010 Hinges in the Mix Choosing hardware for a project is often an arm-wrestle between style and function. In the case of this chest, Rob and I debated about using Rocklers new Lid-Stay Torsion Hinges, because they allow nearly any size lid to open smoothly and stay open without additional support hardware. If we had gone that route, the Rustic Bronze color could have worked. Instead, we decided to go with more classic hardware styling for this period piece, to keep it closer to its Arts & Crafts roots: three antique brass butt hinges and a pair of matching lid supports. You _ could also use a piano hinge or even no-mortise hinges to keep things really simple. Whatever style of hinges suits your fancy, keep in mind that, at 1V7 thick, this is a very heavy lid. You'll need some sturdy means of stopping the lid when it's fully opened or to help slow it down during closing. Rockier sells a variety of lid support options. Buy a pair that are rated for around 125-inch/lbs. of support each to play it safe. Pinched skin and fingers is nobody's idea of a good time! www.journal-plaza.net & www.freedowns.net it |


