Woodworker's Journal 2010-34-2, страница 30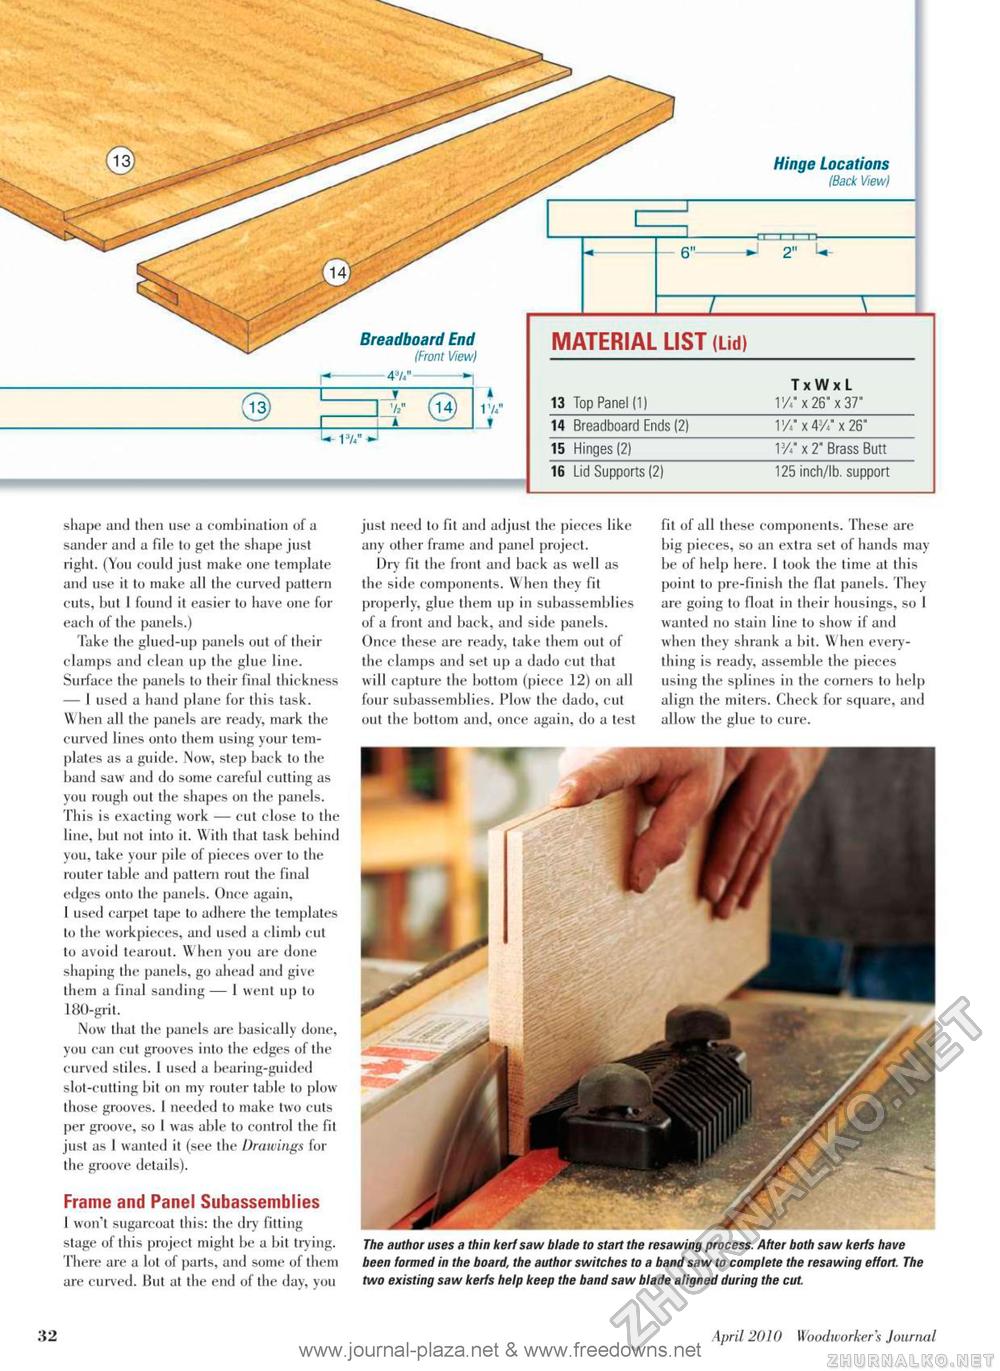
shape and then use a combination of a sander and a fde to get the shape just right. (You could just make one template and use it to make all the curved pattern cuts, but I found it easier to have one for each of the panels.) Take the glued-up panels out of their clamps and clean up the glue line. Surface the panels to their final thickness — 1 used a hand plane for this task. When all the panels are ready, mark the curved lines onto them using your templates as a guide. Now, step back to the band saw and do some careful cutting as you rough out the shapes on the panels. This is exacting work — cut close to the line, but not into it. With that task behind you, take your pile of pieces over to the router table and pattern rout the final edges onto the panels. Once again, I used carpet tape to adhere the templates lo the workpieces, and used a climb cut to avoid tearout. When you are done shaping the panels, go ahead and give them a final sanding — 1 went up to 180-grit. Now that the panels are basically done, you can cut grooves into the edges of the curved stiles. I used a bearing-guided slot-cutting bit on my router table to plow those grooves. 1 needed to make two cuts per groove, so I was able to control the fit just as 1 wanted it (see the Drawings for the groove details). Frame and Panel Subassemblies I won't sugarcoat this: the dry fitting stage of this project might be a bit trying. There are a lot of parts, and some of them are curved. But at the end of the day, you just need to fit and adjust the pieces like any other frame and panel project. Dry fit the front and back as well as the side components. W hen they fit properly, glue them up in subassemblies of a front and back, and side panels. Once these are ready, lake them out of the clamps and set up a dado cut that will capture the bottom (piece 12) on all four subassemblies. Plow the dado, cut out the bottom and, once again, do a test fit of all these components. These are big pieces, so an extra set of hands may be of help here. 1 took the time at this point to pre-finish the flat panels. They are going to float in their housings, so I wanted no stain line to show if and when they shrank a bit. When everything is ready, assemble the pieces using the splines in the corners to help align the miters. Check for square, and allow the glue to cure. The author uses a thin kerf saw blade to start the resawing process. After both saw kerfs have been formed in the board, the author switches to a band saw to complete the resawing effort. The two existing saw kerfs help keep the band saw blade aligned during the cut. 32 April 2010 Woodworkers Jourruil |


