Woodworker's Journal 2010-34-2, страница 32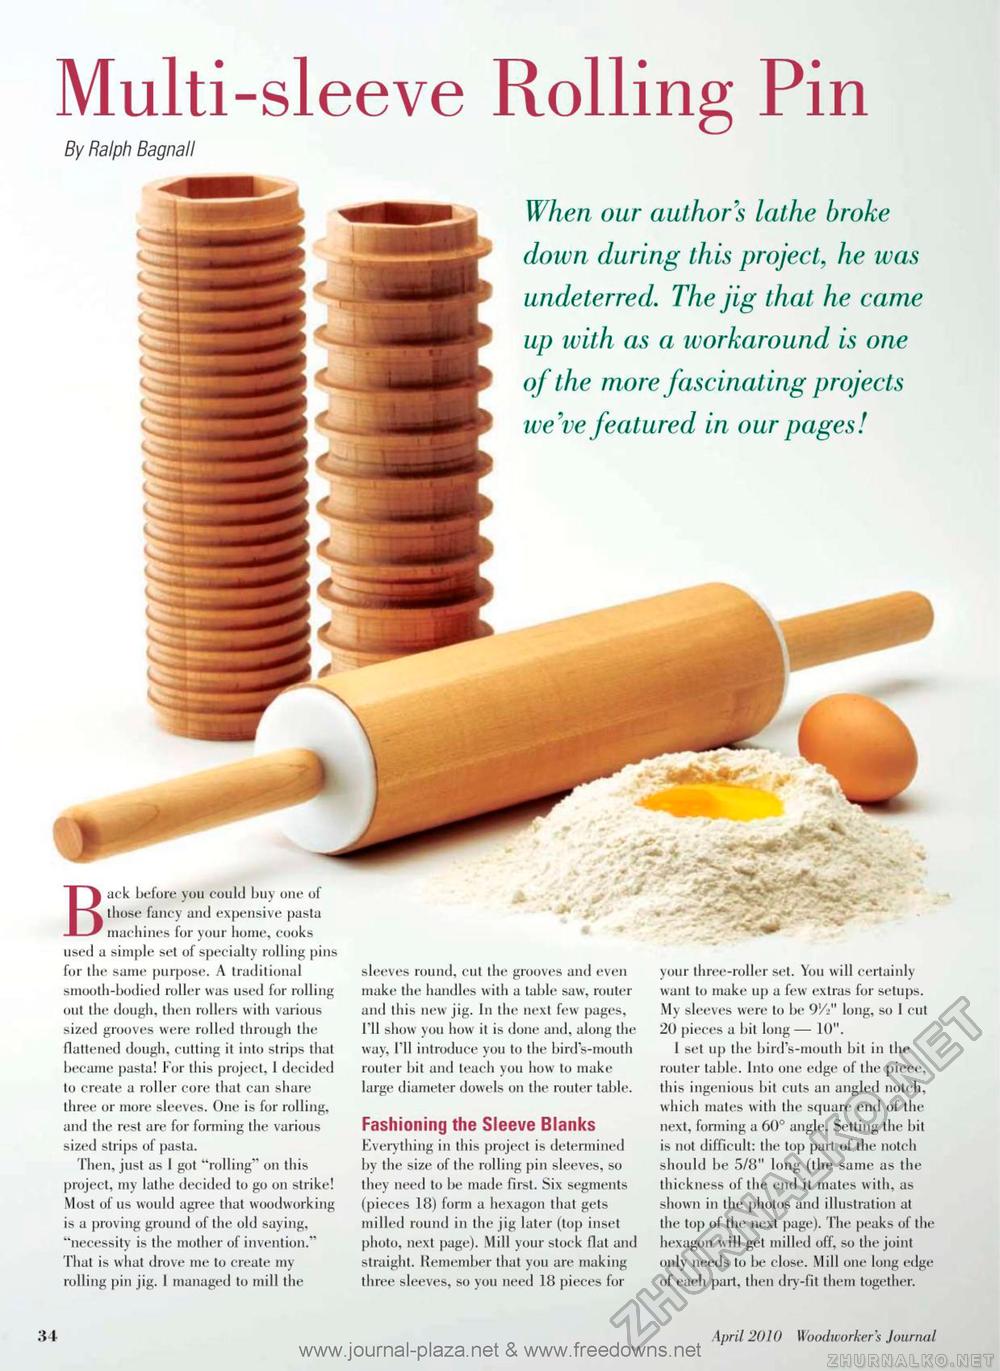
Multi-sleeve Rolling Pin By Ralph Bagnall Back before you could buy one of those fancy and expensive pasta machines for your home, cooks used a simple set of specialty rolling pins for the same purpose. A traditional smooth-bodied roller was used for rolling out the dough, then rollers with various sized grooves were rolled through the flattened dough, cutting it into strips that became pasta! For this project, 1 decided lo create a roller core that can share three or more sleeves. One is for rolling, and the rest are for forming the various sized strips of pasta. Then, just as 1 got "rolling" on this project, my lathe decided to go on strike! Most of us would agree that woodworking is a proving ground of the old saying, "necessity is the mother of invention." That is what drove me to create my rolling pin jig. I managed to mill the When our authors lathe broke down during this project, he was undeterred. The jig that he came up with as a workaround is one of the more fascinat ing projects we've featured in our pages! sleeves round, cut the grooves and even make the handles with a table saw, router and this new jig. In the next few pages, I'll show you how it is done and, along the way, I'll introduce you to the bird's-mouth router bit and teach you how to make large diameter dowels 011 the router table. Fashioning the Sleeve Blanks Everything in this project is determined by the size of the rolling pin sleeves, so they need to be made first. Six segments (pieces 18) form a hexagon that gets milled round in the jig later (top inset photo, next page). Mill your stock flat and straight. Remember that you are making three sleeves, so you need 18 pieces for your three-roller set. You will certainly want to make up a few extras for setups. My sleeves were to be 9'/>" long, so I cut 20 pieces a bit long — 10". I set up the bird's-mouth bit in the router table. Into one edge of the piece, this ingenious bit cuts an angled notch, which mates with the square end of the next, forming a 60° angle. Setting the bit is not difficult: the top part of the notch should be 5/8" long (the same as the thickness of the end it mates with, as shown in the photos and illustration at the top of the next page). The peaks of the hexagon will get milled oil, so the joint only needs lo be close. Mill one long edge of each part, then dry-fit them together. 34 April 2010 Woodworkers Jourruil |


