38 - Ring Boxes, страница 12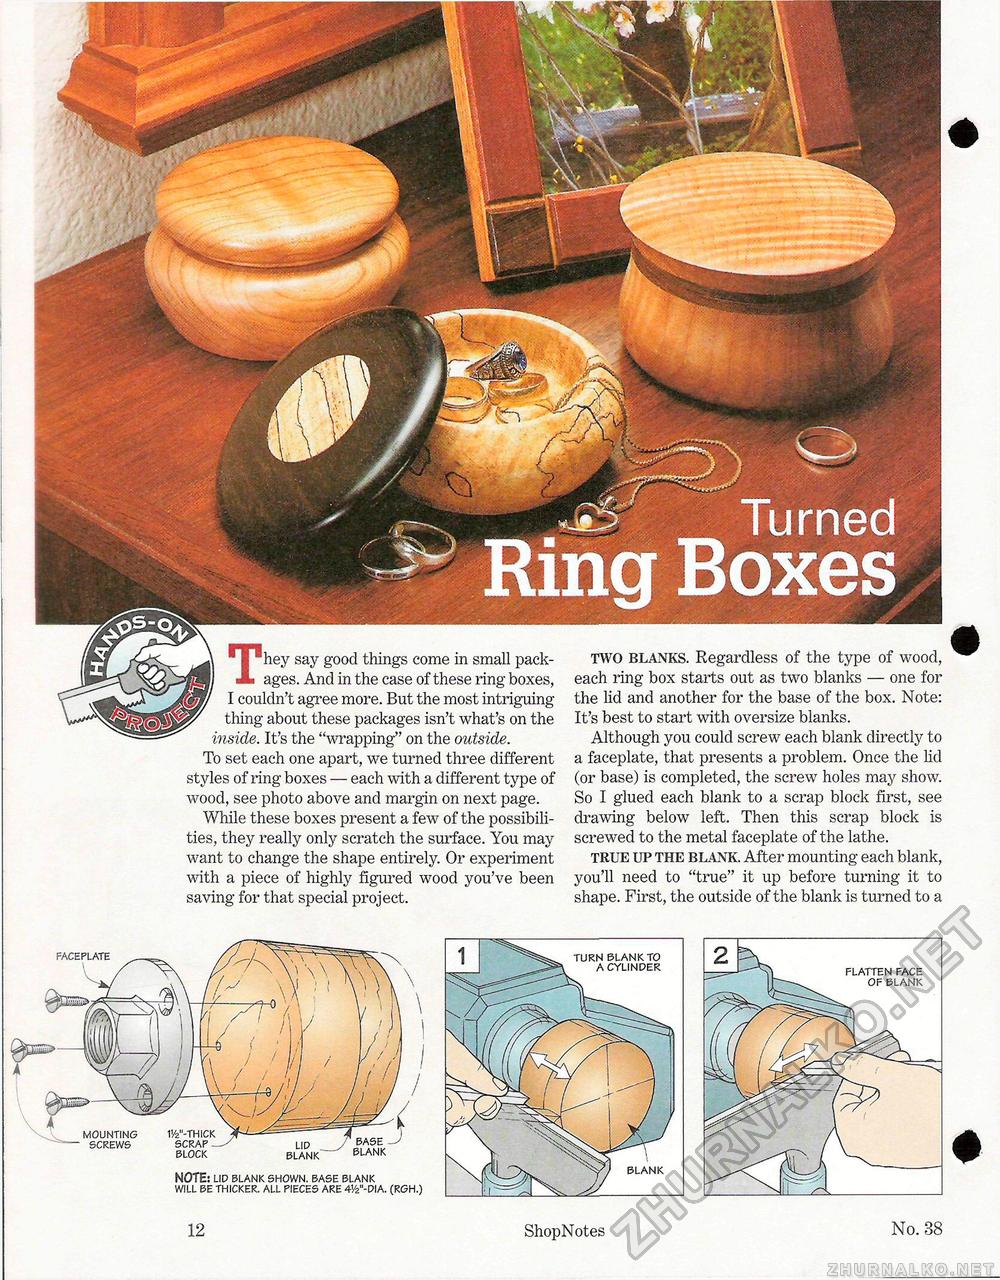
FACEPLATE MOUNTING 1'/2"-THlCK SCREWS SCRAP BLOCK L|p / BASE BLANK ~ BLANK NOTE: LID BLANK SHOWN. BASE BLANK WILL BE THICKER. ALL PIECES ARE 41/2"-DIA. (RGH.) They say good things come in small packages. And in the case of these ring boxes, I couldn't agree more. But the most intriguing thing about these packages isn't what's on the inside. It's the "wrapping" on the outside. To set each one apart, we turned three different styles of ring boxes — each with a different type of wood, see photo above and margin on next page. While these boxes present a few of the possibilities, they really only scratch the surface. You may want to change the shape entirely. Or experiment with a piece of highly figured wood you've been saving for that special project. two blanks. Regardless of the type of wood, each ring box starts out as two blanks — one for the lid and another for the base of the box. Note: It's best to start with oversize blanks. Although you could screw each blank directly to a faceplate, that presents a problem. Once the lid (or base) is completed, the screw holes may show. So I glued each blank to a scrap block first, see drawing below left. Then this scrap block is screwed to the metal faceplate of the lathe. true up the blank. After mounting each blank, you'll need to "true" it up before turning it to shape. First, the outside of the blank is turned to a + # # BLANK TURN BLANK TO A CYLINDER FLATTEN FACE OF BLANK 12 ShopNotes No. 38 |


