43 - Build Your Own Dovetail Jig, страница 21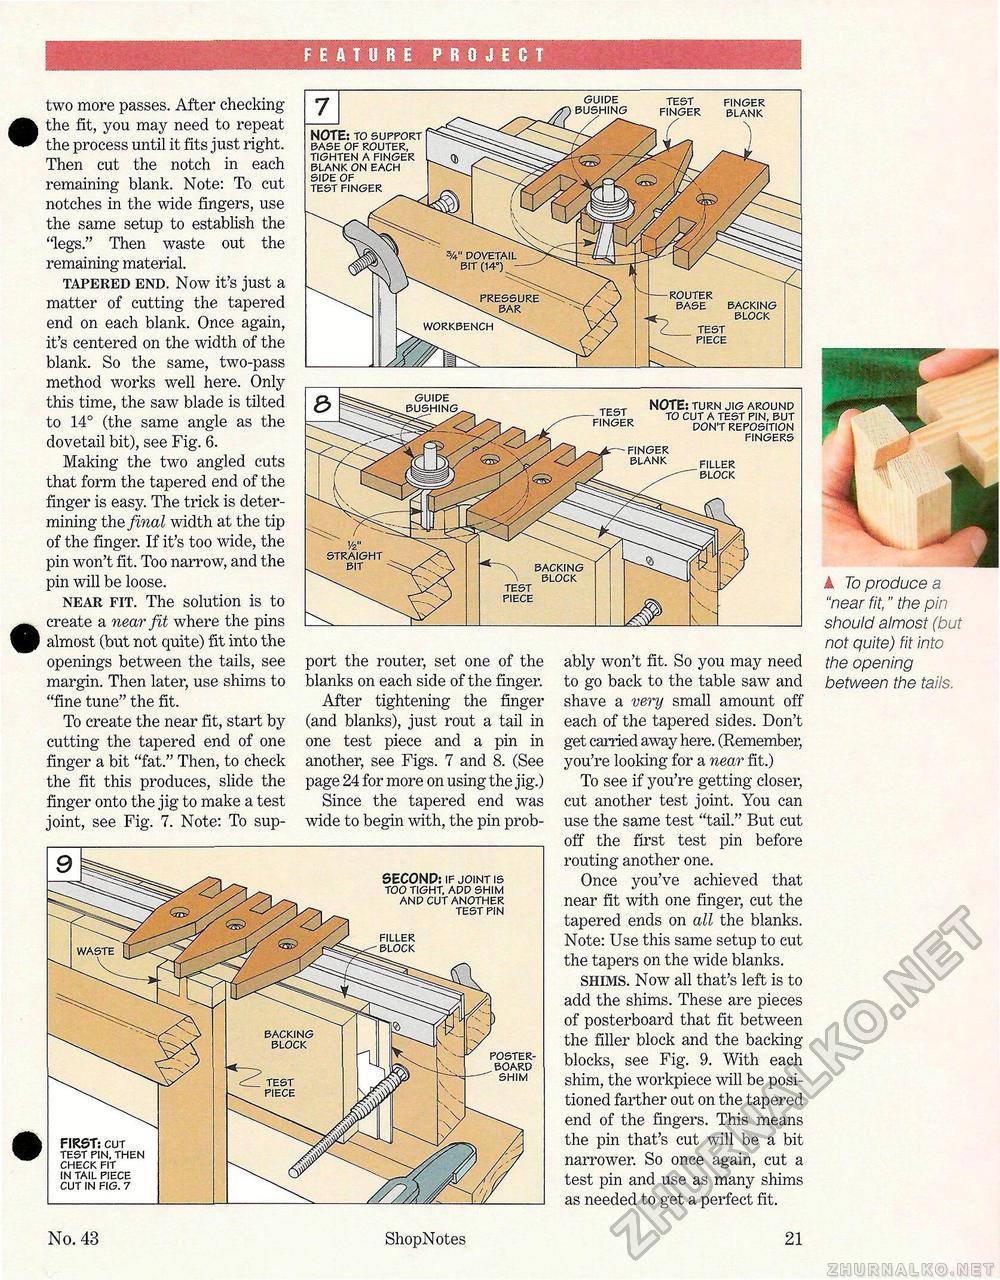
FEATURE PROJECT two more passes. After checking the fit, you may need to repeat the process until it fits just right. Then cut the notch in each remaining blank. Note: To cut notches in the wide fingers, use the same setup to establish the 'legs." Then waste out the remaining material. tapered end. Now it's just a matter of cutting the tapered end on each blank. Once again, it's centered on the width of the blank. So the same, two-pass method works well here. Only this time, the saw blade is tilted to 14° (the same angle as the dovetail bit), see Fig. 6. Making the two angled cuts that form the tapered end of the finger is easy. The trick is determining the final width at the tip of the finger. If it's too wide, the pin won't fit. Too narrow, and the pin will be loose. near fit. The solution is to create a near fit where the pins almost (but not quite) fit into the openings between the tails, see margin. Then later, use shims to "fine tune" the fit. To create the near fit, start by cutting the tapered end of one finger a bit "fat." Then, to check the fit this produces, slide the finger onto the jig to make a test joint, see Fig. 7. Note: To sup port the router, set one of the blanks on each side of the finger. After tightening the finger (and blanks), just rout a tail in one test piece and a pin in another, see Figs. 7 and 8. (See page 24 for more on using the jig.) Since the tapered end was wide to begin with, the pin prob SECOND: if joint is too tight, ADD shim anpcut another test pin FIRST: cut test pin, then check fit in tail piece cut in fig. 7 ably won't fit. So you may need to go back to the table saw and shave a very small amount off each of the tapered sides. Don't get carried away here. (Remember, you're looking for a near fit.) To see if you're getting closer, cut another test joint. You can use the same test "tail." But cut off the first test pin before routing another one. Once you've achieved that near fit with one finger, cut the tapered ends on all the blanks. Note: Use this same setup to cut the tapers on the wide blanks. shims. Now all that's left is to add the shims. These are pieces of posterboard that fit between the filler block and the backing blocks, see Fig. 9. With each shim, the workpiece will be positioned farther out on the tapered end of the fingers. This means the pin that's cut will be a bit narrower. So once again, cut a test pin and use as many shims as needed to get a perfect fit. A To produce a "near fit," the pin should almost (but not quite) fit into the opening between the tails. No. 43 ShopNotes 21 |


